
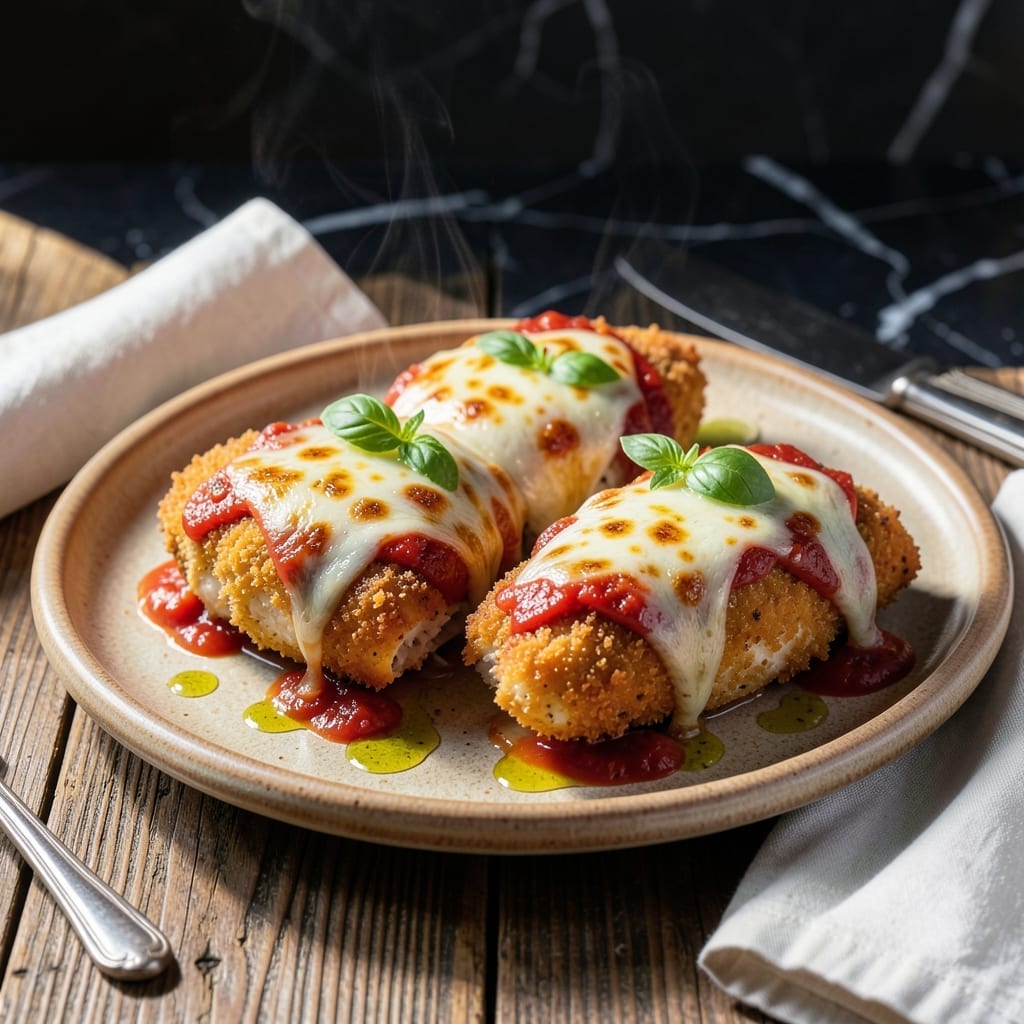
This chicken parmigiana delivers crispy breaded cutlets smothered in rich tomato sauce and melted cheese, perfectly scaled for two.
I developed this method to ensure the breading stays crunchy even after baking, using a simple three-step process that locks in moisture. The key is pressing the breadcrumbs firmly onto each cutlet before frying.
After a quick pan-fry, the chicken finishes in the oven under a blanket of marinara and cheese, creating that signature bubbling, golden topping. The result is tender chicken with a satisfying crunch in every bite.
Serve with pasta or a fresh salad for a complete meal. This recipe delivers restaurant-quality results with minimal effort.
Ingredients for Chicken Parmigiana Recipe for 2
Twelve ingredients deliver crispy breaded chicken with melty cheese for two.
| Ingredient | Amount | Notes |
|---|---|---|
| Chicken Breast 🍗 | ¾ lb | Boneless, skinless, pounded to 1/2-inch thickness |
| All-Purpose Flour 🌾 | ½ cup | For dredging chicken |
| Large Egg 🥚 | 1 whole | Beaten for egg wash |
| Italian Breadcrumbs 🍞 | ¾ cup | Panko works too |
| Parmesan Cheese 🧀 | ½ cup | Freshly grated from block |
| Marinara Sauce 🍅 | 1 cup | Homemade or quality jarred |
| Mozzarella Cheese 🧀 | 4 oz | Fresh mozzarella, sliced |
| Garlic Cloves 🧄 | 2 cloves | Minced for sauce |
| Olive Oil 🫒 | ½ cup | For frying chicken |
| Salt 🧂 | ½ tsp | Kosher or sea salt |
| Black Pepper 🌶️ | ¼ tsp | Freshly ground preferred |
| Dried Oregano 🌿 | ½ tsp | For seasoning sauce |
| Fresh Basil Leaves 🌿 | ¼ cup | Chopped, for garnish |
The chicken quality matters here. Boneless, skinless breasts pounded to even thickness ensure even cooking. Costco or Whole Foods typically carry high-quality options. Freshly grated Parmesan is non-negotiable—pre-grated won’t melt properly. For the marinara, look for San Marzano tomatoes if making from scratch, or choose a premium jarred variety.
No Italian breadcrumbs? Panko plus Italian seasoning creates an even crispier crust. Fresh mozzarella can be swapped for low-moisture if needed. Out of basil? Dried oregano at half the amount works in a pinch. The olive oil should be extra-virgin for best flavor. For a lighter option, pan-fry in a mix of oil and butter.
Store raw chicken in the coldest part of your fridge—use within 2 days. The breaded cutlets can be prepped a day ahead. Completed dish keeps 3-4 days refrigerated. Reheat in the oven to maintain that crispy texture.
Why You’ll Love This Recipe
- Minimal Mess: I love that this only needs one shallow dish for breading and one pan for frying—cleanup is a breeze.
- Crispy Perfection: The combo of Italian breadcrumbs and Parmesan gives the chicken that golden, crunchy coating I crave every time.
- Date Night Ready: Honestly, it feels fancy enough for a special dinner but is simple enough for a Tuesday.
- Budget Stretcher: Two chicken breasts go a long way, and the breadcrumbs and cheese keep it affordable without skimping on flavor.
Step-by-Step Instructions for Chicken Parmigiana
This method ensures a golden crust, melty cheese, and restaurant-quality results for two.
Step 1: Bread and Pan-Fry the Chicken
Set up a breading station with three shallow dishes. Place the 0.5 cup all-purpose flour mixed with 0.5 tsp salt and 0.25 tsp black pepper in the first dish, beat the large egg in the second, and combine the 0.75 cup Italian breadcrumbs with 0.5 cup Parmesan cheese in the third.
Dredge each piece of 0.75 lb chicken breast in the flour mixture, shaking off excess, then dip in the egg, and finally coat in the breadcrumb mixture, pressing gently to adhere. Heat 0.5 cup olive oil in a large skillet over medium heat until shimmering.
Fry the chicken for 3-4 minutes per side until golden brown and crispy. Transfer to a paper towel-lined plate to drain excess oil.
Step 2: Prepare the Marinara Sauce
In a small saucepan, warm the 1 cup marinara sauce over low heat. Add the 2 cloves minced garlic cloves and 0.5 tsp dried oregano, stirring to combine. Simmer for 5 minutes to allow the flavors to meld.
The sauce should be warm but not boiling. Taste and adjust seasoning if needed, though the marinara should already be well-seasoned.
Step 3: Assemble and Bake
Preheat the oven to 375°F. Spread a thin layer of the warm marinara sauce in a baking dish. Place the fried chicken pieces in the dish and top each with additional marinara sauce, then 4 oz sliced mozzarella cheese.
Bake for 15-20 minutes until the cheese is fully melted and bubbly, and the sauce is heated through. The edges of the chicken should remain crispy even after baking.
Step 4: Garnish and Serve
Remove from the oven and let rest for 2-3 minutes. Garnish with the 0.25 cup chopped fresh basil leaves for a pop of color and freshness. The basil should wilt slightly from the heat but retain its vibrant green color.
Serve immediately while the cheese is still gooey and the breading crisp. Each serving should have a generous portion of sauce and melted cheese, with the breading maintaining its crunch underneath.
Pro Tips For Making Chicken Parmigiana Recipe For 2
- Pound the Chicken: Use a rolling pin or meat mallet to pound the chicken breasts to an even 1/2-inch thickness—this guarantees even cooking and prevents dry, chewy edges.
- Double Dredge: After the initial flour-egg-breadcrumb coating, dip the chicken back in the egg and breadcrumbs for a second pass. It creates a thicker, crunchier crust that holds up to the sauce.
- Rest Before Frying: Let the breaded chicken rest for 5 minutes before frying. I learned this the hard way—it keeps the coating from sliding off in the pan.
- Mix Cheese In: Stir 1/4 cup grated Parmesan into the Italian breadcrumbs before coating. Sounds small, but it adds a sharp, salty depth that plain breadcrumbs can’t match.
Essential Equipment for Great chicken parmigiana recipe for 2
Breading Station Setup
I use 3 shallow dishes for efficient breading—8-inch pie plates work perfectly. The first holds your flour mixture, the second your beaten egg, and the third your breadcrumb-Parmesan mix. This assembly line approach keeps the process clean and fast. 💡
Frying Pan Choice
A 12-inch cast iron skillet is my go-to for even heat distribution and durable non-stick properties. Lodge makes an affordable option that lasts forever. Avoid non-stick pans for this recipe—the high heat can damage the coating.
Oil Thermometer
For perfect frying every time, I recommend a candy thermometer to monitor oil temperature. 350-375°F is the sweet spot for golden-brown breading. Taylor Precision makes reliable models under $15. Too cold and you’ll get greasy chicken; too hot and it burns.
Baking Dish
An 8×8-inch baking dish is ideal for two servings—it keeps the chicken snug so the sauce and cheese cover everything. I prefer stoneware like Le Creuset for even baking, but any oven-safe dish works. Just ensure it’s not too large or the sauce will spread too thin.
For easy cleanup, line your dish with parchment paper before adding sauce. 🔥
Cheese Grater
Freshly grated Parmesan melts better than pre-shredded. A Microplane creates fine, fluffy shreds that incorporate beautifully into the breading. For mozzarella, a box grater gives you thicker shreds that melt into gooey layers.
Nutrition Facts
Frequently Asked Questions
Can I use chicken thighs instead of breasts?
Yes, boneless, skinless thighs work well and stay juicier. Pound them to 1/2-inch thickness for even cooking. They may need 1-2 minutes less frying time per side.
How do I keep the breading crispy after baking?
Place the breaded chicken on a wire rack in the baking dish. This allows air circulation underneath, preventing sogginess. Also, bake at 375°F for only 15-20 minutes.
Can I make this ahead of time?
Bread and fry the chicken up to a day ahead. Store in the fridge, then assemble and bake just before serving. Avoid baking the full dish ahead—it’s best fresh from the oven.
What sides pair well with this dish?
Classic pairings include spaghetti, garlic bread, or a simple green salad. For a lighter option, try roasted vegetables like zucchini or broccoli.

- Jollof Rice Sauce Recipe: West African Tomato and Spice Infusion - September 25, 2026
- Japanese Rice Soup Recipe: Umami-Rich Comfort in a Bowl - September 25, 2026
- Homemade Cream Of Rice Recipe: Silk-Smooth Breakfast in Minutes - September 25, 2026