
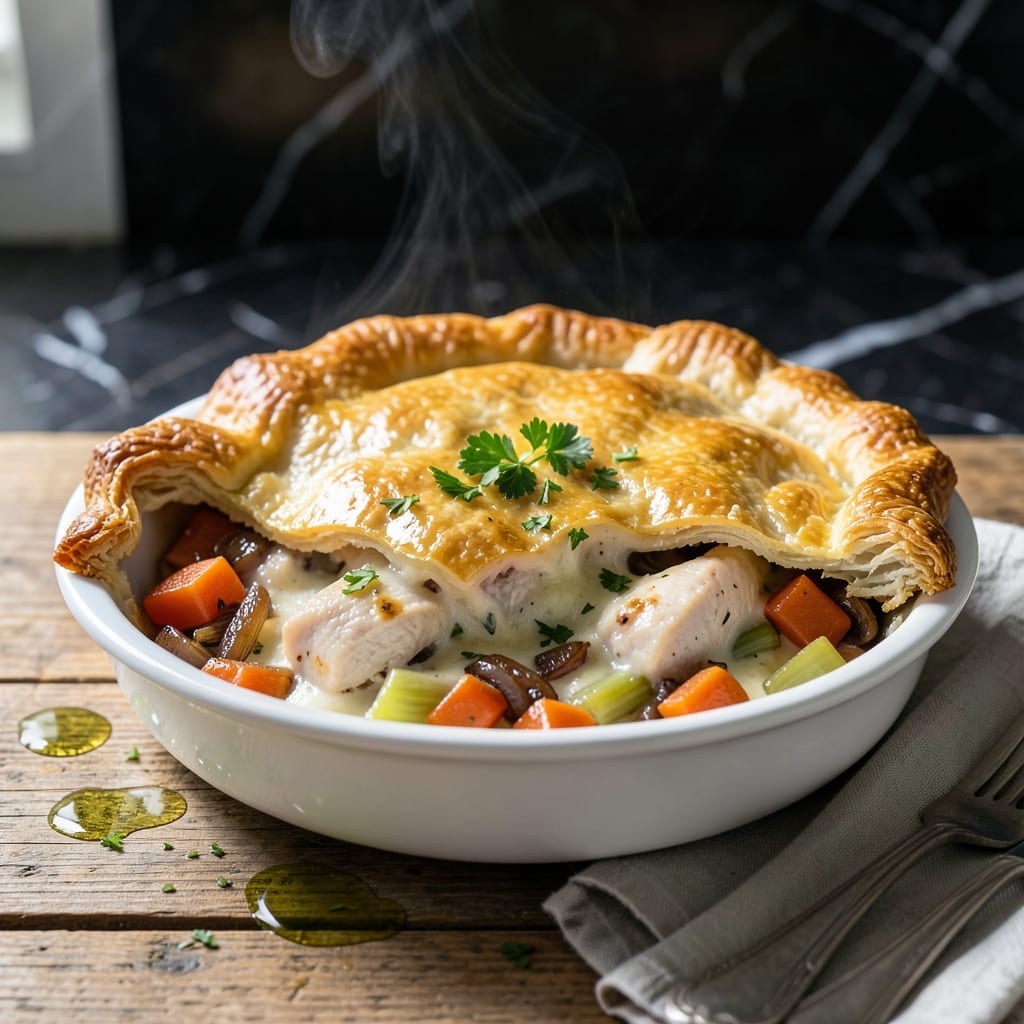
There’s nothing quite like a golden, flaky crust enveloping a rich, creamy chicken and vegetable filling. This classic comfort dish brings warmth and satisfaction to any meal, proving that homemade can outshine any restaurant version.
The secret lies in the layers: tender chicken, fresh vegetables, and a velvety sauce that comes together beautifully under that perfect crust. I’ve refined this method to ensure every bite delivers that ideal balance of textures and flavors.
What emerges from the oven is a dish with a crust so flaky it shatters at the touch, revealing a hearty filling that’s creamy without being heavy. The aroma alone will have everyone gathering around the table.
Serve it fresh from the oven for the ultimate comfort food experience. Here’s how to make it at home.
Ingredients for Chicken Pot Pit
Nothing exotic here—just good stuff for a flaky, golden pie crust and savory filling.
| Ingredient | Amount | Notes |
|---|---|---|
| All-Purpose Flour 🌾 | 2 ½ cups | Divided for crust and filling |
| Unsalted Butter 🧈 | 1 cup | Cold and cubed for flaky crust |
| Boneless Chicken Breast 🍗 | 1 ½ lb | Diced into bite-sized pieces |
| Yellow Onion 🧅 | 1 whole | Diced for filling |
| Carrots 🥕 | 2 whole | Peeled and diced |
| Celery Stalks 🌿 | 2 whole | Diced for texture |
| Frozen Peas 🌱 | 1 cup | No need to thaw |
| Chicken Broth 🥄 | 1 ½ cups | Low-sodium preferred |
| Whole Milk 🥛 | ¾ cup | For creamy sauce |
| Heavy Cream 🥛 | ½ cup | Full-fat for richness |
| Garlic Cloves 🧄 | 2 cloves | Minced for depth |
| Fresh Thyme Leaves 🌿 | 1 tbsp | Or dried at half amount |
| Salt 🧂 | 1 tsp | Adjust to taste |
| Black Pepper 🌶️ | ½ tsp | Freshly ground preferred |
| Ice Water 💧 | ¼ cup | For pie crust |
The crust is everything here. King Arthur Flour is my go-to for all-purpose—consistent texture, every time. Use cold, cubed butter (I prefer Plugrá or Kerrygold for the richest flavor). The chicken should be fresh, not frozen, to avoid excess moisture in the filling. Most supermarkets have pre-diced chicken that saves time, but diced breast gives you the most tender result.
No thyme? Poultry seasoning at half the amount works in a pinch. Swap peas for frozen mixed vegetables (the tiny kind). If you’re avoiding dairy, full-fat coconut milk can replace the cream, though the flavor will be slightly different. The broth can be homemade or store-bought—Better Than Bouillon makes a solid chicken base. For the crust, shortening can replace half the butter for extra flakiness.
This pie is best served fresh but keeps in the fridge for 3-4 days. Reheat individual slices in a 350°F oven for 10-15 minutes to crisp the crust. The filling thickens as it cools, so don’t worry if it’s a little loose when you pull it out of the oven.
Why You’ll Love This Recipe
- One Pan Magic: I toss everything in—chicken, onions, carrots—then let the buttery crust do its thing while I do mine.
- That Golden Crust: The flour and butter bake into this flaky, savory top that soaks up all the juices from the chicken and veggies.
- Feeds the Week: I make a big batch Sunday and we’re set for lunches—still tastes amazing reheated.
- Pantry Friendly: All-purpose flour, butter, and basic veggies mean I can pull this together without a last-minute grocery run.
Step-by-Step Instructions for Chicken Pot Pie
Here’s the method. Straightforward, tested, works every time.
Step 1: Prepare the Flaky Pie Crust
In a food processor, pulse 2.5 cups all-purpose flour and 1 tsp salt to combine. Add 1 cup unsalted butter (cold and cubed) and pulse until the mixture resembles coarse crumbs with pea-sized butter pieces visible. This is crucial for flakiness—don’t over-process.
With the processor running, drizzle in 0.25 cup ice water 1 tablespoon at a time until the dough just starts to come together. It should hold when pressed but not be sticky. Turn onto a floured surface, divide into two equal portions, flatten into discs, wrap in plastic, and chill for 1 hour.
Step 2: Cook the Chicken and Vegetables
In a large skillet over medium heat, cook the diced 1.5 lb boneless chicken breast until no longer pink, about 6-8 minutes. Remove and set aside. In the same skillet, add the diced 1 whole yellow onion, 2 whole carrots, and 2 whole celery stalks. Cook for 5-7 minutes until softened.
Add the minced 2 cloves garlic cloves and 1 tbsp fresh thyme leaves, cooking for 1 minute until fragrant. Stir in 1.5 cups chicken broth, scraping up any browned bits from the bottom. This builds the flavor foundation for your filling.
Step 3: Create the Creamy Sauce
Return the cooked chicken to the skillet. Stir in 1 cup frozen peas (no need to thaw first), 0.75 cup whole milk, and 0.5 cup heavy cream. Bring to a gentle simmer and cook for 3-4 minutes until the sauce begins to thicken slightly.
Season with 0.5 tsp black pepper and adjust salt to taste. The sauce should coat the back of a spoon but still be pourable. If it’s too thick, add a splash more chicken broth. Remove from heat and let cool slightly while you roll out the crust.
Step 4: Assemble and Bake the Pot Pie
On a floured surface, roll out one dough disc to fit a 9-inch pie dish. Transfer to the dish, pressing gently into the bottom and sides. Pour in the chicken and vegetable filling. Roll out the second dough disc and place it over the filling. Crimp the edges to seal, then cut several slits in the top crust to allow steam to escape.
Bake in a preheated 375°F oven for 45-50 minutes until the crust is golden brown and the filling is bubbling. If the edges brown too quickly, cover them with foil. Let rest for 10 minutes before serving to allow the filling to set.
Pro Tips For Making Chicken Pot Pit
- Brown the Chicken Well: Get a deep golden sear on the chicken breast before adding liquids—this builds flavor that carries through the whole pot pie. I learned this the hard way when my early versions tasted bland.
- Cut Carrots Evenly: Slice carrots into uniform, thin coins so they cook at the same rate as the onions. After ending up with half raw, half mushy carrots once, I now pull out a ruler if I have to.
- Skip Overworking Dough: Mix the flour and butter just until combined—overworking makes the crust tough. My grandmother swore by this, and she was right: a light hand means a flaky top.
- Use Cold Butter: Keep your unsalted butter ice-cold when cutting it into the flour. Sounds weird, but it works: the little butter chunks create steam in the oven, making the crust airy and layered.
Essential Equipment for chicken pot pit
Pie Dish Essentials
A 9-inch glass pie dish is my go-to for even heat distribution and easy monitoring of the crust. I prefer Pyrex for its durability and the way it lets me check the bottom crust’s browning. The deep-dish version works if you like extra filling.
Food Processor
For the flakiest crust, a food processor cuts cold butter into flour in seconds. I use my Cuisinart 14-cup model—it handles double crusts with ease. If you don’t have one, two knives or a pastry cutter work, but it takes more elbow grease.
Rolling Pin
A French-style tapered rolling pin gives me the most control for rolling out crusts. I like the J.K. Adams maple wood version. Dust it with flour to prevent sticking, and roll from the center outward for even thickness.
Pastry Brush
Before baking, brush the top crust with a beaten egg or 2 tbsp milk for that gorgeous golden finish. A silicone pastry brush (like OXO’s) won’t shed bristles and cleans easily. This step makes all the difference in appearance. 💫
Sharp Knife
For venting the top crust, a sharp paring knife creates clean slits. I use Wüsthof’s 3.5-inch for precision. Make 4-5 small cuts in the center to allow steam to escape without breaking the design.
Cooling Rack
After baking, transfer the pie to a wire cooling rack to prevent the bottom crust from getting soggy. I wait the full 10 minutes before slicing—this lets the filling set so it doesn’t run out when served.
Nutrition Facts
Frequently Asked Questions
Can I use store-bought pie crust?
Yes, but homemade offers superior flakiness. If using store-bought, opt for refrigerated over frozen for better texture. Thaw completely before rolling and bake at 375°F as directed.
How do I prevent a soggy bottom crust?
Pre-bake the bottom crust for 8-10 minutes before adding filling, or brush it with beaten egg white to create a moisture barrier. Always use a wire cooling rack after baking.
Can I make this ahead of time?
Assemble the pie but don’t bake. Refrigerate for up to 24 hours or freeze for 2 months. Bake from frozen, adding 10-15 minutes to the cooking time.
What’s the best way to reheat leftovers?
Place slices on a baking sheet in a 350°F oven for 10-15 minutes. Microwaving makes the crust soggy. Cover with foil if the crust browns too quickly.

- Jollof Rice Sauce Recipe: West African Tomato and Spice Infusion - September 25, 2026
- Japanese Rice Soup Recipe: Umami-Rich Comfort in a Bowl - September 25, 2026
- Homemade Cream Of Rice Recipe: Silk-Smooth Breakfast in Minutes - September 25, 2026