
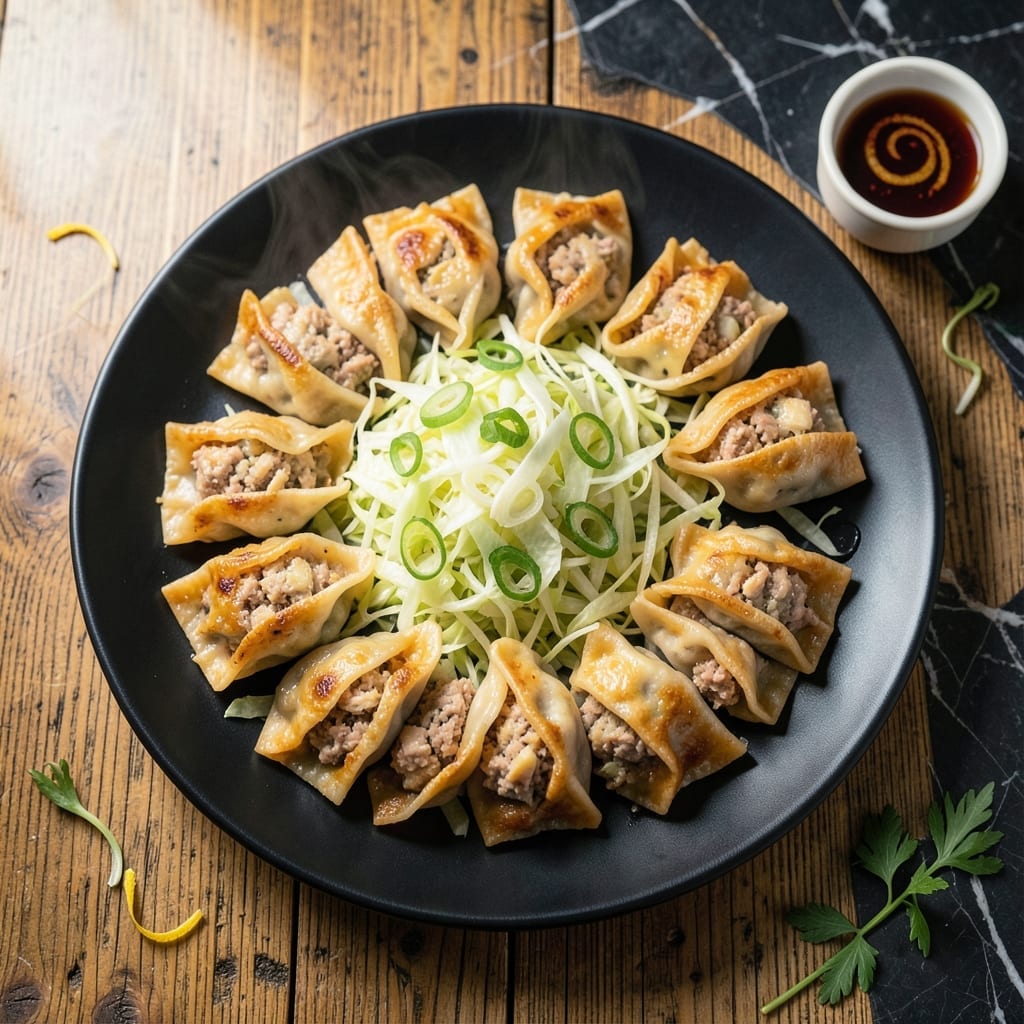
This recipe delivers the perfect balance of crispy golden bottoms and tender, juicy filling every time. I’ve refined the technique to ensure the wrappers stay intact while achieving that signature pan-fried texture.
The key is proper heat control and a simple folding method that seals in the flavors. A hot skillet creates the crisp base, while a quick steam finishes the cooking for a restaurant-quality result at home.
Each bite offers a satisfying contrast of textures, with savory chicken and pork complemented by fresh ginger and garlic. The dipping sauce ties everything together with its tangy, umami-rich profile.
Serve these as an appetizer or main dish. This method guarantees consistent results with minimal effort.
Ingredients for Chicken Potsticker
Quality proteins and fresh aromatics create these restaurant-worthy dumplings with perfect texture contrast.
| Ingredient | Amount | Notes |
|---|---|---|
| Ground Chicken 🍗 | ¾ lb | Lean, preferably thigh meat |
| Ground Pork 🐖 | ½ lb | For juicy filling texture |
| Napa Cabbage 🥬 | 1 ½ cups | Finely shredded, salted |
| Green Onions 🧅 | 4 whole | Thinly sliced, white and green parts |
| Fresh Ginger 🌿 | 1 tbsp | Finely grated or minced |
| Garlic Cloves 🧄 | 3 cloves | Minced to paste consistency |
| Soy Sauce 🫒 | 2 tbsp | Low-sodium preferred for balance |
| Sesame Oil 🫒 | 1 tbsp | Toasted, for depth of flavor |
| Rice Wine 🍶 | 1 tbsp | Dry sherry as alternative |
| Potsticker Wrappers 🥟 | 30 pieces | Round, thawed if frozen |
| Vegetable Oil 🫒 | ¼ cup | Neutral flavor, for frying |
| Rice Vinegar 🍯 | 2 tbsp | For dipping sauce tang |
| Chili Oil 🌶️ | 1 tsp | Optional, for heat in sauce |
| Cornstarch 🌾 | 1 tbsp | For filling binder and crisp texture |
| White Pepper 🧂 | ¼ tsp | Ground, for subtle warmth |
The meat selection is critical for authentic flavor and juiciness. Ground chicken thigh provides richness while pork shoulder (ask your butcher to grind it) adds the necessary fat for moisture. Asian markets typically carry pre-ground mixes perfect for potstickers. For wrappers, Nasoya or Twin Marquis brands are widely available in the refrigerated section at most supermarkets.
Need to swap proteins? Ground turkey works as a leaner alternative (add an extra tbsp of sesame oil for moisture). No rice wine? Dry sherry or sake at one-to-one ratio substitutes well. For the cabbage, regular green cabbage can be used—salt and drain thoroughly to prevent soggy wrappers. The cornstarch is essential for binding, but arrowroot powder works at equal amounts in a pinch.
Filling can be made 1 day ahead and refrigerated. Wrappers should stay sealed in their package until use to prevent drying. Cooked potstickers keep in the fridge for 3 days but are best served immediately for that crisp texture. Freeze uncooked on a tray before bagging for up to 2 months.
Why You’ll Love This Recipe
- Minimal Chopping Required: I just shred the napa cabbage and slice green onions—no fancy knife work needed.
- Ginger Zing: That fresh ginger and pork combo gives these potstickers a warm, punchy flavor I crave weekly.
- Freezer Friendly: I make a big batch, freeze half, and pull them straight from icy to crispy in a pan.
- Stretches Far: A pound of ground meat fills 30+ dumplings, feeding my family for two meals without breaking the bank.
Step-by-Step Instructions for Chicken Potstickers
Master the technique for perfectly crisp bottoms and a juicy, flavorful filling every time.
Step 1: Prepare the Filling Mixture
In a large bowl, combine the 0.75 lb Ground Chicken and 0.5 lb Ground Pork. Add the 1.5 cups Napa Cabbage, 4 whole Green Onions, 1 tbsp Fresh Ginger, and 3 cloves Garlic Cloves.
Pour in the 2 tbsp Soy Sauce, 1 tbsp Sesame Oil, 1 tbsp Rice Wine, 1 tbsp Cornstarch, and 0.25 tsp White Pepper. Mix thoroughly in one direction until the mixture becomes sticky and cohesive—this ensures even distribution of flavors and a consistent texture.
The cornstarch acts as a binder, keeping the filling moist during cooking. Let the mixture rest for 10 minutes to allow the flavors to meld and the cornstarch to fully hydrate.
Step 2: Assemble the Potstickers
Place a potsticker wrapper on a clean surface and add 1 tablespoon of filling to the center. Be precise with the amount—overfilling makes sealing difficult and can cause leaks during cooking.
Dip your finger in water and trace the edge of the wrapper to moisten it. Fold the wrapper in half over the filling and pinch the center to seal. Then, working from the center outward, pleat the edges by making small folds on one side while pressing firmly to adhere to the flat side. This creates the classic crescent shape with a sturdy seal.
Place each finished potsticker on a parchment-lined tray and cover with a damp towel to prevent drying. Repeat with the remaining 30 pieces Potsticker Wrappers and filling.
Step 3: Pan-Fry to Crisp Perfection
Heat 2 tablespoons of the 0.25 cup Vegetable Oil in a large non-stick skillet over medium-high heat. Arrange the potstickers in a single layer, flat side down, ensuring they don’t touch. Fry undisturbed for 2-3 minutes until the bottoms turn golden brown and crisp.
This initial high-heat sear creates the signature crispy crust. Watch for the edges to turn translucent as the filling begins to cook through. Resist the urge to move them—this ensures an even, unbroken crust.
Step 4: Steam to Finish Cooking
Carefully add ½ cup of water to the skillet—it will sizzle violently. Immediately cover with a tight-fitting lid and reduce the heat to medium. Steam for 6-8 minutes until the water has fully evaporated and the potstickers are cooked through.
The steam finishes cooking the filling while keeping it juicy, as promised. You’ll hear the sizzling change to a gentler hiss as the water cooks off. Once the pan is dry, remove the lid and let them crisp for an additional 1-2 minutes to restore the bottoms’ texture.
Step 5: Prepare the Dipping Sauce and Serve
While the potstickers cook, whisk together the remaining 2 tbsp Soy Sauce, 2 tbsp Rice Vinegar, 1 tsp Chili Oil, and 1 tbsp Sesame Oil in a small bowl. Taste and adjust the balance of tangy, spicy, and savory to your preference.
Transfer the potstickers to a serving plate, crisp side up. Serve immediately with the dipping sauce on the side. The contrast of the crispy bottom and tender filling, paired with the bold dipping sauce, delivers the full experience.
Pro Tips For Making Chicken Potsticker
- Squeeze Out Cabbage: After salting and resting the shredded Napa cabbage, squeeze out every drop of water with your hands—I learned this the hard way when my first batch turned into soggy dumplings.
- Chill the Filling: Let your chicken-pork mixture rest in the fridge for 20-30 minutes before folding; it makes the filling easier to handle and prevents tearing.
- Skip Overfilling: Resist the urge to pack more than 1 teaspoon of filling per wrapper—overstuffed potstickers burst open when pan-frying, and nobody wants that.
- Use Ginger Juice: Instead of mincing fresh ginger, grate it and press out the juice into the filling; it distributes flavor more evenly without chewy bits.
Wine and Beer Pairings for chicken potsticker
White Wine Pairings
A crisp Riesling from Germany or Washington state complements the savory filling beautifully. The slight sweetness balances the umami, while bright acidity cuts through the richness. I recommend Chateau Ste. Michelle for an accessible option. 🍷
Sparkling Options
Prosecco or Cava offer effervescence that cleanses your palate between bites. The bubbles enhance the texture contrast of crispy and tender. A La Marca Prosecco provides consistent quality at a reasonable price point.
Asian Beer Choices
Sapporo or Asahi lagers have the clean, crisp profile that pairs naturally with potstickers. Their light body doesn’t compete with the dish’s flavors. I always keep a few bottles in my fridge for Asian-inspired meals. 🍺
Craft Beer Alternatives
A light pilsner like Firestone Walker Pivo works wonderfully. Its subtle hop character and crisp finish match the dish’s complexity. Avoid heavy stouts or IPAs that would overpower the delicate filling flavors.
Non-Alcoholic Pairings
For non-drinkers, try a ginger beer like Fever-Tree—its spicy kick complements the ginger in the filling. Sparkling green tea also offers a refreshing contrast with its light bitterness.
Serving Temperature Tip
Serve whites and sparklings chilled at 45-50°F and beers at 40-45°F. This temperature range brings out the best in both your drink and this creation. Proper chilling enhances all the flavors.
Nutrition Facts
Frequently Asked Questions
Can I use only chicken instead of the chicken-pork mix?
Yes, but add 1 tablespoon extra sesame oil or chicken fat to maintain juiciness. The pork adds natural moisture that chicken alone lacks.
How do I keep them from sticking to the pan?
Use a non-stick skillet and ensure it’s fully heated before adding the potstickers. Never move them during the initial 2-3 minutes of frying.
Can I bake or air-fry them instead?
Baking at 375°F for 15-20 minutes works, but pan-frying delivers the classic crispy-steamed texture. Brush with oil for better browning.
How do I store leftovers?
Refrigerate cooked potstickers in an airtight container for up to 3 days. Reheat in a pan with a splash of water to restore crispness.

- Jollof Rice Sauce Recipe: West African Tomato and Spice Infusion - September 25, 2026
- Japanese Rice Soup Recipe: Umami-Rich Comfort in a Bowl - September 25, 2026
- Homemade Cream Of Rice Recipe: Silk-Smooth Breakfast in Minutes - September 25, 2026