
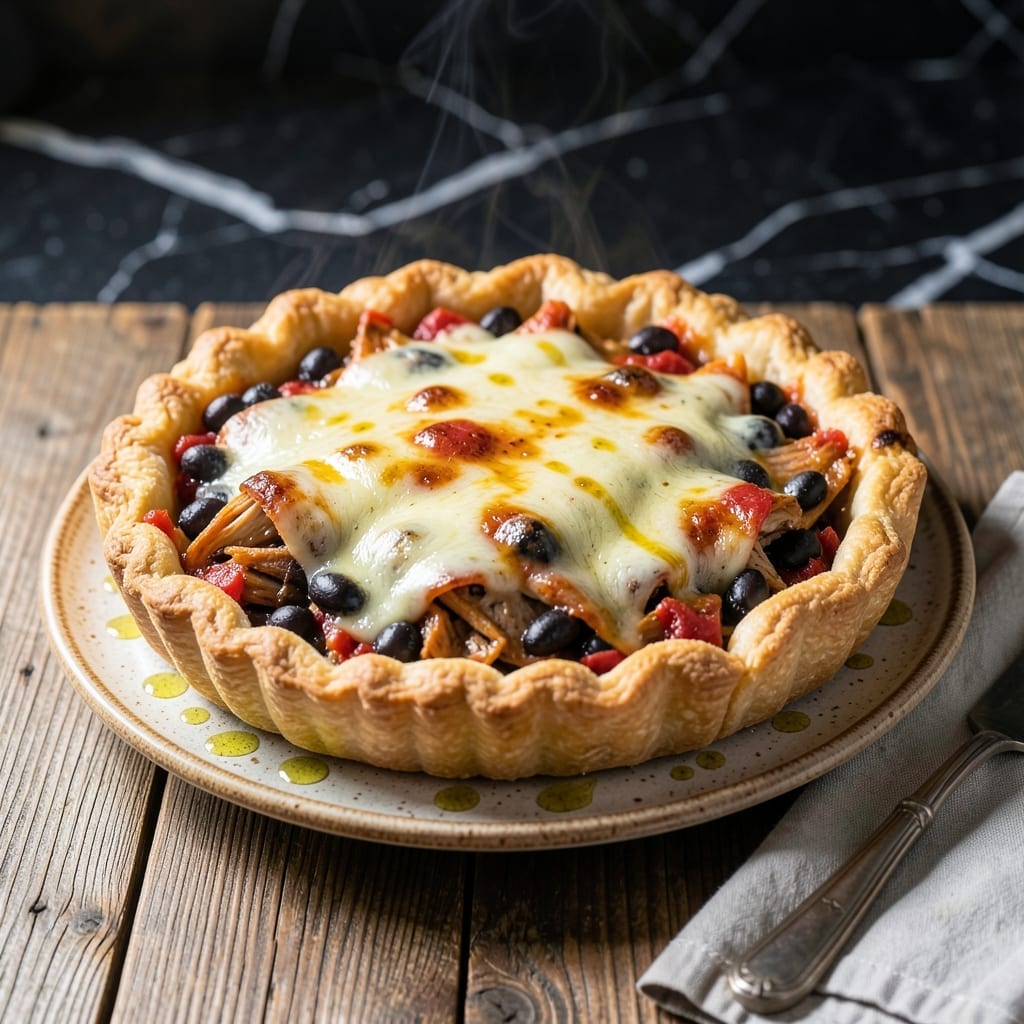
This layered pie brings bold Southwestern flavors to your dinner table with minimal effort. The combination of tender chicken, zesty ranchero sauce, and melty cheese creates a satisfying meal that’s both hearty and flavorful.
I’ve streamlined the process to ensure every bite is packed with smoky, tangy, and slightly spicy notes. The crust stays golden and flaky, while the filling delivers a perfect balance of textures and tastes.
What sets this dish apart is its ability to feed a crowd without complicated steps. It’s ideal for busy weeknights or casual gatherings where you want to serve something impressive yet approachable.
Ready in under an hour, this pie is a surefire way to bring restaurant-quality flavor home.
Ingredients for Chicken Ranchero Pie
Pantry staples and fresh veggies create this flavor-packed layered dish effortlessly.
| Ingredient | Amount | Notes |
|---|---|---|
| Refrigerated Pie Crust 🥧 | 2 sheets | Store-bought or homemade |
| Boneless Skinless Chicken Breasts 🍗 | 1 ½ lb | Diced into bite-sized pieces |
| Ranchero Sauce 🍅 | 1 ½ cups | Canned or homemade |
| Shredded Monterey Jack Cheese 🧀 | 2 cups | Or pepper jack for heat |
| Shredded Cheddar Cheese 🧀 | 1 cup | Sharp for best flavor |
| Black Beans 🌱 | 1 can | Drained and rinsed |
| Corn Kernels 🌽 | 1 cup | Fresh, frozen, or canned |
| Red Onion 🧅 | ½ whole | Diced for filling |
| Green Bell Pepper 🌶️ | 1 whole | Diced, seeds removed |
| Olive Oil 🫒 | 2 tbsp | For sautéing vegetables |
| Ground Cumin 🌿 | 1 tsp | Toasted for extra depth |
| Chili Powder 🌶️ | 1 tsp | Mild or hot variety |
| Salt 🧂 | ½ tsp | Adjust to taste |
| Black Pepper 🌶️ | ¼ tsp | Freshly ground preferred |
| Large Egg 🥚 | 1 whole | For sealing crust edges |
The crust is your foundation here. Pillsbury refrigerated crust saves time without sacrificing flakiness, but if you’re feeling ambitious, homemade is always a win. For the chicken, boneless, skinless breasts stay tender—thighs work too (just remove the skin). I grab mine from Costco for the best value, but any supermarket’s butcher section will do. Look for vibrant, firm peppers and onions at the produce stand.
No ranchero sauce on hand? Salsa with a spoonful of tomato paste gets you 80% there. Black beans can be swapped for pinto or kidney beans—whatever’s in your cupboard. For the cheese, Monterey Jack is a must (it melts like a dream), but cheddar alone works in a pinch. Fresh corn off the cob? Even better (just cut it raw). Frozen works too (no need to thaw).
Assemble the pie ahead and refrigerate for up to 2 hours before baking. Leftovers keep well for 3-4 days in the fridge—great for lunches. Reheats nicely in the microwave or oven. I always make two and freeze one (unbaked) for busy nights.
Why You’ll Love This Recipe
- No-Fuss Assembly: I just roll out the pie crust, layer in the chicken and ranchero sauce, and top with cheese—no fancy techniques required.
- Cheesy Comfort: That melty blend of Monterey Jack and cheddar with the zesty ranchero sauce? Pure satisfaction in every bite.
- Weeknight Hero: Honestly, it’s my go-to for busy Tuesdays when I need something hearty on the table fast.
- Stretches Far: One pie feeds my whole family, and the leftovers taste even better the next day.
Step-by-Step Instructions for Chicken Ranchero Pie
This method builds bold Southwestern flavors in every satisfying layer.
Step 1: Cook the Chicken and Vegetable Filling
Heat the 2 tbsp olive oil in a large skillet over medium-high heat. Add the diced 1.5 lb boneless skinless chicken breasts and cook for 5-6 minutes until no longer pink inside. Break up any large pieces with a wooden spoon as it cooks.
Add the diced 0.5 whole red onion, diced 1 whole green bell pepper, 1 tsp ground cumin, 1 tsp chili powder, 0.5 tsp salt, and 0.25 tsp black pepper. Cook for 3-4 minutes until the vegetables soften and the spices become fragrant.
Step 2: Mix in Sauce and Remaining Filling Ingredients
Pour in the 1.5 cups ranchero sauce, drained and rinsed 1 can black beans, and 1 cup corn kernels. Stir well to combine. Reduce heat to medium and let simmer for 3-4 minutes until the mixture thickens slightly.
Remove from heat and let cool for 5 minutes. This prevents the sauce from making the crust soggy when assembled. The filling should be thick enough to hold its shape when spooned.
Step 3: Assemble the Pie
Preheat oven to 375°F. Unroll 1 sheet refrigerated pie crust and press it into a 9-inch pie dish. Trim any excess dough from the edges. Spread half of the 2 cups shredded Monterey Jack cheese and half of the 1 cup shredded cheddar cheese evenly over the crust.
Spoon the chicken and vegetable filling over the cheese layer, spreading it evenly. Top with the remaining Monterey Jack and cheddar cheeses. This double cheese layer ensures gooey, melted goodness in every bite.
Step 4: Add Top Crust and Bake
Unroll the second refrigerated pie crust and place it over the filling. Crimp the edges to seal, then cut several slits in the top to allow steam to escape. Beat the 1 whole large egg and brush it lightly over the crust for a golden finish.
Bake for 35-40 minutes until the crust is golden brown and the filling is bubbling. If the edges begin to brown too quickly, cover them with foil. Let rest for 10 minutes before slicing to allow the filling to set.
Pro Tips For Making Chicken Ranchero Pie
- Precook the Chicken: Poach or bake the chicken breasts first—raw chicken in the pie won’t cook through before the crust burns. I learned this the hard way after pulling a pie with underdone centers twice.
- Drain the Sauce: Simmer the ranchero sauce for 5-10 minutes to thicken it, or your pie will be soupy. Sounds obvious, but I skipped this once and ended up with a soggy bottom crust.
- Vent the Crust: Cut a few small slits in the top pie crust to let steam escape. After burning three pies, I finally figured out that trapped steam ruins the texture.
- Mix the Cheeses: Combine the Monterey Jack and cheddar before layering—they melt more evenly and create that perfect stretchy pull. My grandmother swore by this, and she was right.
Perfect Pairings for This Dish
Side Dishes
A simple Mexican street corn salad with cotija cheese and lime pairs perfectly, balancing the pie’s richness. I toss 4 cups grilled corn with 2 tbsp mayo and 1 tsp chili powder for a quick version. 🌽
Light Options
A crisp jicama slaw with cabbage and cilantro adds refreshing crunch. I use 2 cups shredded jicama and 1 cup shredded cabbage with lime juice. This cuts through the dish’s hearty flavors beautifully.
Wine Pairings
A chilled Sauvignon Blanc from California complements the zesty ranchero sauce with its citrus notes. For red lovers, a light Grenache with its red fruit flavors works surprisingly well. 🍷
Beer Matches
A crisp Mexican lager like Modelo Especial is my go-to—its clean finish cleanses the palate. Alternatively, a wheat beer with citrus notes enhances the dish’s Southwestern flair.
Topping Ideas
Serve with fresh cilantro and diced avocado for brightness. A dollop of sour cream or Greek yogurt adds a cooling contrast. I always keep these on hand for customizing each slice. 💫
Nutrition Facts
Frequently Asked Questions
Can I use store-bought pie crust?
Refrigerated pie crust works perfectly and saves time. Just press it into your dish and proceed as directed. For extra flakiness, let it sit at room temperature for 15 minutes before rolling.
What if my filling seems too runny?
Simmer it for an extra 3-5 minutes to thicken. You can also add 1 tbsp cornstarch mixed with 1 tbsp water to help bind it. A thick filling prevents a soggy crust.
Can I make this ahead of time?
Yes! Assemble the pie, cover tightly, and refrigerate for up to 24 hours. Bake as directed, adding 5-10 minutes if baking straight from the fridge.
How do I know when it’s done?
The crust should be golden brown, and the filling should be bubbling through the slits. A 10-minute rest before slicing helps it set.

- Jollof Rice Sauce Recipe: West African Tomato and Spice Infusion - September 25, 2026
- Japanese Rice Soup Recipe: Umami-Rich Comfort in a Bowl - September 25, 2026
- Homemade Cream Of Rice Recipe: Silk-Smooth Breakfast in Minutes - September 25, 2026