
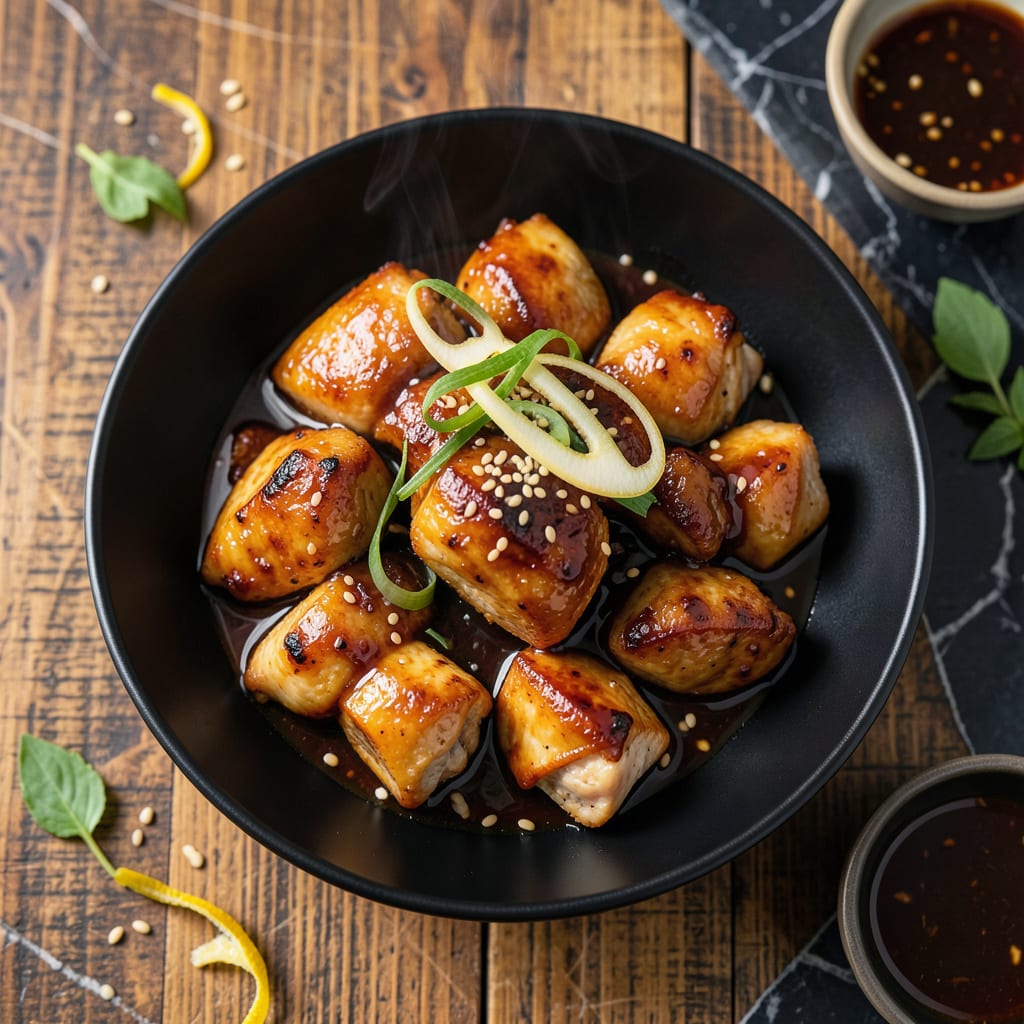
This wok-tossed chicken delivers sweet and tangy flavors in every bite, thanks to a simple soy-vinegar marinade. The dish comes together quickly with minimal prep.
High heat ensures the chicken stays tender while the sauce caramelizes into a glossy coat. Serve over steamed rice for a complete meal.
Ingredients for Chicken Recipe with Soy Sauce and Vinegar
Minimal ingredients, maximum flavor. Sweet, tangy, and ready in minutes over high heat.
| Ingredient | Amount | Notes |
|---|---|---|
| Boneless, Skinless Chicken Thighs 🍗 | 1 ½ lb | Cut into 1-inch pieces |
| Soy Sauce 🫒 | ½ cup | Low-sodium preferred |
| Rice Vinegar 💧 | ¼ cup | Unseasoned for balance |
| Brown Sugar 🍚 | 3 tbsp | Light or dark |
| Garlic Cloves 🧄 | 4 cloves | Minced finely |
| Fresh Ginger 🌿 | 1 tbsp | Grated or minced |
| Cornstarch 🌾 | 1 tbsp | For thickening sauce |
| Vegetable Oil 🫒 | 2 tbsp | High smoke point |
| Red Bell Pepper 🌶️ | 1 whole | Thinly sliced |
| Green Onions 🧅 | 3 whole | Sliced for garnish |
| Sesame Seeds 🌿 | 1 tsp | Toasted for garnish |
| Steamed Rice 🍚 | 3 cups | Cooked, for serving |
| Red Pepper Flakes 🌶️ | ½ tsp | Optional for heat |
[recipeingredientscaler]
The chicken thighs are non-negotiable here—boneless, skinless for quick cooking and tenderness. Whole Foods or Costco have great options, but any supermarket brand works if fresh. Look for thighs with good marbling (that white fat streaking) for juicier results. The soy sauce is the backbone—low-sodium lets you control the salt level without sacrificing depth.
No rice vinegar? Apple cider vinegar works in a pinch, but its sharper taste changes the profile slightly. Brown sugar can be swapped for honey or maple syrup (use 1/4 cup instead of 3 tbsp). For a gluten-free version, tamari replaces soy sauce 1:1. The cornstarch slurry is essential for that glossy caramelization—don’t skip it.
Leftovers keep 4-5 days in the fridge, but the chicken is best fresh (that crispy exterior softens over time). Sauce thickens as it cools—reheat gently with a splash of water. Freeze cooked chicken in sauce for up to 3 months, though texture changes slightly.
Why You’ll Love This Recipe
- One Pan Wonder: I toss everything in—chicken, soy sauce, vinegar, garlic—and let the oven do the work.
- Sweet-Savory Magic: The brown sugar caramelizes with the soy and vinegar for that sticky, tangy glaze I can’t resist.
- Meal Prep Hero: Makes enough for three nights of leftovers, and honestly, it tastes even better the next day.
- Budget Stretcher: Chicken thighs stay juicy and cheap, and the pantry staples do all the flavor heavy lifting.
Step-by-Step Instructions for Wok-Tossed Sweet and Tangy Chicken
Master the technique behind this dish with precise steps and professional timing.
Step 1: Velvet the Chicken for Maximum Tenderness
Cut the 1.5 lb Boneless, Skinless Chicken Thighs into 1-inch pieces as specified. In a bowl, combine the chicken with 0.5 cup Soy Sauce, 0.25 cup Rice Vinegar, 3 tbsp Brown Sugar, 4 cloves minced Garlic Cloves, and 1 tbsp Fresh Ginger.
Add 1 tbsp Cornstarch and mix thoroughly to coat every piece. This velveting process ensures the meat stays succulent during high-heat cooking. Let it marinate for 15 minutes while you prepare the remaining ingredients.
Step 2: Stir-Fry Aromatics and Vegetables
Heat 2 tbsp Vegetable Oil in a wok or large skillet over high heat until it shimmers. Add the marinated chicken in a single layer, working in batches if necessary to avoid overcrowding. Cook undisturbed for 2-3 minutes until the pieces develop a golden crust.
Remove the chicken and set aside. In the same pan, add the thinly sliced Red Bell Pepper and stir-fry for 2-3 minutes until the edges begin to soften but the vegetable retains its crispness.
Step 3: Combine and Thicken the Sauce
Return all the chicken to the wok along with any accumulated juices. The residual marinade will begin to caramelize as it hits the hot surface. Stir constantly for 3-4 minutes until the sauce reduces and coats the chicken in a glossy, thick layer.
If the sauce appears too thin, create a quick slurry with 1 tsp Cornstarch mixed with 1 tbsp water and stir it in. Cook for an additional 1-2 minutes until the sauce reaches your desired consistency.
Step 4: Garnish and Serve Immediately
Transfer the chicken to a serving platter. Sprinkle with 3 whole sliced Green Onions, 1 tsp Sesame Seeds, and 0.5 tsp Red Pepper Flakes if using. The green onions add freshness while the sesame seeds provide a nutty crunch.
Serve hot over 3 cups Steamed Rice, ensuring each portion gets an even distribution of the sauce. The contrast of the sweet-tangy glaze with the fluffy rice creates a balanced, restaurant-quality presentation.
Pro Tips For Making Chicken Recipe With Soy Sauce And Vinegar
- Sear First, Simmer Later: Brown the chicken thighs in a hot pan for 3-4 minutes per side before adding liquids—this builds a deep flavor base that soy sauce alone can’t achieve.
- Mince Garlic Fine: I learned this the hard way—chopped garlic burns faster than minced, so take the extra minute to get it as fine as possible for even flavor distribution.
- Reduce the Sauce: After cooking, let the soy-vinegar mixture reduce for 2-3 minutes until slightly syrupy; this thickens the glaze and prevents a watery finish.
- Use Thighs, Not Breasts: Sounds obvious, but boneless thighs stay juicy in the vinegar-soy marinade, while breasts tend to dry out—even if you’re watching the clock carefully.
Common Mistakes When Making Perfect Results
Overcrowding the Pan
Trying to cook all 1.5 lb chicken thighs at once will steam the meat instead of searing it. Work in batches if needed—this ensures each piece gets that golden crust and proper caramelization. I learned this the hard way with soggy results.
Skipping the Velveting
Don’t omit the cornstarch in the marinade. This step, called velveting, keeps the chicken tender and helps the sauce cling beautifully. It’s the secret to that restaurant-quality texture. 💪
Without it, your chicken may turn out dry or tough, especially with high-heat cooking.
Underestimating Heat
This dish requires high heat to achieve the right sear and sauce reduction. If your oil isn’t shimmering before adding the chicken, it won’t develop the right flavor or texture. Use a wok or heavy skillet for best results.
Rushing the Sauce
Let the sauce reduce and thicken for the full 3-4 minutes. If it’s too thin, your chicken won’t have that glossy, sticky coat. A quick slurry of 1 tsp cornstarch and water can save it if needed.
Overcooking the Bell Pepper
The red bell pepper should retain some crispness. Cook it just until the edges soften—about 2-3 minutes—then remove it from the pan. This keeps a nice texture contrast in the final dish. 🔥
Nutrition Facts
Frequently Asked Questions
Can I use chicken breast instead of thighs?
Yes, but thighs stay juicier. If using breast, reduce cooking to 2-3 minutes per side to prevent dryness.
How do I make the sauce thicker?
Mix 1 tsp cornstarch with 1 tbsp water and stir into simmering sauce. Cook for 1-2 minutes until glossy.
What can I substitute for rice vinegar?
Apple cider vinegar works, but use slightly less as it’s stronger. Lemon juice is another option.
Can I make this ahead of time?
Cooked chicken keeps 4-5 days refrigerated. Reheat gently with a splash of water to refresh the sauce.

- Jollof Rice Sauce Recipe: West African Tomato and Spice Infusion - September 25, 2026
- Japanese Rice Soup Recipe: Umami-Rich Comfort in a Bowl - September 25, 2026
- Homemade Cream Of Rice Recipe: Silk-Smooth Breakfast in Minutes - September 25, 2026