
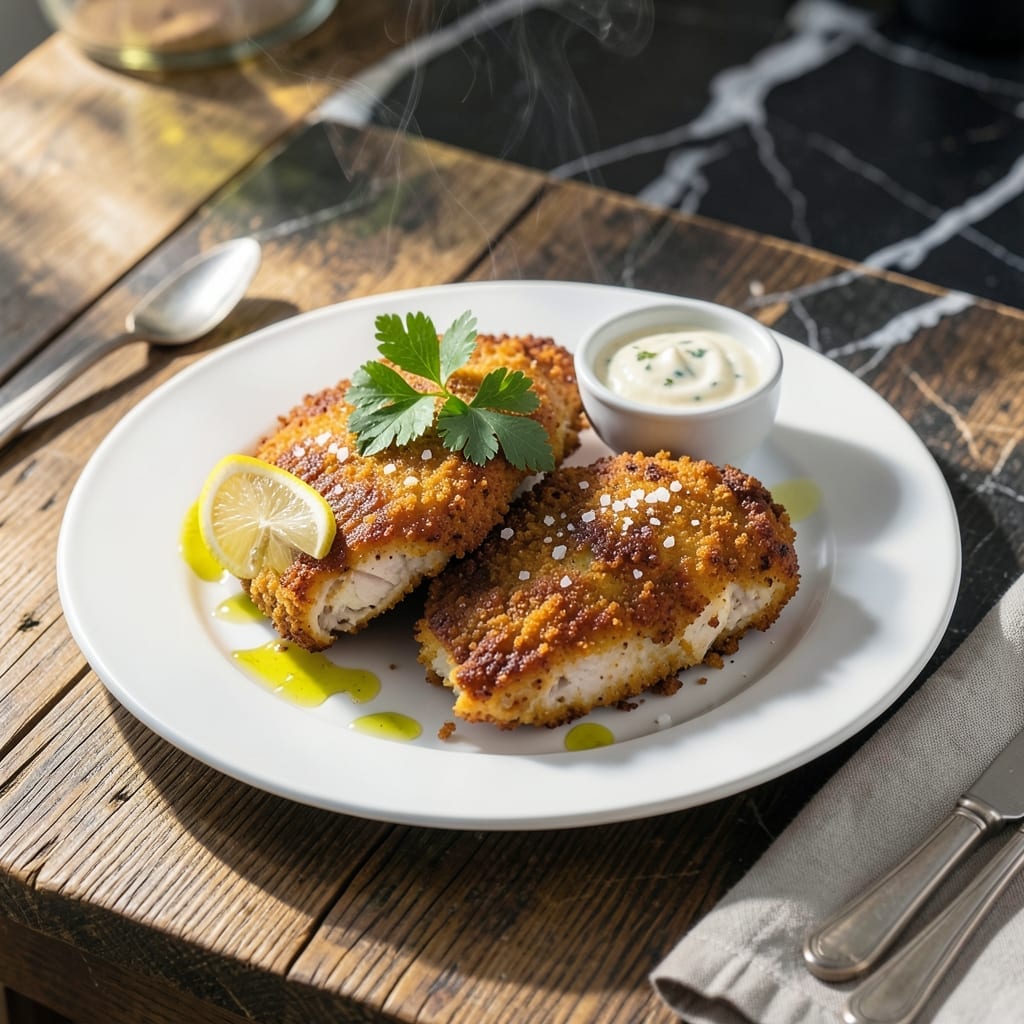
This classic breaded chicken cutlet paired with creamy country gravy delivers comfort food at its finest. The crispy exterior gives way to tender chicken, while the rich, velvety gravy ties everything together perfectly.
I developed this method to ensure a golden, crunchy coating that stays intact through the final plating. The gravy comes together in the same pan, capturing all the flavorful browned bits from frying the chicken.
What you get is a restaurant-quality dish with a creamy, savory sauce that complements the crispy cutlet beautifully. The technique is straightforward but yields impressive results every time.
Serve with mashed potatoes or buttered noodles to soak up every drop of that delicious gravy. This is comfort food that satisfies completely.
Ingredients for Chicken Statler
Elevate comfort food with crispy breaded cutlets and a velvety country gravy ready in minutes.
| Ingredient | Amount | Notes |
|---|---|---|
| Chicken Breast Cutlets 🍗 | 1 ½ lb | Pounded to 1/4-inch thickness |
| All-Purpose Flour 🌾 | 1 cup | Divided for dredging and gravy |
| Large Eggs 🥚 | 2 whole | Beaten for breading |
| Whole Milk 🥛 | ½ cup | For egg wash and gravy |
| Panko Breadcrumbs 🍞 | 1 ½ cups | For crispy coating |
| Kosher Salt 🧂 | 1 ½ tsp | Divided for seasoning |
| Freshly Ground Black Pepper 🌶️ | 1 tsp | Divided for seasoning |
| Garlic Powder 🧄 | 1 tsp | For breading and gravy |
| Onion Powder 🧅 | 1 tsp | For breading and gravy |
| Unsalted Butter 🧈 | ½ cup | For frying and gravy |
| Chicken Stock 🍲 | 1 ½ cups | Low-sodium preferred for gravy |
| Heavy Cream 🥛 | ¾ cup | For creamy gravy |
| Vegetable Oil 🫒 | ½ cup | For frying cutlets |
Optimal quality requires fresh chicken breast cutlets pounded uniformly—look for air-chilled, hormone-free options at Whole Foods or butcher shops. The panko is non-negotiable for that restaurant-style crunch; Kikkoman brand is standard in professional kitchens. For the gravy, low-sodium chicken stock allows precise seasoning control, and organic heavy cream yields the richest texture without curdling.
No panko on hand? Dried breadcrumbs at double the volume work in a pinch, though texture suffers. Swap chicken stock for vegetable stock if needed, but adjust salt judiciously. For a lighter gravy, half-and-half replaces heavy cream at a 1:1 ratio. The breading process demands separate bowls for flour, egg wash, and panko—cross-contamination ruins the crust.
Store raw cutlets in the coldest part of your fridge for up to 2 days. The gravy thickens as it cools—reheat gently with a splash of stock. Leftovers keep 3-4 days refrigerated or 2 months frozen, though the coating softens upon reheating.
Why You’ll Love This Recipe
- One Pan Wonder: I just need a shallow dish, a fork, and 15 minutes to coat and cook these cutlets.
- Crispy Outside, Juicy Inside: Panko gives that golden crunch while the milk-egg wash keeps the chicken tender every time.
- Weeknight Hero: Between us, this is my go-to for Sunday prep—reheats beautifully for lunches all week.
- Budget Stretcher: Chicken breast cutlets stay affordable, and a little flour plus panko goes a long way.
Step-by-Step Instructions for Chicken Statler
Master the technique behind this classic dish with precise steps for crispy cutlets and velvety gravy.
Step 1: Season and Bread the Chicken Breast Cutlets
Begin by patting the 1.5 lb Chicken Breast Cutlets dry with paper towels to ensure the breading adheres properly. Season both sides with 1 tsp Kosher Salt, ½ tsp Freshly Ground Black Pepper, ½ tsp Garlic Powder, and ½ tsp Onion Powder.
Set up a breading station with three shallow dishes. Place 1 cup All-Purpose Flour in the first, beat 2 whole Large Eggs with 0.5 cup Whole Milk in the second, and mix 1.5 cups Panko Breadcrumbs with the remaining ½ tsp Kosher Salt, ½ tsp Freshly Ground Black Pepper, ½ tsp Garlic Powder, and ½ tsp Onion Powder in the third.
Dredge each cutlet in the flour, shaking off excess, then dip into the egg wash, allowing any excess to drip off. Finally, press into the panko mixture, ensuring full coverage. The breading should look evenly textured and dry to the touch.
Step 2: Pan-Fry the Breaded Cutlets to Golden Perfection
Heat 0.5 cup Vegetable Oil and ¼ cup Unsalted Butter in a large, heavy skillet over medium-high heat until the butter melts and the mixture begins to shimmer. You’ll know it’s ready when a pinch of panko sizzles immediately upon contact.
Carefully place the breaded cutlets in the hot oil, working in batches if necessary to avoid crowding. Fry for 3-4 minutes per side until the coating is deep golden brown and crisp. The internal temperature should reach 165°F.
Transfer the cooked cutlets to a paper towel-lined plate to drain excess oil. Keep them warm in a 200°F oven while you prepare the gravy.
Step 3: Prepare the Creamy Country Gravy
After frying, pour off all but 2 tablespoons of the oil and butter from the skillet. Return it to medium heat and whisk in 2 tablespoons All-Purpose Flour from your reserved amount. Cook for 1-2 minutes, stirring constantly, until the mixture turns a light tan color.
Slowly pour in 1.5 cups Chicken Stock, whisking continuously to prevent lumps. Add the remaining ¼ cup Unsalted Butter, ½ tsp Garlic Powder, and ½ tsp Onion Powder. Bring to a simmer and cook for 3-4 minutes until the gravy begins to thicken.
Stir in 0.75 cup Heavy Cream and continue simmering for another 2-3 minutes until the gravy coats the back of a spoon. Taste and adjust seasoning with the remaining ½ tsp Kosher Salt if needed. The gravy should be smooth, rich, and slightly thickened.
Step 4: Plate and Serve
Place each fried cutlet on a serving plate and generously ladle the creamy country gravy over the top. For best results, serve immediately while the cutlets are still crispy and the gravy is hot.
The gravy should pool slightly around the cutlets, creating a decadent presentation. Each bite should deliver a perfect contrast of crispy, golden breading and tender chicken, complemented by the velvety, flavorful gravy.
Pro Tips For Making Chicken Statler
- Pound the Cutlets: Use a meat mallet to pound the chicken to an even 1/2-inch thickness—this guarantees even cooking and prevents dry, chewy edges.
- Chill the Dredge: After breading, let the cutlets rest in the fridge for 15 minutes; the coating sticks better and fries up crisper.
- Skip the Overcrowding: Fry in batches with at least an inch between pieces, or the oil temperature drops and you’ll end up with soggy, greasy chicken.
- Drain on a Rack: Place fried cutlets on a wire rack over a baking sheet instead of paper towels—this keeps the crust crisp instead of steaming it soft.
Make-Ahead Tips for chicken statler
Prep Ahead Breading
You can bread all your cutlets up to 24 hours before cooking. Place them on a wire rack set over a baking sheet in the fridge. This keeps the coating dry and prevents sogginess. I cover mine loosely with parchment paper to avoid drying out. 💡
Gravy Base Prep
Make the gravy base ahead by preparing the roux and stock mixture. Store it in an airtight container in the fridge for up to 2 days. When ready to serve, reheat gently and whisk in the cream just before serving.
Freezing Cooked Cutlets
Cooked cutlets freeze beautifully for up to 2 months. Let them cool completely, then wrap individually in plastic wrap and place in a freezer bag. Reheat in a 375°F oven for 15-20 minutes to restore crispiness.
Gravy Freezing Tips
Freeze gravy in ice cube trays for portion control. Once solid, transfer to a freezer bag. This lets you reheat only what you need. Thaw overnight in the fridge and warm on low heat with a splash of milk.
Reheating Together
To maintain crispiness when reheating both components, place cutlets on a baking sheet in a 400°F oven for 10 minutes. Warm the gravy separately on the stove. This prevents the breading from absorbing too much moisture. ❄️
Time-Saving Hack
If making for a crowd, fry all cutlets first, then make the gravy in batches using the same pan. This maximizes flavor and saves cleanup. I always keep my cooked cutlets warm in the oven while finishing the gravy.
Nutrition Facts
Frequently Asked Questions
What’s the best oil for frying?
Use a neutral oil with a high smoke point like vegetable or canola. The recipe calls for 0.5 cup Vegetable Oil combined with butter for flavor. Avoid olive oil as it can burn at medium-high heat.
Can I use chicken thighs instead?
Yes, but pound them to an even 1/4-inch thickness for consistent cooking. Thighs may cook slightly faster than breasts due to higher fat content. Internal temp should still reach 165°F.
Why did my gravy turn out lumpy?
This usually happens if the flour isn’t fully whisked into the fat before adding liquid. Cook the roux for 1-2 minutes first, then slowly pour in stock while whisking constantly.
How do I keep the breading crispy?
Drain fried cutlets on a wire rack instead of paper towels to prevent steam buildup. Serve immediately and avoid covering until ready to eat. For leftovers, reheat in a 400°F oven.

- Jollof Rice Sauce Recipe: West African Tomato and Spice Infusion - September 25, 2026
- Japanese Rice Soup Recipe: Umami-Rich Comfort in a Bowl - September 25, 2026
- Homemade Cream Of Rice Recipe: Silk-Smooth Breakfast in Minutes - September 25, 2026