
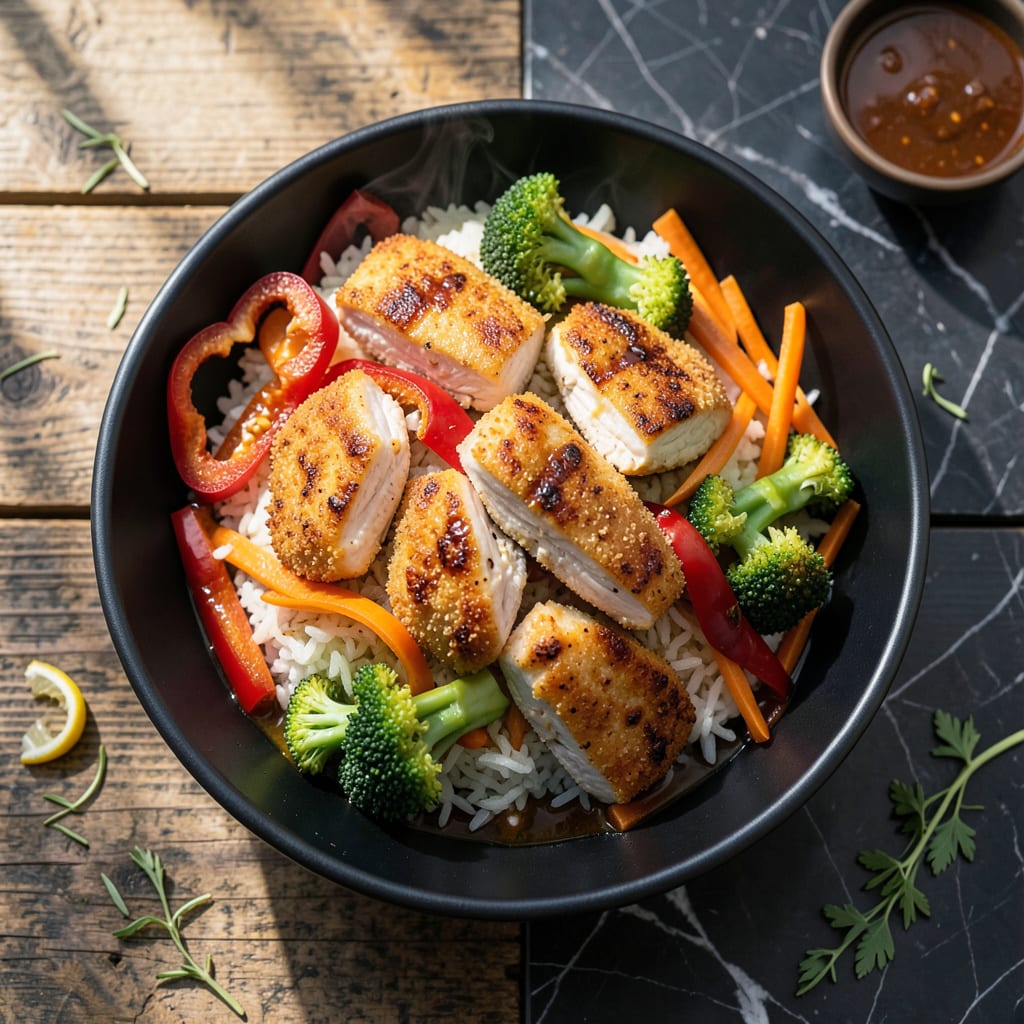
This air fryer method delivers crispy chicken and vegetables with minimal effort. I developed this recipe for busy weeknight dinners when time is limited but flavor can’t be compromised.
The high heat circulates perfectly to create that signature stir fry texture—tender chicken with crispy edges and vegetables that retain their bite. Ready in under 20 minutes from start to finish.
Ingredients for Chicken Stir Fry Air Fryer
Quick weeknight dinner with crispy chicken and vibrant vegetables ready in minutes.
| Ingredient | Amount | Notes |
|---|---|---|
| Boneless Skinless Chicken Breast 🍗 | 1 ½ lb | Cut into 1-inch pieces |
| Soy Sauce 🫒 | 3 tbsp | Low-sodium preferred |
| Sesame Oil 🫒 | 1 tbsp | Toasted for best flavor |
| Bell Peppers 🌶️ | 2 whole | Sliced into strips |
| Broccoli Florets 🥦 | 3 cups | Fresh or frozen |
| Carrots 🥕 | 2 whole | Julienned or thinly sliced |
| Garlic Cloves 🧄 | 3 cloves | Minced finely |
| Fresh Ginger 🌿 | 1 tbsp | Grated for stir fry |
| Cornstarch 🌾 | 2 tbsp | For coating chicken |
| Brown Sugar 🍚 | 1 tbsp | Light or dark works |
| Rice Vinegar 🍋 | 1 tbsp | For tangy balance |
| Green Onions 🧅 | 4 whole | Sliced for garnish |
| Sesame Seeds 🌾 | 1 tbsp | Toasted, for garnish |
| Red Pepper Flakes 🌶️ | ½ tsp | Adjust to heat preference |
[recipeingredientscaler]
The chicken quality matters for texture. Boneless, skinless chicken breast from Whole Foods or Costco gives the best results—avoid pre-ground or pre-cut versions as they dry out. The soy sauce is your flavor base, so Kikkoman low-sodium is a reliable choice. Fresh ginger and garlic are non-negotiable for authentic flavor, but the pre-minced jars at Trader Joe’s work in a pinch.
No soy sauce? Coconut aminos at one-to-one ratio is a great substitute. Swap bell peppers for snap peas or zucchini if that’s what’s in season. The cornstarch can be replaced with all-purpose flour, but the coating won’t be as crispy. For extra heat, add a dash of Sriracha—just balance it with a bit more brown sugar.
Store prepped ingredients in the fridge for up to 2 days before cooking. Leftovers keep well for 4-5 days and reheat beautifully in the air fryer for 3-4 minutes to restore crispiness. Freezing isn’t recommended as it softens the vegetables.
Why You’ll Love This Recipe
- One Pan Wonder: I toss everything in the air fryer basket—chicken, peppers, broccoli—and it cooks while I set the table. No stovetop, no mess.
- Umami Bomb: Sesame oil and soy sauce hit that sweet-salty note that makes me sneak bites before it even hits the plate.
- Feeds a Crowd: I double the batch for meal prep—tastes just as good reheated for lunch the next day.
- Budget Hero: Boneless chicken breast and frozen veggies work just as well, so I save without sacrificing flavor.
Step-by-Step Instructions for Chicken Stir Fry Air Fryer
Here’s the method. Straightforward, tested, works every time.
Step 1: Coat and Season the Chicken
Cut the 1.5 lb Boneless Skinless Chicken Breast into 1-inch pieces and pat dry with paper towels. This ensures the 2 tbsp Cornstarch adheres properly, creating that essential crispy coating. Toss the chicken with the cornstarch in a bowl until fully coated—you should see no pink showing through.
Drizzle with 1 tbsp Sesame Oil and 3 tbsp Soy Sauce, then mix to distribute evenly. The sesame oil adds nutty depth while the soy sauce begins the marinating process. Let it sit for 10 minutes while you prep the vegetables.
Step 2: Prepare Vegetables and Aromatics
Slice the 2 whole Bell Peppers into thin strips and the 2 whole Carrots into matchsticks. Cut the 3 cups Broccoli Florets into even, bite-sized pieces. Thinly slice the 4 whole Green Onions, separating the white and green parts. Mince the 3 cloves Garlic Cloves and grate the 1 tbsp Fresh Ginger.
This uniform sizing ensures even cooking in the air fryer. Keep the vegetable prep separate from the chicken to maintain crispness—mixing them too early can make the veggies soggy from the chicken’s moisture.
Step 3: Air Fry in Batches for Optimal Crispiness
Preheat the air fryer to 400°F for 5 minutes. Working in batches to avoid overcrowding, arrange the chicken in a single layer in the basket. Cook for 8-10 minutes, shaking the basket halfway through, until the chicken is golden brown and reaches 165°F internally.
Transfer the cooked chicken to a clean bowl. Now add the bell peppers, carrots, and broccoli florets to the air fryer in a single layer. Cook for 6-8 minutes until the vegetables are tender-crisp and beginning to char at the edges.
Step 4: Combine and Finish with Signature Sauce
In a large bowl, combine the cooked chicken and vegetables. Add the minced garlic, grated ginger, 1 tbsp Brown Sugar, 1 tbsp Rice Vinegar, and 0.5 tsp Red Pepper Flakes. Toss everything together—the residual heat from the chicken and veggies will soften the aromatics perfectly.
Garnish with the sliced green onions and 1 tbsp Sesame Seeds. The sesame seeds add a nutty crunch that contrasts beautifully with the tender chicken and crisp vegetables. Serve immediately while hot and crispy.
Pro Tips For Making Chicken Stir Fry Air Fryer
- Pre-cook the Chicken: Air fryers struggle with raw chicken in stir-fry cuts—I learned this the hard way—so quickly sear the diced breast in a pan first, then finish in the air fryer with veggies.
- Dry the Broccoli: After chopping the florets, pat them dry with a paper towel—sounds tedious, but it prevents steaming and gets you that crisp texture instead of soggy.
- Skip the Overcrowding: Resist the urge to dump everything in at once; cook in batches or the chicken and veggies will steam rather than sear.
- Toss After Saucing: Hit the cooked chicken and veggies with soy sauce and sesame oil right as they come out, then toss—this coats everything evenly without watering down the flavors.
Storing and Reheating This Dish
Refrigerator Storage
Let your stir fry cool completely before transferring to airtight containers. I use glass meal prep containers from IKEA—they’re perfect for 4-5 day storage in the fridge. The flavors meld beautifully overnight, making leftovers even tastier the next day. ❄️
Freezer Storage
While I don’t recommend freezing for best texture, you can freeze for up to 1 month in heavy-duty freezer bags. Lay flat to save space and remove as much air as possible. Thaw overnight in the fridge before reheating.
Air Fryer Reheating
This is my favorite method for restoring crispiness. Spread leftovers in a single layer in the air fryer basket and reheat at 375°F for 3-4 minutes. Shake halfway through to ensure even heating.
Microwave Reheating
For quick lunches, microwave individual portions on 70% power for 1-2 minutes, stirring halfway. Add a splash of water to prevent drying. The texture won’t be as crispy, but it’s still delicious. 🔥
Stovetop Reheating
Heat a skillet over medium-high heat with 1 tsp sesame oil. Add leftovers and stir-fry for 2-3 minutes until heated through. This method often produces the best texture revival.
Nutrition Facts
Frequently Asked Questions
Can I use chicken thighs instead of breast?
Chicken thighs stay juicier and handle the 400°F heat well. Cut them into 1-inch pieces and reduce cooking time by 1-2 minutes since dark meat cooks faster.
Why cook chicken and veggies separately?
Different cook times ensure perfect results. Chicken needs 8-10 minutes at 400°F, while veggies only need 6-8 minutes to stay crisp. Cooking together risks soggy vegetables or dry chicken.
How do I prevent the coating from falling off?
Pat chicken completely dry before coating. Use 2 tbsp cornstarch and let it sit for 10 minutes before air frying. Avoid overcrowding the basket so pieces crisp instead of steam.
Can I make this gluten-free?
Yes! Swap regular soy sauce for tamari and use cornstarch (already gluten-free) for coating. Double-check all other sauces for hidden gluten.

- Jollof Rice Sauce Recipe: West African Tomato and Spice Infusion - September 25, 2026
- Japanese Rice Soup Recipe: Umami-Rich Comfort in a Bowl - September 25, 2026
- Homemade Cream Of Rice Recipe: Silk-Smooth Breakfast in Minutes - September 25, 2026