
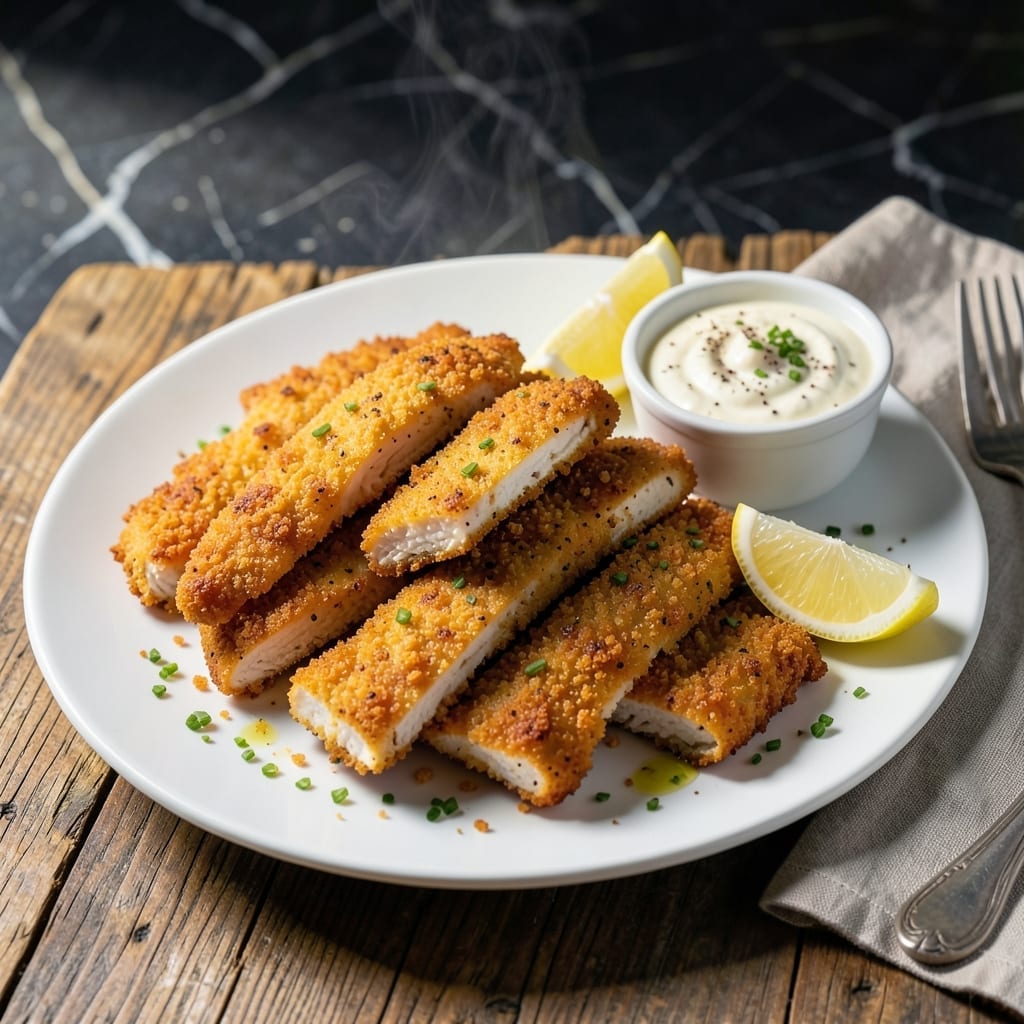
This breading method delivers a crispy coating that clings perfectly to every chicken strip, no exceptions. I developed this technique after years of failed attempts left me with patchy, falling-off breading.
The secret lies in a three-step process: flour for adhesion, egg wash for binding, and panko breadcrumbs for maximum crunch. Each element plays a crucial role in creating that shatteringly crispy exterior.
What you get is golden, evenly coated chicken strips that stay crispy even after baking. The texture is consistent from first bite to last, with no bare spots or soggy sections.
Serve hot with your favorite dipping sauces for a meal that disappears fast. This method works for both baking and frying.
Ingredients for Chicken Strip Breading
A handful of pantry staples creates that shatteringly crispy coating you crave on every strip.
| Ingredient | Amount | Notes |
|---|---|---|
| Boneless Skinless Chicken Breasts 🍗 | 1 ½ lb | Cut into 1-inch strips |
| All-Purpose Flour 🌾 | 1 cup | For initial dredging layer |
| Large Eggs 🥚 | 2 whole | Beaten for binding wash |
| Panko Breadcrumbs 🍞 | 2 cups | Japanese-style for maximum crunch |
| Kosher Salt 🧂 | 1 ½ tsp | Diamond Crystal preferred |
| Freshly Ground Black Pepper 🌶️ | 1 tsp | Coarse grind for texture |
| Garlic Powder 🧄 | 1 tsp | Not garlic salt |
| Onion Powder 🧅 | 1 tsp | Enhances savory depth |
| Paprika 🌶️ | 1 tsp | Sweet or smoked variety |
| Neutral Oil 🫒 | ½ cup | For frying or baking |
| Buttermilk 🥛 | ½ cup | For extra-tender chicken |
| Cornstarch 🌾 | 2 tbsp | Mixed with flour for crispiness |
The panko is non-negotiable here. Kikkoman or Progresso brands give that restaurant-quality crunch you can’t get from regular breadcrumbs. I grab mine from Whole Foods or the Asian aisle at Kroger. For the chicken, look for even thickness—pound the breasts to 1/2-inch if needed. The buttermilk (I use Organic Valley) tenderizes like nothing else.
No buttermilk? Whole milk with 1 tbsp vinegar works in a pinch. Out of panko? Crush corn flakes or stale bread—not ideal but better than regular crumbs. The cornstarch is key for that extra crunch (mixed right into the flour). Want more flavor? Add 1/2 tsp cayenne to the flour mix. Skip the pre-ground pepper—freshly ground makes a noticeable difference.
Bread the chicken just before cooking (or it gets soggy). Leftovers? Reheat in a 400°F oven for 10 minutes to restore crispiness. Keeps 2-3 days in the fridge, but honestly best fresh. Freeze uncooked breaded strips on a tray first—good for 2 months.
Why You’ll Love This Recipe
- 20-Minute Magic: I can go from raw chicken to golden strips faster than my kids can argue over who gets the first one.
- Panko Perfection: That crunch from the panko with the tender chicken inside? Honestly, it’s the reason I keep making these.
- Freezer Friendly: I double the batch, freeze half, and have a solid backup for those “what’s for dinner?” nights.
- Budget Stretcher: Chicken breasts on sale plus pantry staples means I’m feeding four for less than the cost of takeout.
Step-by-Step Instructions for Chicken Strip Breading
This three-step breading process guarantees a shatteringly crisp coating that clings perfectly to every bite.
Step 1: Prepare the Seasoned Flour and Buttermilk Wash
In a shallow dish, whisk together the 1 cup all-purpose flour, 2 tbsp cornstarch, 1.5 tsp kosher salt, 1 tsp freshly ground black pepper, 1 tsp garlic powder, 1 tsp onion powder, and 1 tsp paprika until evenly combined. The cornstarch is your secret weapon for extra crunch.
In a separate bowl, beat the 2 whole large eggs and stir in the 0.5 cup buttermilk until smooth. This wash acts as the glue that binds the coating to the 1.5 lb boneless skinless chicken breasts, cut into uniform strips. I always use buttermilk—it adds tang and keeps the chicken impossibly tender.
Step 2: Dredge and Dip for Maximum Adhesion
Working one at a time, dredge each chicken strip in the seasoned flour mixture, pressing gently so the flour clings to all sides. Shake off any excess—you want a thin, even layer, not a thick paste. This first coat creates a rough surface for the next layers to grab onto.
Immediately dip the floured strip into the egg-buttermilk wash, letting any excess drip off for 5 seconds before moving to the next step. The wash should coat the chicken completely but not pool at the bottom of the bowl. If it’s too thick, thin it with a splash of water.
Step 3: Coat in Panko for Ultra-Crispy Texture
Place the 2 cups panko breadcrumbs in a third shallow dish. Roll each wet chicken strip in the panko, pressing firmly to ensure the crumbs adhere to every crevice. Panko’s larger, irregular flakes create more surface area, which means more crunch in every bite.
For extra crispiness, I like to double-dip: after the first panko coating, give the strip another quick dunk in the egg wash and a final roll in the panko. Let the breaded strips rest on a wire rack for 10 minutes before cooking—this helps the coating set so it doesn’t fall off during frying or baking.
Step 4: Cook to Golden Perfection
Heat the 0.5 cup neutral oil in a large skillet over medium-high heat until it shimmers. Working in batches to avoid crowding, fry the breaded strips for 3-4 minutes per side until they’re deep golden brown and the internal temperature reaches 165°F.
Drain on a wire rack or paper towels to keep them crisp. If baking, arrange the strips on a parchment-lined baking sheet, brush lightly with oil, and bake at 400°F for 15-20 minutes, flipping halfway. Either way, serve immediately while the coating is at its crispiest.
Pro Tips For Making Chicken Strip Breading
- Pound the Chicken: Use a meat mallet or rolling pin to flatten the breasts to an even 1/2-inch thickness—this guarantees even cooking and prevents dry, overdone edges.
- Double Dredge: Dip each strip in flour, egg, then panko, then repeat the egg and panko for a thicker, crunchier crust that actually stays put.
- Skip the Crowding: Fry in batches with at least an inch of space between strips, or the breading steams instead of crisping—I learned this the hard way with soggy results.
- Rest Before Frying: Let the breaded strips sit on a rack for 10 minutes before frying so the coating sets and doesn’t slide off in the pan.
Troubleshooting This Dish
Breading Falls Off
If your coating isn’t sticking, the chicken might be too wet. Pat the strips completely dry with paper towels before dredging. Also, ensure the flour layer is thin but even—too much flour creates a barrier. Let each layer set for 2 minutes between steps. 💡
Soggy Instead of Crispy
Sogginess usually means not enough oil or wrong temperature. For frying, use ½ inch of oil at 350-375°F. For baking, 400°F is non-negotiable. Crowding the pan steams the breading—cook in batches with space between strips.
Uneven Coating
Press the panko firmly into every crevice of the chicken. I use my fingers to pack it on. If you see bare spots, do a quick second dip in egg wash and panko. Also, cut your chicken into uniformly thick strips for even cooking and coating.
Burns Before Cooking
If the outside burns before the inside cooks, your oil is too hot. Reduce heat to medium and monitor the temperature with a thermometer. For baking, move the rack to the middle position and check at 12 minutes—adjust time as needed.
Not Crispy After Baking
Baked strips need a light oil coating before going in the oven. Brush both sides with 1-2 tbsp neutral oil and bake on a wire rack over a sheet pan for air circulation. Flip halfway through for even browning. 🔥
Breading Too Thick
Thick breading steams the chicken and falls off. Shake off excess flour and panko at each step. Aim for a ¼-inch coating max. The double-dip should add crunch, not bulk. Press gently, don’t pack on the crumbs.
Nutrition Facts
Frequently Asked Questions
Can I use regular breadcrumbs instead of panko?
Regular breadcrumbs work but won’t give the same crunch. Panko’s larger flakes create more surface area for crispiness. For best results, stick with panko or crush corn flakes as a substitute.
How do I keep the breading from falling off?
Pat the chicken completely dry first, then let each coating layer set for 2 minutes before moving to the next step. Press the panko firmly into the chicken and avoid overcrowding while cooking.
Can I air fry these instead of baking or frying?
Yes! Spray breaded strips lightly with oil and air fry at 375°F for 12-15 minutes, flipping halfway. Shake the basket occasionally for even crisping.
Why does my breading turn soggy?
Sogginess usually means low heat or excess moisture. Use ½ inch of oil at 350-375°F for frying, or bake at 400°F on a wire rack for air circulation.

- Jollof Rice Sauce Recipe: West African Tomato and Spice Infusion - September 25, 2026
- Japanese Rice Soup Recipe: Umami-Rich Comfort in a Bowl - September 25, 2026
- Homemade Cream Of Rice Recipe: Silk-Smooth Breakfast in Minutes - September 25, 2026