
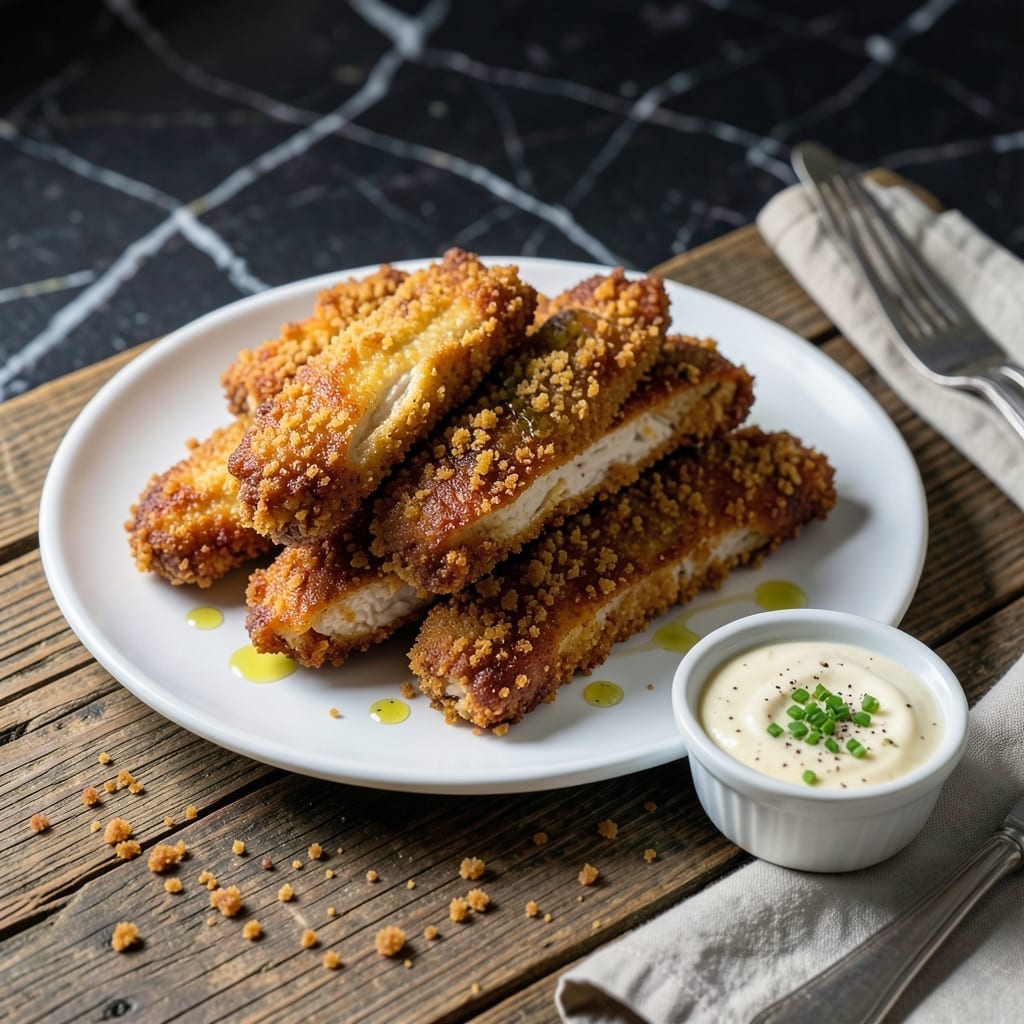
This oven-baked method delivers ultra crispy results without the mess of frying. The secret lies in a double-coating technique that ensures every bite stays crunchy on the outside while remaining juicy inside.
Panko breadcrumbs create that signature light, airy texture that stays crispy even after baking. A quick dip in flour, then egg, then panko forms the perfect crust that locks in moisture while browning beautifully.
At 400°F, these strips bake in 15-20 minutes, emerging golden and shatteringly crisp. The high heat mimics frying while keeping the process hands-off and the kitchen clean.
Serve immediately for maximum crunch. This technique works for tenders, nuggets, or full strips—adaptable to your preference while guaranteeing that perfectly crispy finish every time.
Ingredients for Chicken Strips with Panko
These basic ingredients transform into ultra crispy oven-baked chicken strips with minimal effort.
| Ingredient | Amount | Notes |
|---|---|---|
| Boneless, Skinless Chicken Breasts 🍗 | 1 ½ lb | Cut into 1-inch strips |
| All-Purpose Flour 🌾 | 1 cup | For initial dredging |
| Large Eggs 🥚 | 2 whole | Beaten for egg wash |
| Panko Breadcrumbs 🍞 | 2 cups | Japanese-style for extra crunch |
| Kosher Salt 🧂 | 1 tsp | Diamond Crystal preferred |
| Freshly Ground Black Pepper 🌶️ | ½ tsp | Coarse grind for texture |
| Garlic Powder 🧄 | 1 tsp | For seasoning the flour |
| Onion Powder 🧅 | 1 tsp | For depth of flavor |
| Paprika 🌶️ | ½ tsp | Sweet or smoked variety |
| Neutral Oil 🫒 | 2 tbsp | For baking sheet preparation |
| Buttermilk 🥛 | ½ cup | For extra juiciness |
| Baking Powder 🧂 | ¼ tsp | For lift in coating |
The chicken quality matters here. Boneless, skinless breasts from Whole Foods or Costco ensure consistent texture and flavor. Panko is non-negotiable—Kikkoman brand gives that signature light, airy crunch. Look for panko labeled Japanese-style, not the finer American breadcrumbs. For the flour, all-purpose is standard, but a touch of cornstarch (1 tbsp mixed in) can enhance crispiness.
No buttermilk? Whole milk with 1 tsp vinegar or lemon juice works as a substitute. Out of panko? Crushed cornflakes or saltine crackers can stand in, though texture will differ. The spices are flexible—substitute dried herbs at half the amount if fresh aren’t available. For extra crunch, add crushed pretzels to the panko mix.
Prepped chicken strips can marinate in the buttermilk for up to 12 hours before coating. Baked strips keep warm in a 200°F oven for 30 minutes without losing crispness. Store leftovers in an airtight container for up to 3 days, though they’re best fresh.
Why You’ll Love This Recipe
- 20-Minute Meal: I can have these golden strips from fridge to table faster than takeout arrives. Honestly, the egg and panko team up for a coating that crisps up in a flash.
- Crunch in Every Bite: That panko crust stays shatteringly crisp while the chicken stays juicy—no soggy disappointment here. Between us, it’s the kosher salt that really makes the flavor pop.
- Kid-Approved Dinner: My picky nephew devours these, and they’re just as good cold in lunchboxes the next day. One batch, two meals.
- Pantry Staples: All-purpose flour, eggs, panko—ingredients I always have on hand, so this is my go-to when the fridge looks sad.
Step-by-Step Instructions for Chicken Strips With Panko
Here is the method to achieve that perfect crunch with juicy interiors every time.
Step 1: Prepare and Season the Chicken
Begin by cutting the 1.5 lb boneless, skinless chicken breasts into 1-inch strips. Pat them completely dry with paper towels—this is essential for the coating to adhere properly and create maximum crispiness.
Season the chicken lightly with 1 tsp kosher salt and 0.5 tsp freshly ground black pepper. This initial seasoning enhances the flavor of the meat itself, not just the coating. Set the strips aside while you prepare the breading stations.
Step 2: Set Up the Breading Stations
Create three shallow dishes for your breading process. In the first, combine the 1 cup all-purpose flour with 1 tsp garlic powder, 1 tsp onion powder, 0.5 tsp paprika, and 0.25 tsp baking powder. The baking powder adds lift to the coating for extra crunch.
In the second dish, whisk the 2 whole large eggs with the 0.5 cup buttermilk until fully combined. The buttermilk adds tang and helps the flour and panko adhere better. Place the 2 cups panko breadcrumbs in the third dish, keeping them dry until ready to use.
Step 3: Coat the Chicken for Maximum Crispiness
Dredge each piece of chicken in the seasoned flour, pressing gently to ensure full coverage. Shake off any excess—you want a thin, even layer. Next, dip the floured chicken into the egg and buttermilk mixture, allowing any excess to drip off for a moment.
Finally, roll the chicken in the panko breadcrumbs, pressing firmly to create a thick, even coating. The panko’s coarse texture is what gives these strips their signature crunch. Place the breaded strips on a plate and let them rest for 5 minutes to help the coating set.
Step 4: Bake to Golden Perfection
Preheat your oven to 425°F. Line a baking sheet with parchment paper and drizzle with 2 tbsp neutral oil, spreading it evenly to coat the surface. This prevents sticking and promotes even browning.
Arrange the breaded chicken strips on the prepared baking sheet, leaving space between each piece to ensure even air circulation. Bake for 15 minutes, then carefully flip each strip. Continue baking for another 10-12 minutes until the coating is golden brown and the internal temperature reaches 165°F.
The strips should be crispy on the outside and juicy on the inside. If they aren’t browned to your liking, broil for 1-2 minutes at the end, watching closely to avoid burning.
Pro Tips For Making Chicken Strips With Panko
- Pound the Chicken: Use a rolling pin or meat mallet to flatten the breasts to an even ½-inch thickness—I learned this the hard way after biting into dry, overcooked ends and underdone centers.
- Double Dredge: Dip each strip in flour, then egg, then panko, and repeat the egg-panko step; the extra layer guarantees that crunchy coating that doesn’t fall off mid-bite.
- Skip Cold Chicken: Let the pounded strips sit at room temperature for 15 minutes before frying—after burning three batches, I finally figured out cold chicken lowers the oil temp and makes everything greasy.
- Use a Rack: Place the breaded strips on a wire rack set over a baking sheet while they rest; it keeps the bottom from getting soggy and makes a real difference in the final texture.
Make-Ahead Tips for This Dish
Prep Ahead Strategy
You can cut and season the chicken strips up to 24 hours in advance. Store them in an airtight container with the buttermilk marinade in the fridge. This actually improves tenderness and flavor penetration.
Breading Station Prep
Mix your dry ingredients (flour, spices, baking powder) the night before and store in a sealed container. Set out the panko in its own dish—just cover it with a towel to prevent drying out. The egg wash is best made fresh.
Oven-Ready Assembly
For maximum efficiency, bread all strips at once and arrange them on a parchment-lined tray. Cover with plastic wrap and refrigerate for up to 8 hours before baking. This lets the coating set without compromising crispness. 💡
Reheating for Crispiness
To revive leftovers, spread strips on a wire rack over a baking sheet and reheat at 375°F for 8-10 minutes. The rack ensures air circulates on all sides, restoring that signature crunch.
Microwaving works in a pinch—use 30-second intervals and place a paper towel underneath to absorb moisture.
Freezing for Later
Freeze unbaked breaded strips on a tray first, then transfer to a freezer bag. They’ll keep for 2 months. Bake from frozen, adding 5-7 minutes to the total time. No thawing needed! ❄️
Nutrition Facts
Frequently Asked Questions
Why use panko instead of regular breadcrumbs?
Panko creates a lighter, crispier crust due to its coarse texture and airy structure. Regular breadcrumbs are finer and absorb more oil, resulting in a denser coating.
Can I air fry these instead of baking?
Cook at 375°F for 12-15 minutes, flipping halfway. The air fryer’s circulation ensures even crispiness with less oil.
What’s the best way to keep them crispy?
Serve immediately or place on a wire rack in a 200°F oven for up to 30 minutes. Avoid stacking, as trapped steam makes them soggy.
How do I know when they’re fully cooked?
The internal temperature should reach 165°F. The coating will be golden brown, and the juices should run clear when pierced.

- Jollof Rice Sauce Recipe: West African Tomato and Spice Infusion - September 25, 2026
- Japanese Rice Soup Recipe: Umami-Rich Comfort in a Bowl - September 25, 2026
- Homemade Cream Of Rice Recipe: Silk-Smooth Breakfast in Minutes - September 25, 2026