
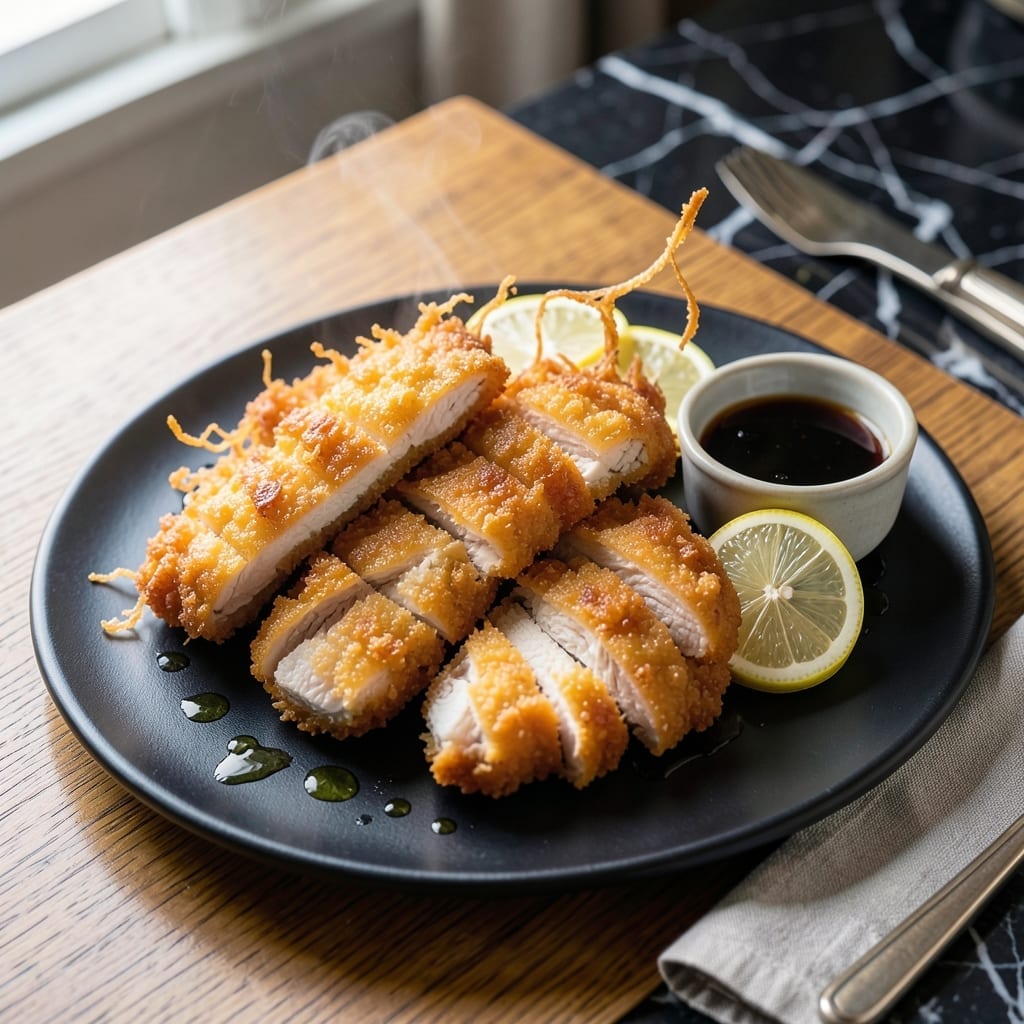
There’s a reason tempura is celebrated for its ultra-crispy texture—this method delivers light, airy bites that shatter at the first bite. The secret lies in the batter’s consistency and the frying temperature, both of which I’ve perfected through trial and error.
This dish requires precision, from the ice-cold batter to the hot oil, but the result is worth every step. The chicken stays tender inside while the exterior turns golden and delicate, never greasy or soggy.
Pair these bites with a tangy dipping sauce or serve them alongside steamed rice and pickled vegetables. The contrast of textures and flavors makes this a standout dish for any occasion.
With a few key techniques, you’ll achieve restaurant-quality tempura at home. Let’s get started.
Ingredients for Chicken Tempura
A few quality ingredients and some technique make that signature light and crispy texture.
| Ingredient | Amount | Notes |
|---|---|---|
| Chicken Thighs 🍗 | 1 ½ lb | Boneless, skinless, cut into strips |
| Cake Flour 🌾 | 1 cup | For ultra-light batter |
| Cornstarch 🌽 | ½ cup | Keeps batter crispy |
| Ice Water 💧 | 1 ½ cups | Very cold for batter |
| Large Egg 🥚 | 1 whole | Beaten lightly |
| Baking Powder 🧂 | 1 tsp | For extra airiness |
| Vegetable Oil 🫒 | 4 cups | For deep frying |
| Salt 🧂 | 1 tsp | Divided for batter and finishing |
| Soy Sauce 🥢 | 2 tbsp | For dipping sauce |
| Rice Vinegar 🍚 | 2 tbsp | For tangy dipping sauce |
| Granulated Sugar 🍬 | 1 tsp | Balances sauce flavor |
| Grated Daikon Radish 🥬 | ½ cup | For serving garnish |
| Matchstick Carrots 🥕 | ½ cup | For serving garnish |
| Green Onions 🧅 | 2 whole | Thinly sliced for garnish |
The chicken is non-negotiable here—boneless, skinless thighs stay juicier than breasts. Cake flour is the secret to that delicate batter (all-purpose works but won’t be as light). For the oil, peanut or vegetable both have high smoke points. I grab King Arthur cake flour from the baking aisle—it’s consistent and easy to find.
No cake flour? Swap half the all-purpose for cornstarch. Out of rice vinegar? Apple cider vinegar gets you close. The daikon and carrots for garnish can be skipped, but they add that restaurant touch. If tempura feels fussy, a deep-fry thermometer (from Target or Amazon) takes the guesswork out of oil temp.
Fry in batches and keep finished pieces warm in a 200°F oven on a rack—no soggy bottoms. Leftovers? Honestly best eaten fresh, but they’ll keep in the fridge for 1-2 days (reheat in the oven to recrisp).
Why You’ll Love This Recipe
- No Fuss Batter: I just whisk cake flour, cornstarch, egg, and ice water—no resting, no fuss. Honestly, it’s the easiest tempura batter I’ve ever made.
- Crispy Perfection: The cornstarch gives it that ultra-crunchy shell while keeping the chicken thighs juicy inside. That first bite? Ridiculously good.
- Weeknight Hero: Between us, this is my go-to for busy evenings—fries up in minutes and pairs with everything from rice to salad.
- Budget Friendly: Chicken thighs stay tender and cheap, and a little batter goes a long way. I’ll be real: it’s a solid way to stretch a meal without sacrificing flavor.
Step-by-Step Instructions for Chicken Tempura
Here’s how I get that ultra-light, shatteringly crisp coating every single time.
Step 1: Prep the Chicken and Make the Batter
Cut the 1.5 lb Chicken Thighs into ½-inch wide strips. Pat them completely dry with paper towels—any moisture will prevent the batter from adhering properly. Season lightly with ½ tsp Salt (reserve the rest for finishing).
In a large bowl, whisk together the 1 cup Cake Flour, 0.5 cup Cornstarch, and 1 tsp Baking Powder. The cornstarch is what gives you that extra-crispy texture. Make a well in the center and add the 1 whole Large Egg and 1.5 cups Ice Water. Whisk gently until just combined—small lumps are fine. Don’t overmix or you’ll develop gluten and lose that airy texture.
Step 2: Heat the Oil to the Perfect Temperature
Pour the 4 cups Vegetable Oil into a deep, heavy-bottomed pot or Dutch oven, leaving at least 2 inches of headspace to prevent overflow. Heat over medium-high heat until it reaches 350°F on a deep-fry thermometer. This temperature is crucial—too low and your tempura will absorb oil and be greasy, too high and it’ll burn before cooking through.
While the oil heats, line a baking sheet with a wire rack or paper towels. This setup lets excess oil drain away from your finished pieces, keeping them crisp instead of soggy.
Step 3: Fry in Batches for Even Cooking
Working in small batches to avoid crowding (which lowers the oil temperature), dip each chicken strip into the batter, letting any excess drip off. Carefully lower into the hot oil. Fry for 3-4 minutes, turning occasionally, until the coating is golden brown and puffed.
Use a slotted spoon to transfer the cooked pieces to your prepared rack. Sprinkle immediately with the remaining ½ tsp Salt while they’re still hot. The salt will stick better to the warm, crispy surface.
Step 4: Make the Dipping Sauce and Serve
In a small bowl, whisk together the 2 tbsp Soy Sauce, 2 tbsp Rice Vinegar, and 1 tsp Granulated Sugar until the sugar dissolves. Taste and adjust the balance if needed—you want that perfect sweet-tangy contrast to the rich tempura.
Arrange the tempura on a platter with the 0.5 cup Grated Daikon Radish, 0.5 cup Matchstick Carrots, and thinly sliced 2 whole Green Onions on the side. Serve immediately while hot and crispy with the dipping sauce. The vegetables add freshness and crunch to cut through the richness.
Pro Tips For Making Chicken Tempura
- Use Ice-Cold Water: Keep your water as cold as possible—it slows gluten formation in the cake flour, making the batter lighter and crispier. I learned this the hard way after my first few batches turned out gummy.
- Dry the Chicken Well: Pat the thighs completely dry with paper towels before dredging. Any moisture will make the batter slide right off, and you’ll end up with sad, bare spots.
- Fry in Small Batches: Resist the urge to crowd the pot—too many pieces at once drops the oil temp, and your tempura will absorb grease instead of getting that airy crunch.
- Rest Before Frying: Let the battered chicken sit for 2-3 minutes before hitting the oil. This helps the coating set slightly, so it doesn’t all slough off the second it hits the heat.
Flavor Customization for This Dish
Spicy Kick
Add 1 tsp gochujang or ½ tsp cayenne pepper to your batter for a subtle heat that builds with each bite. I also like to sprinkle chili flakes on the finished pieces. The warmth pairs beautifully with the cool daikon garnish. 🌶️
Citrus Zing
Incorporate 1 tbsp grated ginger and 1 tsp lime zest into the batter for bright, aromatic notes. The citrus lifts the richness of the fried coating. Serve with a lime wedge for an extra pop of freshness.
Herb Infusion
Stir 1 tbsp chopped cilantro or 1 tsp dried thyme into the batter for an earthy depth. This works especially well if you’re serving the tempura with a creamy dipping sauce to balance the herbs.
Umami Boost
Mix 1 tsp miso paste or 1 tbsp grated Parmesan into your batter for a savory undercurrent. I love how the umami enhances the chicken’s natural flavors without overpowering the dish. 💡
Extra Crunch
Add ¼ cup crushed rice crackers or panko breadcrumbs to the batter for an even crispier texture. The bits toast up beautifully in the oil, creating little pockets of crunch in every bite.
Sweet Touch
Drizzle finished tempura with 1 tbsp honey or dust with powdered sugar for a sweet-savory contrast. This works surprisingly well with the tangy dipping sauce, creating a complex flavor profile.
Nutrition Facts
Frequently Asked Questions
What oil works best for frying?
Use oils with a high smoke point like vegetable, peanut, or canola oil. They handle 350°F without breaking down. Avoid olive oil as it can burn and impart a bitter taste.
Can I use all-purpose flour instead of cake flour?
Yes, but replace 2 tablespoons of all-purpose with 2 tablespoons of cornstarch per 1 cup to mimic cake flour’s lightness. The texture won’t be identical but will still be crispy.
Why did my batter turn out dense?
Overmixing develops gluten, making the batter heavy. Stir just until combined, and keep the water ice-cold to prevent this. Small lumps are perfectly fine.
How do I keep tempura crispy after frying?
Place finished pieces on a wire rack, not paper towels. This allows air circulation and prevents steam from making them soggy. Serve immediately for the best texture.

- Jollof Rice Sauce Recipe: West African Tomato and Spice Infusion - September 25, 2026
- Japanese Rice Soup Recipe: Umami-Rich Comfort in a Bowl - September 25, 2026
- Homemade Cream Of Rice Recipe: Silk-Smooth Breakfast in Minutes - September 25, 2026