
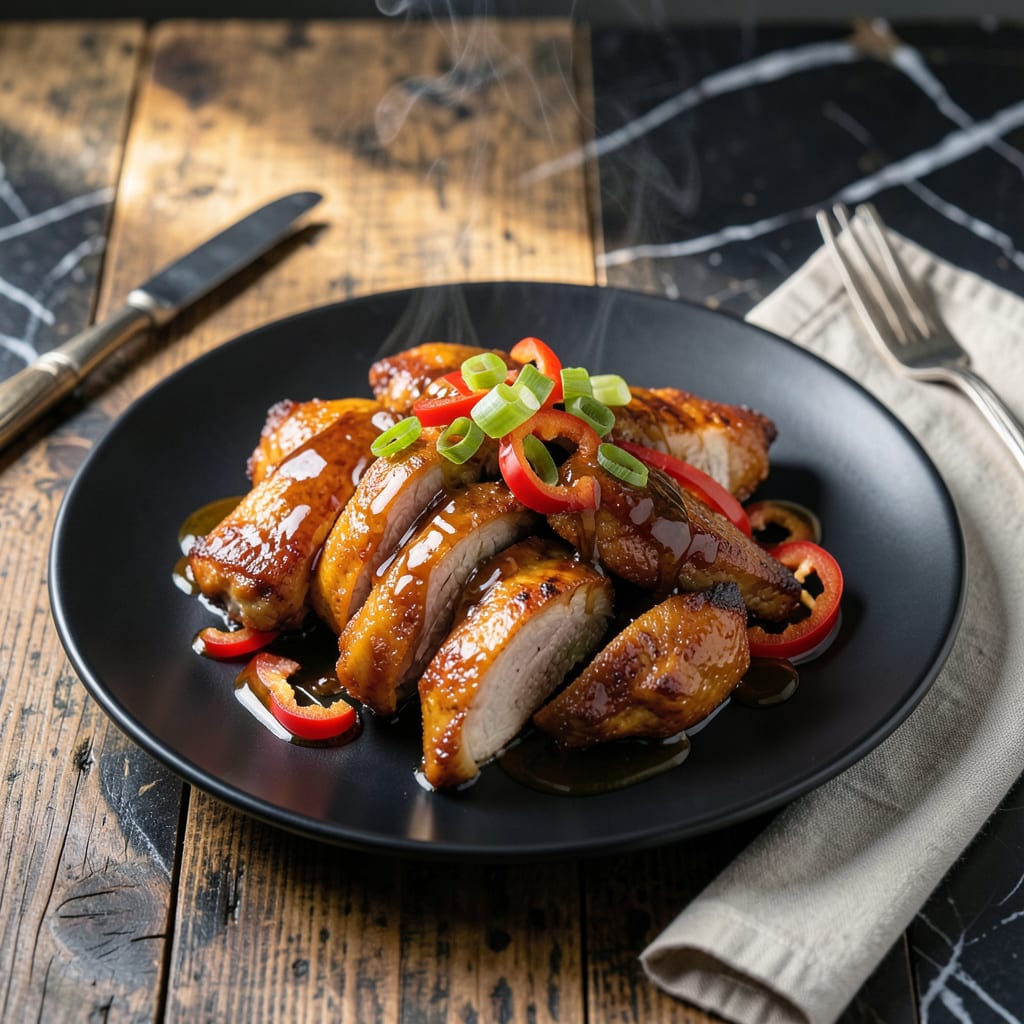
This chicken teriyaki delivers restaurant-quality results with minimal effort. The Kikkoman sauce creates a sticky glaze that caramelizes beautifully on the chicken, locking in juices while adding depth of flavor.
With just a few simple ingredients and 15 minutes of active cooking, you’ll have tender chicken pieces coated in a glossy, savory-sweet sauce. Serve over steamed rice for a complete meal that’s both satisfying and impressive.
Ingredients for Chicken Teriyaki Recipe with Kikkoman Teriyaki Sauce
Quality ingredients deliver that signature restaurant-style teriyaki with minimal effort and maximum flavor impact.
| Ingredient | Amount | Notes |
|---|---|---|
| Boneless Skinless Chicken Thighs 🍗 | 1 ½ lb | Cut into bite-sized pieces |
| Kikkoman Teriyaki Sauce 🥫 | 1 cup | Original variety preferred |
| Soy Sauce 🥫 | 2 tbsp | Low-sodium variety recommended |
| Brown Sugar 🍚 | 2 tbsp | Light or dark both work |
| Fresh Garlic Cloves 🧄 | 3 cloves | Minced finely |
| Fresh Ginger Root 🌿 | 1 tbsp | Grated or minced |
| Cornstarch 🌾 | 1 tbsp | For thickening sauce |
| Water 💧 | 2 tbsp | Cold for slurry |
| Vegetable Oil 🫒 | 1 tbsp | High smoke point preferred |
| Toasted Sesame Seeds 🌰 | 1 tsp | For garnish |
| Green Onions 🧅 | 3 whole | Thinly sliced for garnish |
| Long-Grain White Rice 🍚 | 1 ½ cups | Uncooked, for serving |
The chicken matters most here. Boneless skinless thighs stay juicier than breasts—look for uniform sizing at Whole Foods or your local butcher. The Kikkoman teriyaki sauce (original formula) is non-negotiable for authentic flavor. Fresh ginger and garlic are worth the extra minute to prep—they add brightness that dried versions can’t match. If your grocery store has pre-minced options, they’re fine in a pinch (but fresh is always better).
Out of teriyaki sauce? Mix soy sauce, brown sugar, and a touch of honey at a 2:1:1 ratio. No fresh ginger? Ground ginger at half the amount works, though it’s less vibrant. The cornstarch slurry is key for that glossy finish—arrowroot powder can substitute 1:1. For extra depth, a splash of rice vinegar or mirin (find at Asian markets) elevates the sauce without overpowering.
Leftovers keep 4-5 days refrigerated and reheat beautifully. The sauce thickens as it cools—loosen with a splash of water if needed. Freeze cooked chicken (without rice) for up to 3 months. Always garnish with sesame seeds and green onions just before serving for freshness.
Why You’ll Love This Recipe
- One Pan Wonder: I toss the chicken thighs in the Kikkoman teriyaki sauce with garlic and let the oven do the rest—no babysitting required.
- Sweet-Savory Magic: That sticky glaze from the brown sugar and soy sauce? Honestly, I could eat it with a spoon.
- Weeknight Rescue: Between us, this is my go-to when I need dinner on the table before the kids start asking.
- Leftovers That Disappear: I make extra on purpose—the chicken tastes even better the next day in a wrap or over rice.
Step-by-Step Instructions for Chicken Teriyaki With Kikkoman Teriyaki Sauce
Here’s the method I rely on for perfectly caramelized chicken with a glossy, sticky glaze.
Step 1: Prepare and Sear the Chicken
Cut the 1.5 lb Boneless Skinless Chicken Thighs into bite-sized pieces. This uniform size ensures even cooking and maximum surface area for that desirable caramelization.
Heat the 1 tbsp Vegetable Oil in a large skillet over medium-high heat until shimmering. Add the chicken in a single layer—don’t crowd the pan or it’ll steam instead of sear. Cook undisturbed for 4-5 minutes until deep golden brown on the bottom.
Step 2: Build the Teriyaki Sauce Base
While the chicken cooks, mince the 3 cloves Fresh Garlic Cloves and grate the 1 tbsp Fresh Ginger Root. These aromatics are the foundation of your sauce’s depth.
Once the chicken is browned, flip it and add the minced garlic and grated ginger to the pan. Sauté for 30 seconds until fragrant—just long enough to bloom the flavors without burning.
Pour in the 1 cup Kikkoman Teriyaki Sauce, 2 tbsp Soy Sauce, and 2 tbsp Brown Sugar. Stir to combine, scraping up any browned bits from the bottom of the pan. These fond bits dissolve into the sauce, adding layers of flavor.
Step 3: Thicken and Finish the Glaze
In a small bowl, whisk together the 1 tbsp Cornstarch and 2 tbsp Water until smooth. This slurry will transform your sauce from thin to luxuriously thick.
Stir the slurry into the simmering sauce and cook for 1-2 minutes until it thickens enough to coat the back of a spoon. The sauce should look glossy and slightly syrupy—this is when you know it’s ready.
Return the chicken to the pan if you removed it, and toss to coat evenly in the thickened glaze. Cook for an additional 1-2 minutes until the chicken is fully cooked through and the sauce clings beautifully to each piece.
Step 4: Serve Over Rice with Garnishes
Cook the 1.5 cups Long-Grain White Rice according to package instructions. The neutral flavor and fluffy texture make it the perfect base for this bold dish.
Plate the rice and top with the glazed chicken. Drizzle any remaining sauce from the pan over the top. Garnish with the 3 whole Green Onions (thinly sliced) and 1 tsp Toasted Sesame Seeds for a pop of color and nutty crunch.
The green onions add freshness to balance the richness, while the sesame seeds provide textural contrast. Serve immediately while the glaze is still warm and sticky.
Pro Tips For Making Chicken Teriyaki Recipe With Kikkoman Teriyaki Sauce
- Sear First, Glaze Later: Start by searing the chicken thighs in a hot pan for 3-4 minutes per side until golden—this builds flavor before adding the Kikkoman teriyaki sauce. I learned this the hard way after making soggy, pale chicken by dumping the sauce in too early.
- Trim the Fat: Pat the thighs completely dry with a paper towel before cooking, and trim any excess fat to prevent greasy flare-ups in the pan. Sounds tedious, but it actually changes the outcome.
- Skip the Boil: Simmer your sauce mixture (Kikkoman, soy sauce, brown sugar, garlic) on medium-low heat, never boiling—boiling makes the sugar separate and the sauce turn grainy.
- Rest Before Slicing: Let the chicken rest 5 minutes after cooking while you thicken the sauce—this keeps the juices inside where they belong. I used to skip this and wondered why my teriyaki was dry.
Creative Variations of These Flavors
Spicy Sriracha Twist
Add 1 tbsp sriracha to the teriyaki sauce mixture for a sweet-spicy kick. The heat complements the caramelized edges beautifully. I also add ½ tsp red pepper flakes when cooking the chicken for extra warmth. 🌶️
Honey Garlic Variation
Replace the 2 tbsp brown sugar with 3 tbsp honey and add 2 extra minced garlic cloves. This creates a stickier, more aromatic glaze. The honey also adds a subtle floral note that pairs perfectly with the Kikkoman base.
Pineapple Teriyaki Fusion
Add 1 cup fresh pineapple chunks when simmering the sauce. The fruit’s natural enzymes tenderize the chicken further. I like to use cored pineapple from Whole Foods for consistent sweetness. The acidity balances the richness wonderfully.
Sesame-Ginger Boost
Stir in 1 tbsp toasted sesame oil and 1 tsp grated ginger extra into the finished sauce. This amplifies the nutty depth. I always keep Kadokawa sesame oil in my pantry for this purpose. The aroma is incredible.
Vegetable Medley Add-In
Toss in 1 cup broccoli florets and ½ bell pepper (sliced) when cooking the chicken. They soak up the teriyaki glaze beautifully. This turns the dish into a complete one-pan meal with minimal extra effort.
Low-Sodium Option
Use low-sodium soy sauce and reduce the Kikkoman teriyaki to ¾ cup. Add 1 tbsp rice vinegar to maintain brightness. This version keeps all the flavor while cutting sodium by nearly 40%.
Nutrition Facts
Frequently Asked Questions
Can I use chicken breasts instead of thighs?
Yes, but they tend to dry out faster. Reduce cooking time to 3-4 minutes per side and consider brining for extra juiciness. Thighs stay tender and absorb the glaze better.
How do I prevent the sauce from burning?
Keep heat at medium once the sauce is added. Stir frequently and remove from heat as soon as it thickens. The sugar in the teriyaki can scorch quickly.
Can I make this ahead of time?
Store cooked chicken and sauce separately in the fridge for up to 4 days. Reheat gently on the stove with a splash of water to loosen the glaze.
What if my sauce is too thin?
Mix 1 tsp cornstarch with 1 tbsp cold water, then stir into simmering sauce. Cook for 1-2 minutes until thickened.

- Jollof Rice Sauce Recipe: West African Tomato and Spice Infusion - September 25, 2026
- Japanese Rice Soup Recipe: Umami-Rich Comfort in a Bowl - September 25, 2026
- Homemade Cream Of Rice Recipe: Silk-Smooth Breakfast in Minutes - September 25, 2026