
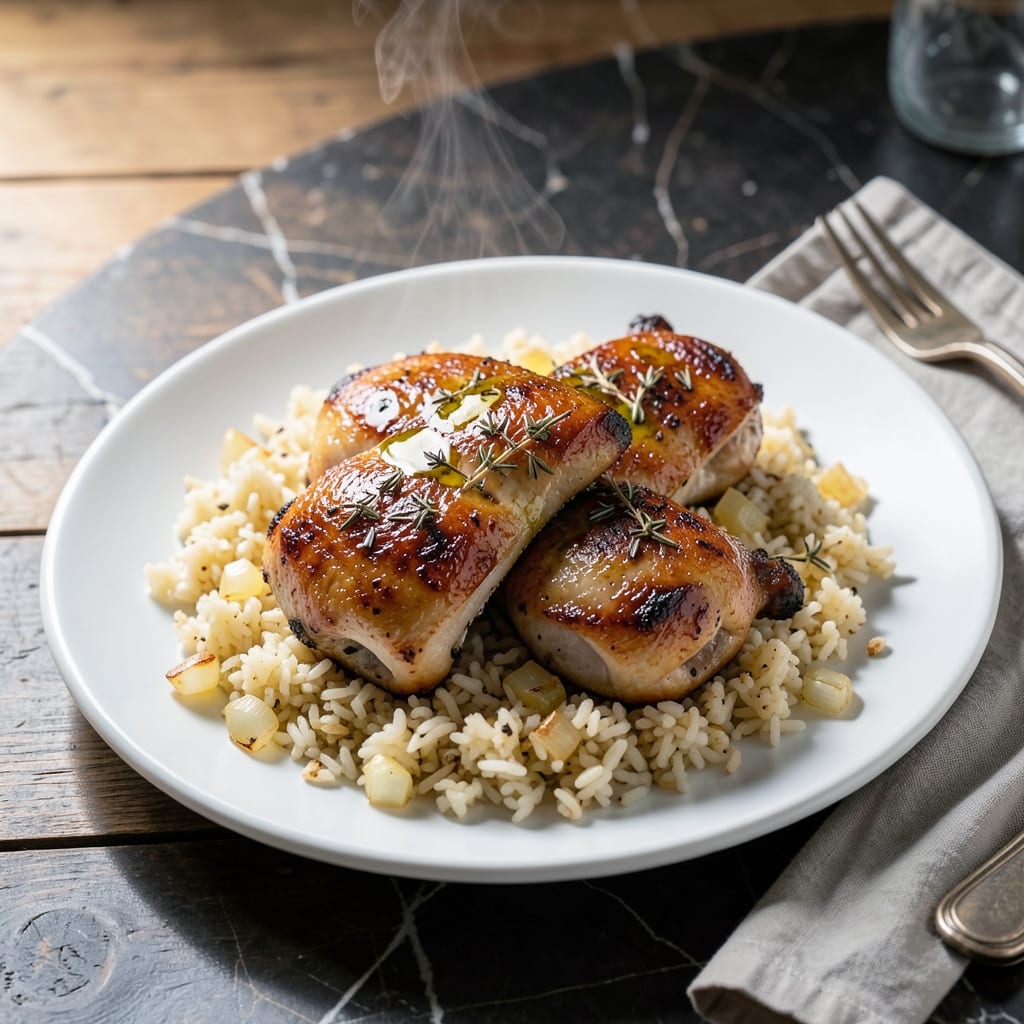
This skillet meal delivers low-carb satisfaction without sacrificing flavor or texture. I developed this recipe for busy weeknights when I needed something nourishing but quick.
The chicken thighs cook until golden and juicy, while the cauliflower rice absorbs all the savory pan drippings. One skillet means minimal cleanup and maximum flavor development.
You get tender, flavorful chicken with perfectly cooked cauliflower that mimics traditional rice. The garlic and herbs add depth without overpowering the natural tastes.
Serve straight from the skillet for a meal that’s as practical as it is delicious. This has become my go-to for healthy dinners.
Ingredients for Chicken Thigh and Cauliflower Rice
Golden chicken thighs and cauliflower rice come together for a satisfying low-carb skillet dinner.
| Ingredient | Amount | Notes |
|---|---|---|
| Boneless Skinless Chicken Thighs 🍗 | 1 ½ lb | Patted dry for crispiness |
| Cauliflower Rice 🥦 | 4 cups | Fresh or frozen, thawed |
| Olive Oil 🫒 | 2 tbsp | Divided for cooking stages |
| Garlic Cloves 🧄 | 4 cloves | Minced for even flavor |
| Yellow Onion 🧅 | ½ whole | Finely diced for texture |
| Dried Thyme 🌿 | 1 tsp | Rubbed between fingers to release oils |
| Dried Rosemary 🍃 | 1 tsp | Crushed lightly before adding |
| Smoked Paprika 🌶️ | ½ tsp | Adds depth and color |
| Sea Salt 🧂 | 1 tsp | Divided for layering flavors |
| Black Pepper 🌶️ | ½ tsp | Freshly ground preferred |
| Chicken Broth 💧 | ½ cup | Low-sodium for control |
| Fresh Parsley 🌿 | ¼ cup | Chopped for garnish |
| Lemon 🍋 | ½ whole | Zested and juiced |
The chicken thighs are the star here. Boneless, skinless stay juicy and cook faster than bone-in. Look for uniform thickness so they finish at the same time. I grab mine from Costco for bulk savings, but any supermarket works. Cauliflower rice? Fresh or frozen both work—just squeeze out excess moisture from frozen to avoid sogginess.
No thyme or rosemary? Italian seasoning at the same amount covers both. Smoked paprika missing? Regular paprika plus a pinch of cayenne gets you close. Chicken broth can be swapped with vegetable broth if that’s what you have. The fresh parsley is just for garnish—dried parsley flakes work too (though they lack that bright pop).
Leftovers keep beautifully. Store in an airtight container for up to 4 days in the fridge. Reheats well in a skillet with a splash of broth. Honestly, it tastes even better the next day once the flavors meld together.
Why You’ll Love This Recipe
- One Pan Wonder: I toss everything—the chicken, cauliflower rice, garlic, and onion—onto a single sheet pan and let the oven do the work.
- Garlic-Infused Bite: The smell of sizzling garlic and onions with the chicken? It makes my kitchen smell like a restaurant.
- Meal Prep Hero: I make a big batch on Sunday and it stays fresh for days—lunches sorted.
- Budget Friendly: Chicken thighs are cheaper than breasts, and cauliflower rice stretches the meal further without breaking the bank.
Step-by-Step Instructions for Chicken Thigh and Cauliflower Rice
Here’s the method. Straightforward, tested, works every time.
Step 1: Season and Sear the Chicken Thighs
Pat the 1.5 lb boneless skinless chicken thighs completely dry with paper towels. This is the secret to achieving that perfect golden sear without steaming the meat. Season both sides generously with ½ tsp black pepper and ½ tsp sea salt.
Heat 1 tbsp olive oil in a large skillet over medium-high heat until it shimmers. Add the chicken thighs in a single layer, being careful not to overcrowd the pan. Cook undisturbed for 5-6 minutes until the edges are deep golden brown and the meat releases easily from the pan.
Step 2: Sauté the Aromatics
While the chicken cooks, finely dice the 0.5 whole yellow onion and mince the 4 cloves garlic cloves. When the chicken is browned on both sides (about 5-6 minutes per side), transfer it to a plate and set aside.
In the same skillet, add the remaining 1 tbsp olive oil if needed. Add the diced yellow onion and cook for 3-4 minutes until softened and translucent. Stir in the minced garlic cloves, 1 tsp dried thyme, 1 tsp dried rosemary, and ½ tsp smoked paprika. Cook for 30 seconds until fragrant.
Step 3: Cook the Cauliflower Rice
Add the 4 cups cauliflower rice to the skillet, stirring to combine with the aromatics. Pour in the 0.5 cup chicken broth and the remaining ½ tsp sea salt. Cook for 5-6 minutes, stirring occasionally, until the cauliflower rice is tender and the liquid has mostly evaporated.
Return the chicken thighs to the skillet, nesting them into the cauliflower rice. Reduce heat to medium-low and cover. Let everything cook together for 5 minutes to allow the flavors to meld.
Step 4: Finish with Lemon and Parsley
Zest and juice the 0.5 whole lemon. Drizzle the lemon juice over the skillet and sprinkle the zest evenly. Stir gently to distribute the bright citrus flavor throughout the dish.
Remove from heat and let rest for 2 minutes. Sprinkle with the 0.25 cup fresh parsley just before serving. The parsley adds a fresh, vibrant finish that complements the savory, aromatic base.
Pro Tips For Making Chicken Thigh And Cauliflower Rice
- Sear Chicken First: Get your skillet screaming hot and sear the chicken thighs for 4-5 minutes per side until deeply browned—I learned this the hard way after serving pale, soggy chicken more times than I care to admit.
- Dry the Cauliflower: Spread the cauliflower rice on a paper towel and press out all moisture before cooking, or it’ll steam instead of sauté. Sounds tedious, but it’s the only way to avoid a watery mess.
- Skip Overcrowding: Cook the chicken in batches if needed—cramming the pan drops the temperature and turns your sear into a sad simmer. Your future self will appreciate the crispy edges.
- Toast the Garlic: Add minced garlic to the pan for just 30 seconds after removing the chicken, until fragrant but not brown. After burning three batches, I finally figured out that burnt garlic ruins the whole dish.
Storing and Reheating This Dish
Refrigerator Storage
Let your skillet meal cool for no more than 2 hours before transferring to airtight containers. I use glass containers with locking lids for easy reheating. Store in the fridge at 40°F or below for up to 4 days. The flavors deepen overnight as the herbs and spices meld. ❄️
Freezer Storage
This dish freezes well for up to 3 months without texture loss. Portion into freezer-safe bags or containers, leaving 1 inch of headspace for expansion. Squeeze out excess air to prevent freezer burn. I prefer flat bags for efficient stacking.
Stovetop Reheating
My preferred method: transfer to a skillet with 2 tbsp chicken broth or water. Heat over medium-low heat for 5-7 minutes, covered, stirring occasionally. This revitalizes the cauliflower rice and keeps the chicken moist. 🔥
Microwave Reheating
For quick meals, microwave individual portions covered with a damp paper towel. Use 70% power for 2-3 minutes, stir, then continue in 30-second intervals until reaching 165°F. Add a splash of water if it looks dry.
Nutrition Facts
Frequently Asked Questions
Can I use bone-in thighs instead?
Yes, but increase cooking time to 8-10 minutes per side. Bone-in stays juicier but takes longer to cook through. Use a meat thermometer to confirm 165°F internally.
Why did my cauliflower rice turn mushy?
This usually happens with frozen rice that wasn’t thawed and squeezed dry first. Cook on medium-high heat and avoid over-stirring. Spread in a single layer for best texture.
What can I use instead of smoked paprika?
Mix ½ tsp regular paprika with a pinch of cayenne. Or use ½ tsp cumin for a different but complementary earthy flavor. Both work well.
Can I make this ahead for meal prep?
Prepare the dish fully, then store in airtight containers for up to 4 days. Reheat with a splash of broth to restore moisture.

- Jollof Rice Sauce Recipe: West African Tomato and Spice Infusion - September 25, 2026
- Japanese Rice Soup Recipe: Umami-Rich Comfort in a Bowl - September 25, 2026
- Homemade Cream Of Rice Recipe: Silk-Smooth Breakfast in Minutes - September 25, 2026