
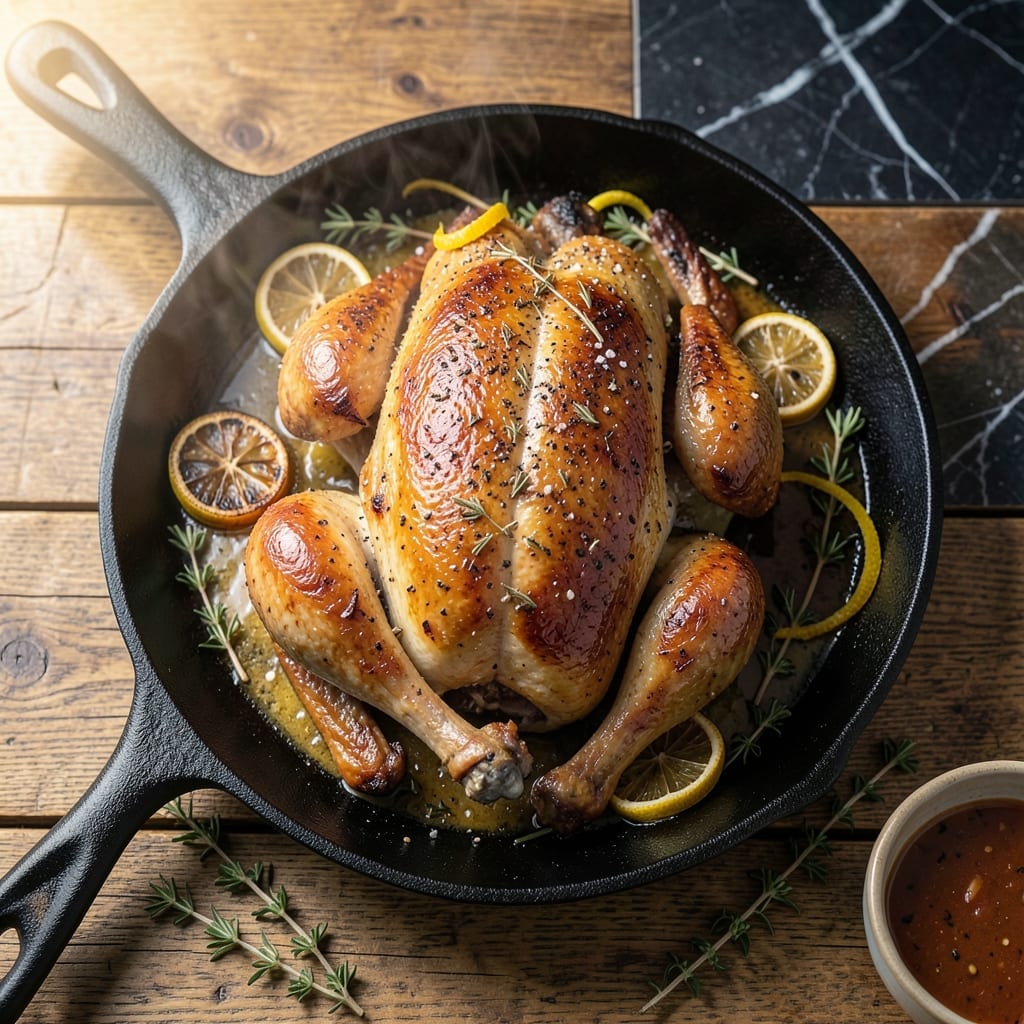
This method delivers crispy chicken skin and perfectly even cooking every time. The technique involves flattening the bird with weight to ensure direct heat contact across the entire surface.
I’ve tested multiple approaches, but pressing the chicken under a heavy pan (or actual brick) produces the most consistent results. The weight keeps the bird flat, preventing uneven cooking and maximizing skin contact with the heat source.
You’ll achieve golden, crispy skin while the meat stays juicy and tender. The method works on a grill, stovetop, or in the oven with equally impressive results.
Ready in under an hour with minimal effort. This is the foolproof way to cook whole chicken for any meal.
Ingredients for Chicken Under a Brick
A whole chicken and a handful of dry spices yield crispy, evenly cooked perfection.
| Ingredient | Amount | Notes |
|---|---|---|
| Whole Chicken 🍗 | 1 whole | 3.5 to 4 lbs, patted dry |
| Kosher Salt 🧂 | 1 tbsp | Diamond Crystal preferred |
| Black Pepper 🌶️ | 1 tsp | Freshly ground preferred |
| Garlic Powder 🧄 | 1 tsp | Not garlic salt |
| Onion Powder 🧅 | 1 tsp | Fresh ground preferred |
| Dried Thyme 🌿 | 1 tsp | Crushed for better flavor |
| Dried Rosemary 🌿 | 1 tsp | Crushed for better flavor |
| Paprika 🌶️ | 1 tsp | Sweet or smoked variety |
| Olive Oil 🫒 | 2 tbsp | Extra-virgin for richness |
| Lemon 🍋 | 1 whole | Zested and juiced |
| Fresh Parsley 🌿 | ¼ cup | Chopped, for garnish |
The chicken is the foundation here. Opt for a 3.5 to 4 lb bird—any larger and the cooking becomes uneven despite the weight. Diamond Crystal kosher salt is the professional choice for its texture and pure flavor. Pat the skin thoroughly dry before seasoning; moisture is the enemy of crispiness. Most butchers will spatchcock the chicken for you if asked, but it’s a simple process to do at home with kitchen shears.
No garlic powder? Fresh minced garlic at double the quantity works, though the flavor profile will be slightly more pungent. Swap dried thyme or rosemary for fresh at triple the amount, finely chopped. The olive oil can be substituted with avocado oil for a higher smoke point, particularly useful for stovetop cooking. Lemon zest can be replaced with 1 tsp citrus zest of choice if needed.
Store the whole chicken in the coldest part of your fridge for up to 2 days before cooking. Once seasoned, cook immediately for best results. Leftovers keep well for 4-5 days refrigerated and can be frozen for up to 3 months.
Why You’ll Love This Recipe
- One Pan Wonder: I just season the chicken with salt, pepper, and those powders, then let the oven do the work—no flipping, no fuss.
- Crispy & Juicy: The brick (or my cast iron pan) presses the skin into this golden, crackly perfection while keeping the meat stupidly tender.
- Feeds a Crowd: This whole bird becomes the centerpiece for Sunday supper or an easy weeknight meal when I’m too tired to think.
- Leftovers for Days: Between us, the cold chicken makes the best next-day sandwiches or salads—I always make extra.
Step-by-Step Instructions for Chicken Under a Brick
Follow this method precisely for perfectly crisp skin and evenly cooked meat every time.
Step 1: Season the Chicken Thoroughly
Pat the whole chicken completely dry with paper towels, inside and out. This step is non-negotiable—moisture prevents crisping. In a small bowl, combine the 1 tbsp kosher salt, 1 tsp black pepper, 1 tsp garlic powder, 1 tsp onion powder, 1 tsp dried thyme, 1 tsp dried rosemary, and 1 tsp paprika.
Rub this mixture evenly over every surface of the chicken, including under the skin and inside the cavity. The spices should adhere to the skin, creating a flavorful crust. Zest the lemon directly onto the chicken, then set the lemon aside for later use.
Step 2: Prepare for Even Cooking
Place the chicken breast-side up on a clean work surface. Tuck the wings behind the back and tie the legs together with kitchen twine if desired. This creates a compact shape that promotes even cooking under weight.
Drizzle 1 tbsp olive oil over the chicken and rub to coat evenly. The oil helps the skin crisp and prevents the spices from burning. Let the chicken sit at room temperature for 30 minutes to take the chill off—this ensures more even cooking.
Step 3: Cook Under Weight
Heat a large, heavy skillet (cast iron works best) over medium-high heat until hot. Add the remaining 1 tbsp olive oil and swirl to coat the pan. Place the chicken breast-side down in the pan.
Immediately place a heavy weight (like a cast iron skillet or foil-wrapped bricks) directly on top of the chicken. The weight should press the bird flat against the pan. Cook for 20-25 minutes until the skin is deep golden brown and crispy.
Step 4: Finish Cooking and Rest
Carefully remove the weight and flip the chicken skin-side up. Squeeze the juiced lemon over the chicken. Return to the oven and cook for an additional 15-20 minutes until the internal temperature reaches 165°F in the thickest part of the thigh.
The skin should remain crispy while the meat cooks through completely. If the skin begins to darken too much, tent loosely with foil.
Step 5: Rest and Serve
Transfer the chicken to a cutting board and let it rest for 10-15 minutes. This allows the juices to redistribute throughout the meat. Carve the chicken and garnish with the 0.25 cup fresh parsley.
The result should be exceptionally crisp skin with tender, juicy meat underneath. Serve immediately while the skin is at its crispiest. The parsley adds a fresh contrast to the rich, spiced chicken.
Pro Tips For Making Chicken Under A Brick
- Preheat the Brick: Place your brick or weight in the oven while it preheats—this ensures it’s scorching hot when it hits the chicken, guaranteeing a crispier skin right from the start.
- Dry the Chicken: Pat the whole chicken thoroughly dry with paper towels before seasoning; moisture is the enemy of that golden, crackling skin under the brick.
- Skip the Overcrowding: Use a pan just big enough for the chicken—if it’s too small, the steam will build up and you’ll end up with soggy skin instead of that perfect press.
- Double the Spices: Don’t be shy with the garlic and onion powder; rub them under the skin too for flavor that actually penetrates the meat, not just the surface.
Pro Cooking Tips for chicken under a brick
Weight Selection
Use a weight that’s heavy enough to flatten the bird completely—I recommend a cast iron skillet or foil-wrapped bricks totaling 10-15 lbs. The weight should press the chicken flat against the cooking surface without crushing the bones. 🔥
Heat Distribution
Preheat your cast iron pan over medium-high heat for at least 5 minutes before adding the chicken. Even heat distribution is crucial for consistent crisping. I use a Lodge 12-inch skillet for optimal surface area.
Skin Contact
Press down firmly when placing the weight to ensure maximum skin contact with the pan. This direct contact creates the Maillard reaction that produces that coveted golden-brown crust. Check periodically to confirm the weight hasn’t shifted.
Temperature Monitoring
Use an instant-read thermometer to check doneness in the thickest part of the thigh. The internal temp should reach 165°F—this guarantees safe, fully cooked meat without drying it out. I prefer the ThermoWorks MK4 for accuracy.
Resting Technique
After cooking, transfer the chicken to a wire rack set over a baking sheet. This allows air circulation underneath, preventing the skin from getting soggy. Let it rest for 10-15 minutes before carving for optimal juiciness. 💡
Crisp Preservation
Serve immediately after resting—the skin loses its crispness quickly. If you must hold it, place in a 200°F oven on the wire rack for up to 30 minutes. Never cover the chicken, as trapped steam will soften the skin.
Nutrition Facts
Frequently Asked Questions
Why use a brick for cooking chicken?
The weight flattens the bird, ensuring even heat contact for crispy skin and uniform cooking. It prevents curling and maximizes surface area exposed to direct heat.
What can I use instead of a brick?
A heavy cast iron skillet or foil-wrapped cans work perfectly. The weight should be 10-15 lbs to press the chicken flat without crushing it.
How do I prevent the skin from getting soggy?
Pat the chicken completely dry before seasoning and cook over medium-high heat. Rest it on a wire rack, not a plate, after cooking.
Can I cook this on a grill instead?
Preheat the grill to medium-high and use the same weighted technique. The charcoal or gas heat will add a subtle smoky flavor.

- Jollof Rice Sauce Recipe: West African Tomato and Spice Infusion - September 25, 2026
- Japanese Rice Soup Recipe: Umami-Rich Comfort in a Bowl - September 25, 2026
- Homemade Cream Of Rice Recipe: Silk-Smooth Breakfast in Minutes - September 25, 2026