
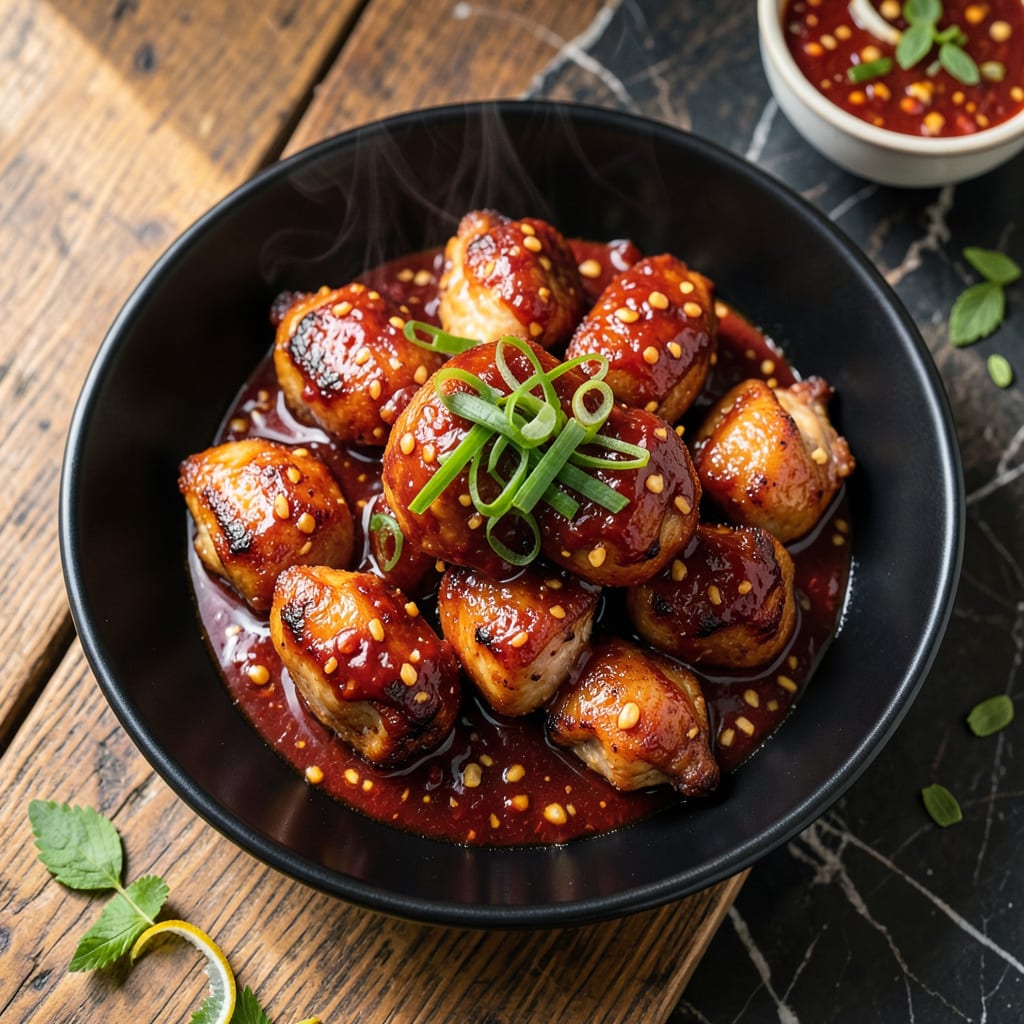
This chicken delivers bold, spicy-sweet flavors with minimal effort. The chili garlic sauce creates a sticky glaze that clings to every piece, balancing heat with just enough sweetness to keep you reaching for more.
I’ve perfected the timing to ensure tender chicken coated in a thick, glossy sauce. Serve it over rice or noodles to soak up every last drop of that irresistible savory-sweet goodness.
Ingredients for Chicken with Chili Garlic Sauce
Everything you need for that sticky, spicy-sweet chicken we all crave.
| Ingredient | Amount | Notes |
|---|---|---|
| Boneless Skinless Chicken Thighs 🍗 | 1 ½ lb | Cut into bite-sized pieces |
| Chili Garlic Sauce 🌶️ | ½ cup | Found in Asian aisle |
| Soy Sauce 🫒 | 3 tbsp | Low-sodium preferred |
| Honey 🍯 | 3 tbsp | Balances the heat |
| Rice Vinegar 💧 | 2 tbsp | Adds tangy brightness |
| Minced Garlic 🧄 | 4 cloves | Fresh is best |
| Fresh Ginger 🌿 | 1 tbsp | Peeled and grated |
| Cornstarch 🌾 | 1 tbsp | Thickens the glaze |
| Vegetable Oil 🫒 | 2 tbsp | For high-heat cooking |
| Green Onions 🧅 | 3 whole | Thinly sliced for garnish |
| Sesame Seeds 🌰 | 1 tsp | Toasted for garnish |
| Red Pepper Flakes 🔥 | ½ tsp | Optional for extra heat |
[recipeingredientscaler]
The chicken thighs are non-negotiable here—they stay juicy through the high-heat cook. Look for skinless, boneless at Costco or your regular grocer (usually sold in 3lb packs). The chili garlic sauce is the soul of the dish—Huy Fong is the gold standard, but Koon Chun works too. Fresh ginger and garlic make a difference (that pre-minced jar stuff just doesn’t cut it).
No chili garlic sauce? Sriracha plus minced garlic (2 tbsp each) gets you 80% there. Out of honey? Brown sugar dissolved in 1 tbsp warm water. Need it gluten-free? Tamari instead of soy sauce. The cornstarch can be swapped for arrowroot powder at 1:1 ratio—just don’t skip it, or your glaze won’t cling right.
Leftovers keep 4-5 days in the fridge—reheat gently so the sauce doesn’t break. Freezes beautifully for up to 3 months. I double the sauce recipe and keep extra in the freezer (it’s that good on rice or veggies).
Why You’ll Love This Recipe
- One Pan Wonder: I just toss the chicken thighs with the sauce ingredients and let the oven do the work—minimal mess, maximum flavor.
- Sweet & Spicy Fix: The honey balances the chili garlic sauce so well it’s ridiculous. I always go back for seconds.
- Meal Prep Magic: This keeps beautifully for lunches all week. Honestly, it tastes even better the next day.
- Budget Winner: Chicken thighs are cheap, and a little chili garlic sauce goes a long way. I stretch this to feed four without breaking the bank.
Step-by-Step Instructions for Chicken With Chili Garlic Sauce
Here’s the method. Straightforward, tested, works every time.
Step 1: Prep and Season the Chicken
Cut the 1.5 lb Boneless Skinless Chicken Thighs into bite-sized pieces, trimming any excess fat. I like to keep them uniform so they cook evenly. Pat them dry with paper towels—this prevents splattering when they hit the hot pan.
Season the chicken lightly with salt and pepper. Toss the pieces with 1 tbsp Cornstarch until evenly coated. This creates a velvety texture and helps the sauce cling beautifully to each piece later.
Step 2: Sear the Chicken to Golden Perfection
Heat 2 tbsp Vegetable Oil in a large skillet over medium-high heat until it shimmers but doesn’t smoke. Add the chicken in a single layer, working in batches if needed to avoid crowding. Let it sear undisturbed for 3-4 minutes until the bottoms develop a deep golden crust.
Flip each piece and cook for another 3-4 minutes until the chicken is cooked through and no longer pink inside. Transfer to a plate and set aside. The fond left in the pan will deepen the flavor of your sauce.
Step 3: Build the Sticky Chili Garlic Glaze
In the same skillet over medium heat, add 4 cloves Minced Garlic and 1 tbsp Fresh Ginger. Sauté for 30 seconds until fragrant—don’t let it brown. Pour in 0.5 cup Chili Garlic Sauce, 3 tbsp Soy Sauce, 3 tbsp Honey, and 2 tbsp Rice Vinegar.
Stir to combine and let it simmer for 2-3 minutes until slightly thickened. If you prefer extra heat, sprinkle in 0.5 tsp Red Pepper Flakes now. The sauce should coat the back of a spoon and have a glossy sheen.
Step 4: Finish and Garnish
Return the chicken to the skillet and toss to coat evenly in the sauce. Cook for an additional 1-2 minutes until everything is heated through and the chicken is glazed. The sauce should cling to each piece with a sticky, lacquered finish.
Transfer to a serving dish and garnish with thinly sliced 3 whole Green Onions and 1 tsp Sesame Seeds. The green onions add a fresh crunch, while the sesame seeds provide a nutty contrast to the bold, spicy-sweet sauce.
Pro Tips For Making Chicken With Chili Garlic Sauce
- Sear First, Simmer Later: Brown the chicken thighs in the pan first—about 3-4 minutes per side over medium-high heat—before adding the sauce. I learned this the hard way after ending up with pale, steamed chicken instead of caramelized edges.
- Trim the Fat: Even though it’s skinless, trim any excess fat from the thighs to prevent greasy pools in your sauce. It’s a small step that keeps the flavors clean and balanced.
- Skip the Overcrowding: Cook the chicken in batches if needed—crowding the pan steams the meat instead of searing it. After burning a few batches, I finally figured out patience pays off here.
- Bloom the Sauce: Sauté the chili garlic sauce in the pan for 30 seconds before adding liquids—it deepens the flavor. Sounds weird, but it works and makes the dish taste richer.
Pro Cooking Tips for Great chicken with chili garlic sauce
Perfect Searing Technique
Prevent steaming by patting chicken completely dry before searing. Use medium-high heat and avoid crowding the pan—this ensures a proper crust. I use a stainless steel skillet for best browning results. 🔥
Sauce Thickness Control
Simmer the sauce for 2-3 minutes until it coats the back of a spoon. If it’s too thin, mix 1 tsp cornstarch with 1 tbsp water and stir in. The glaze should be thick enough to cling but still pourable.
Timing Matters
Don’t overcook the chicken during the initial sear—3-4 minutes per side is perfect for bite-sized pieces. The chicken will finish cooking when you return it to the sauce, preventing dryness.
Fond Utilization
Those browned bits left in the pan after searing are pure flavor. When you add the garlic and ginger, scrape them up with a wooden spoon to incorporate into the sauce. This adds depth to your glaze.
Garnish Like a Pro
Toast the sesame seeds in a dry pan for 30 seconds before garnishing to enhance their nutty flavor. Sprinkle them just before serving so they stay crisp. I always add extra green onions for color contrast.
Rest Before Serving
Let the chicken rest 2-3 minutes in the sauce off the heat. This allows the glaze to set slightly and penetrate the meat. Serve immediately while the sauce is still glossy and clinging beautifully. ✨
Nutrition Facts
Frequently Asked Questions
Can I use chicken breast instead of thighs?
You can, but thighs stay juicier. If using breasts, cut into smaller pieces and reduce initial searing to 2-3 minutes per side to prevent dryness. The cornstarch coating helps retain moisture regardless.
How do I adjust the spice level?
Reduce the chili garlic sauce to 1/3 cup for mild heat, or add 1/2 tsp red pepper flakes for extra kick. Taste the sauce before adding the chicken and adjust with honey if it’s too spicy.
What if my sauce is too thin?
Mix 1 tsp cornstarch with 1 tbsp cold water and stir into the simmering sauce. Cook for 1-2 minutes until it thickens to a glossy consistency that coats the chicken.
Can I make this ahead?
The dish tastes even better the next day. Store in an airtight container for up to 5 days in the fridge. Reheat gently on the stove with a splash of water to loosen the sauce.

- Jollof Rice Sauce Recipe: West African Tomato and Spice Infusion - September 25, 2026
- Japanese Rice Soup Recipe: Umami-Rich Comfort in a Bowl - September 25, 2026
- Homemade Cream Of Rice Recipe: Silk-Smooth Breakfast in Minutes - September 25, 2026