
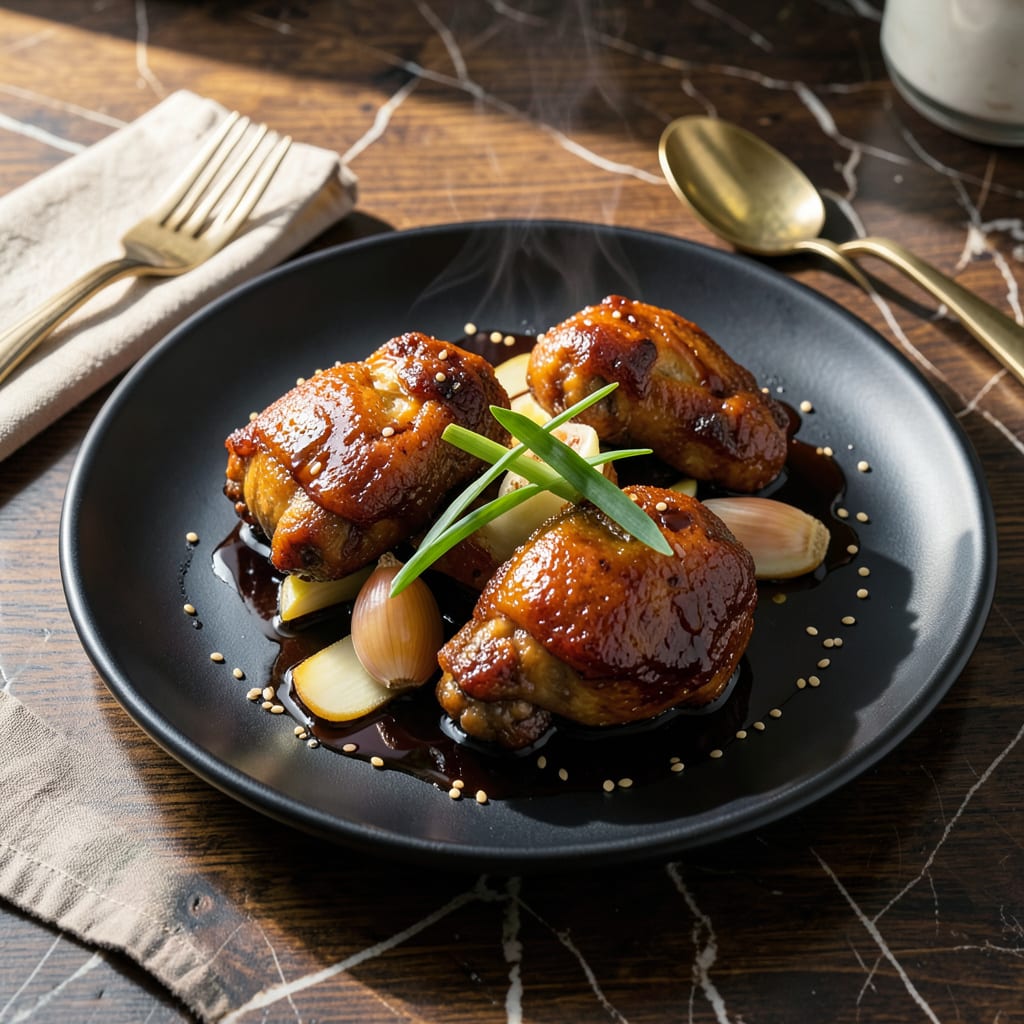
This traditional dish delivers umami-rich flavor with minimal effort. The chicken braises in a soy-based sauce until fall-off-the-bone tender, with a sticky glaze that clings to every piece.
I’ve perfected this method to ensure the meat stays moist while the sauce reduces to a glossy finish. Serve over steamed rice to soak up every last drop of that deeply savory liquid.
Ingredients for Chinese Braised Soy Sauce Chicken
These bold ingredients create a deeply savory braise with minimal effort.
| Ingredient | Amount | Notes |
|---|---|---|
| Chicken Thighs 🍗 | 2 lb | Boneless, skin-on preferred |
| Light Soy Sauce 🫒 | ½ cup | Low-sodium for balance |
| Dark Soy Sauce 🫒 | 2 tbsp | For depth and color |
| Shaoxing Wine 🍶 | ¼ cup | Or dry sherry substitute |
| Brown Sugar 🍚 | 3 tbsp | Light or dark variety |
| Garlic Cloves 🧄 | 6 cloves | Smashed for aroma |
| Fresh Ginger 🌿 | 1 whole | 2-inch piece, sliced |
| Green Onions 🧅 | 4 whole | Cut into 2-inch pieces |
| Star Anise ⭐ | 2 pieces | Whole pods for infusion |
| Dried Shitake Mushrooms 🍄 | 4 pieces | Rehydrated, sliced |
| Sesame Oil 🫒 | 1 tsp | Toasted for finishing |
| Water 💧 | 1 ½ cups | For braising liquid |
| Cornstarch 🌾 | 1 tbsp | Mixed with water for slurry |
[recipeingredientscaler]
The chicken thighs are key here—skin-on, bone-in gives the richest flavor (boneless works but loses some depth). I source mine from Costco or a trusted butcher. The soy sauces matter: Pearl River Bridge for light, Lee Kum Kee for dark. Shaoxing wine is non-negotiable for authenticity, but dry sherry from the grocery store works in a pinch.
Out of dark soy sauce? Add 1 tsp molasses to light soy for color and depth. No Shaoxing wine? Mirin plus a splash of rice vinegar gets close. The shiitake mushrooms can be fresh if you find them, but dried are more concentrated. Skip the star anise if you can’t find it—just add an extra clove of garlic and a pinch of cinnamon.
This tastes even better the next day. Store in the fridge for up to 4 days or freeze for 3 months. Reheat gently with a splash of water to revive the sauce.
Why You’ll Love This Recipe
- One Pot Wonder: I just dump everything in, let it simmer, and the soy sauces do all the work.
- Umami Bomb: The dark soy sauce gives it that deep color while the Shaoxing wine adds this rich, savory kick.
- Meal Prep Magic: I make a big batch Sunday and it tastes even better Tuesday over rice or noodles.
- Budget Keeper: Chicken thighs stay juicy and cheap, and a little soy sauce goes a long way.
Step-by-Step Instructions for Chinese Braised Soy Sauce Chicken
Master the technique behind this classic dish with precise timing and layering of flavors.
Step 1: Sear and Brown the Chicken Thighs
Heat a heavy pot or Dutch oven over medium-high heat until hot. Add the 2 lb chicken thighs skin-side down and sear undisturbed for 5-6 minutes until the skin turns deep golden brown and releases easily from the pot.
Flip the thighs and sear the other side for 3-4 minutes. This initial browning develops the Maillard reaction, creating a rich flavor base for the braise. Transfer the chicken to a plate and set aside.
Step 2: Build the Aromatic Foundation
In the same pot, add the 6 cloves garlic cloves, sliced 1 whole fresh ginger, 4 whole green onions, 2 pieces star anise, and sliced 4 pieces dried shitake mushrooms. Stir for 1-2 minutes until fragrant.
Pour in the 0.5 cup light soy sauce, 2 tbsp dark soy sauce, 0.25 cup Shaoxing wine, and 3 tbsp brown sugar. Stir well to dissolve the sugar and deglaze the pot, scraping up any browned bits from the chicken. This creates a deeply flavorful braising liquid.
Step 3: Braise the Chicken to Tenderness
Return the chicken thighs to the pot along with any accumulated juices. Add the 1.5 cups water and bring the liquid to a gentle simmer. Reduce the heat to low, cover the pot, and let it braise for 30-35 minutes.
The chicken is done when it reaches an internal temperature of 165°F and the meat pulls away from the bone easily. The liquid should be slightly reduced and the aromatics fully infused into the sauce.
Step 4: Thicken and Finish the Glaze
In a small bowl, mix the 1 tbsp cornstarch with 2 tablespoons water to create a slurry. Stir this into the braising liquid and increase the heat to medium. Simmer uncovered for 3-5 minutes until the sauce thickens to a glossy, syrupy consistency that coats the back of a spoon.
Drizzle the 1 tsp sesame oil over the chicken and stir to combine. The sauce should be rich, sticky, and deeply savory with a balance of sweetness from the brown sugar and umami from the soy sauces.
Serve the chicken thighs with the reduced sauce spooned over the top. The dish should have a glossy, caramelized appearance with tender, fall-off-the-bone meat.
Pro Tips For Making Chinese Braised Soy Sauce Chicken
- Brown the Thighs: Sear the chicken thighs until deeply golden before braising—this builds a rich base flavor that the soy sauce can cling to. I learned this the hard way after skipping it once and ending up with bland meat.
- Balance the Sauces: Use a 2:1 ratio of light to dark soy sauce for the right mix of saltiness and color. Too much dark soy makes it bitter and overly dark.
- Deglaze with Wine: After browning, pour in the Shaoxing wine while the pan’s still hot to lift all those sticky brown bits—it adds a ton of depth to the sauce.
- Simmer Low and Slow: Keep the heat at a gentle simmer, not a boil, or the sugar in the sauce will burn. About 30-40 minutes does the trick for fall-off-the-bone thighs.
Best Sauces and Condiments for These Flavors
Chili Oil Drizzle
I always keep a bottle of Lao Gan Ma chili crisp on hand for this dish. Drizzle about 1-2 teaspoons over each serving to add a spicy, crunchy contrast to the rich soy sauce glaze. The heat cuts through the umami beautifully. 🔥
Sweet and Sour Contrast
A quick pickled cucumber salad makes an excellent accompaniment. Thinly slice 1 English cucumber and toss with 2 tbsp rice vinegar, 1 tsp sugar, and a pinch of salt. Let it sit for 10 minutes before serving.
Fresh Herb Garnish
Finishing with fresh herbs brightens up the dish. I love sprinkling cilantro leaves or Thai basil over the top just before serving. About ¼ cup chopped herbs per serving adds the perfect fresh note.
Sesame Seeds Crunch
Toast 1 tbsp white sesame seeds in a dry pan for 2-3 minutes until golden and fragrant. Sprinkle over the chicken for added texture and nutty flavor. The contrast with the tender meat is wonderful.
Extra Umami Boost
For an extra depth of flavor, serve with a small dish of XO sauce on the side. Just 1 teaspoon per serving adds luxurious seafood umami that complements the soy-based braise perfectly. 💛
Simple Rice Vinegar Dip
Mix 2 tbsp rice vinegar with 1 tsp soy sauce and a pinch of red pepper flakes. This tangy dip provides a bright contrast to the rich chicken and helps cut through the fat.
Nutrition Facts
Frequently Asked Questions
Can I use chicken breasts instead of thighs?
Thighs are ideal for their fat content, but breasts work if cooked carefully. Reduce braising time to 20-25 minutes to prevent drying out. The texture will be leaner but still flavorful.
Why do we sear the chicken first?
Searing creates a rich flavor base through the Maillard reaction. It also renders fat from the skin, which enhances the sauce’s depth. Don’t skip this step!
How can I make the sauce thicker?
Simmer uncovered longer after adding the slurry. If still thin, mix an extra ½ tbsp cornstarch with water and stir in. The sauce should coat the back of a spoon.
Can I make this in a slow cooker?
Yes! Brown the chicken first, then transfer to the slow cooker with all ingredients. Cook on low for 4-5 hours or high for 2-3 hours. Thicken the sauce on the stovetop afterward.

- Jollof Rice Sauce Recipe: West African Tomato and Spice Infusion - September 25, 2026
- Japanese Rice Soup Recipe: Umami-Rich Comfort in a Bowl - September 25, 2026
- Homemade Cream Of Rice Recipe: Silk-Smooth Breakfast in Minutes - September 25, 2026