
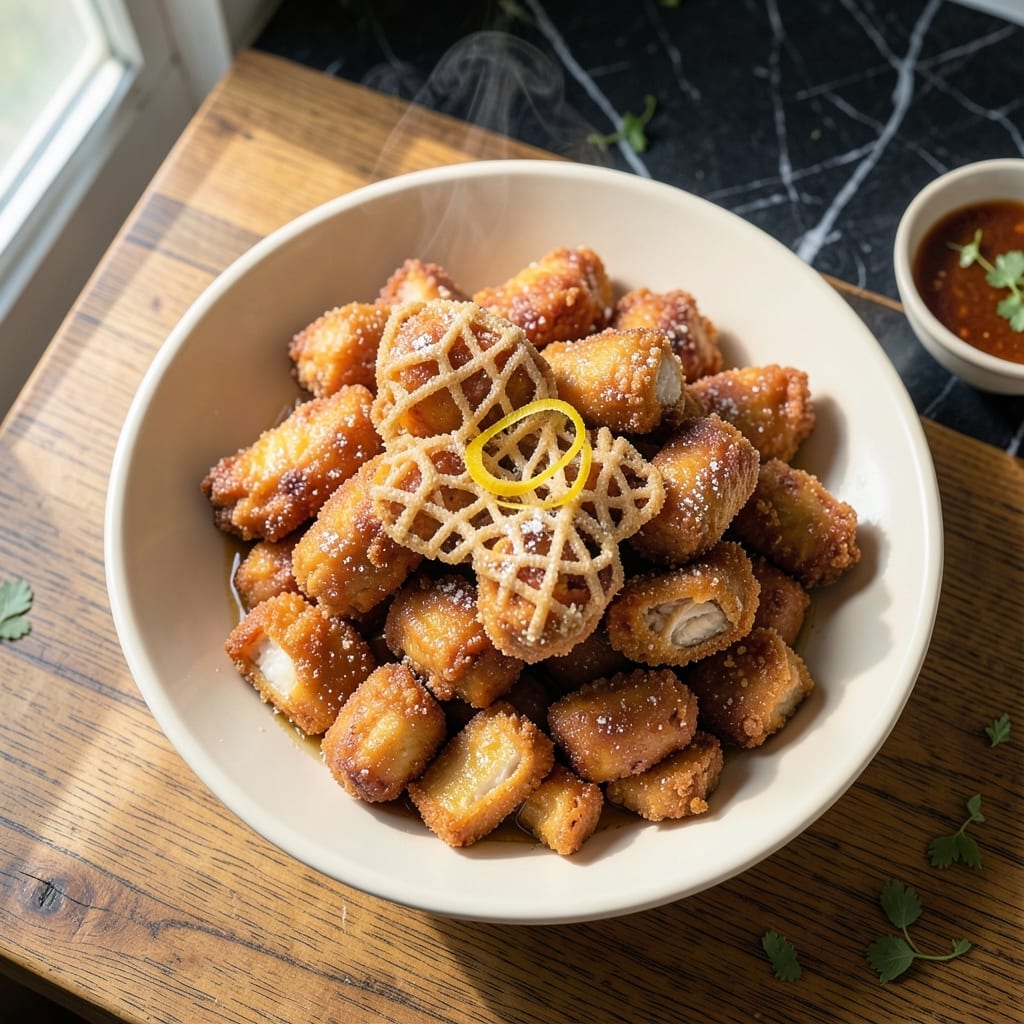
This authentic batter transforms ordinary chicken into restaurant-quality fare with its signature light, crispy texture. The secret lies in the perfect ratio of starch to liquid, creating a coating that fries up shatteringly delicate.
I developed this method after years of testing to achieve the same consistency as my favorite takeout spots. The cornstarch base ensures maximum crispness, while a touch of baking powder adds airiness to every bite.
When fried at the right temperature, this batter creates a golden shell that stays crispy long after cooking. The chicken remains juicy inside, with each piece encased in that distinctive, airy crunch.
Serve immediately with your favorite dipping sauce for an authentic Chinese restaurant experience at home.
Ingredients for Chinese Chicken Batter
Pantry staples plus a few key additions create that iconic shatteringly crisp coating.
| Ingredient | Amount | Notes |
|---|---|---|
| Boneless Skinless Chicken Thighs 🍗 | 1 ½ lb | Cut into 1-inch pieces |
| Cornstarch 🌾 | 1 cup | For ultra-crispy texture |
| All-Purpose Flour 🌾 | ½ cup | Balances starch ratio |
| Baking Powder 🧂 | 1 tsp | Adds airiness to batter |
| Salt 🧂 | 1 tsp | Kosher or sea salt preferred |
| Ground White Pepper 🌶️ | ½ tsp | Classic Chinese flavor |
| Egg Whites 🥚 | 2 whole | Lightens the batter |
| Cold Water 💧 | ¾ cup | Ice-cold for crispiness |
| Vodka 🍸 | ¼ cup | Evaporates for extra crunch |
| Vegetable Oil 🫒 | 4 cups | For deep frying |
| Sesame Oil 🫒 | 1 tsp | For aromatic finish |
| Garlic Powder 🧄 | ½ tsp | Enhances savory depth |
The cornstarch is non-negotiable here—look for pure cornstarch (not corn flour) at any grocery store. I grab mine in bulk from Whole Foods since it’s a staple in my kitchen. The vodka might seem odd, but any neutral spirit works (cheap stuff is fine). Chicken thighs stay juicier than breasts, and cutting them yourself gives more even pieces than pre-cut tenders.
No vodka? Skip it and use extra cold water—the texture won’t be quite as light but still crispy. Rice flour at 1:1 can replace cornstarch in a pinch. Egg whites can be swapped for aquafaba (3 tbsp per white). For gluten-free, use all cornstarch but expect slightly less structure. The white pepper is traditional, but black pepper works too (just less authentic).
Fry in batches—overcrowding kills crispiness. Leftovers? Reheat on a rack in a 400°F oven for 10-12 minutes. Batter keeps 1 day in the fridge (whisk before using). The oil can be reused once if strained and cooled.
Why You’ll Love This Recipe
- 5-Minute Mix: I dump the cornstarch, flour, baking powder, and salt into one bowl—no sifting, no fuss, just whisk and dip.
- That Crunch: The baking powder makes the coating puff up into these airy, crackly bits that stay crispy way longer than I expected.
- Freezer Friendly: I double the batter, fry half for dinner, and freeze the rest raw—perfect for those nights I’m out of ideas.
- Thighs Over Breasts: Boneless skinless thighs stay juicy even if I overcook them a minute, and they cost half what breasts do at my store.
Step-by-Step Instructions for Chinese Chicken Batter
This method delivers that signature light, shatteringly crisp coating found in authentic Chinese restaurants.
Step 1: Prepare the Chicken and Dry Coating
Cut the 1.5 lb boneless skinless chicken thighs into 1-inch pieces and pat them completely dry with paper towels. I can’t stress this enough—moisture is the enemy of crispiness.
In a large bowl, combine the 1 cup cornstarch, 0.5 cup all-purpose flour, 1 tsp baking powder, 1 tsp salt, and 0.5 tsp ground white pepper. Whisk thoroughly until no lumps remain. The baking powder creates tiny air pockets for extra crunch.
Step 2: Make the Light and Airy Batter
In a separate bowl, whisk together the 2 whole egg whites, 0.75 cup cold water, and 0.25 cup vodka until fully combined. Here’s the thing—the vodka evaporates quickly when frying, leaving behind an extra-crispy crust without any alcohol taste.
Slowly pour the wet mixture into the dry ingredients while gently folding with a spatula. The batter should be thin and slightly lumpy, like heavy cream. Don’t overmix; a few lumps are fine and will dissolve during frying.
Step 3: Double-Coat for Maximum Crispiness
Working in batches, toss the chicken pieces in the dry cornstarch mixture first, shaking off any excess. Then dip each piece into the batter, letting any excess drip off before returning it to the dry mixture for a final coat.
This double-coating technique is the secret to that restaurant-quality texture. Place the coated pieces on a wire rack set over a baking sheet. This prevents them from sticking together and helps the coating set evenly.
Step 4: Fry to Golden Perfection
Heat the 4 cups vegetable oil in a deep, heavy pot to 350°F. Use a thermometer for accuracy—this temperature ensures even cooking without burning the coating. Carefully lower the chicken pieces into the hot oil in batches, being careful not to overcrowd the pot.
Fry for 4-5 minutes, turning occasionally, until the coating is golden brown and the internal temperature reaches 165°F. The chicken should float and sizzle actively. Drain on a wire rack or paper towels.
Step 5: Finish with Aromatic Touch
While the chicken is still hot, drizzle it with the 1 tsp sesame oil and sprinkle evenly with the 0.5 tsp garlic powder. Toss gently to coat. This final step adds that authentic Chinese takeout aroma and flavor.
Serve immediately while the coating is at its crispiest. The contrast between the tender chicken and the shatteringly crisp exterior is what makes this dish so special. Any leftovers (if you have any) reheat well in a 375°F oven for 5-7 minutes.
Pro Tips For Making Chinese Chicken Batter
- Double Fry for Crisp: Fry the coated chicken once at 325°F until just cooked, then rest 2 minutes and fry again at 375°F. I learned this the hard way—single frying leaves the crust soggy under the sauce.
- Velvet the Chicken: Toss the thigh pieces with 1 tsp cornstarch and 1 tsp water before battering. Sounds weird, but it works: the coating clings better and the meat stays tender.
- Skip the Overmixing: Stir the batter just until the dry streaks disappear—about 8-10 folds with a spatula. After burning three batches, I finally figured out overmixing makes the crust dense and gummy.
- Chill the Batter: Let the battered chicken rest in the fridge for 10 minutes before frying. My grandmother swore by this, and she was right: it sets the coating so it doesn’t slide off in the oil.
Serving Suggestions for This chinese chicken batter
Classic Pairings
This dish shines with traditional Chinese sides. I love serving it with steamed jasmine rice to soak up any extra sauce. A simple cucumber salad with rice vinegar, sesame oil, and a pinch of sugar adds a refreshing crunch. 🥗
Sauce Recommendations
The crispy coating begs for dipping. Sweet and sour sauce is a classic choice—I use Kikkoman’s version for convenience. For heat lovers, Sriracha mayo (mix 2 tbsp mayo with 1 tbsp Sriracha) adds a creamy kick.
Vegetable Sides
Stir-fried bok choy with garlic and ginger complements the chicken beautifully. Toss 4 chopped bok choy in a hot wok with 1 tbsp oil, 2 minced garlic cloves, and 1 tsp grated ginger for 3-4 minutes.
Soup Pairings
A light egg drop soup or wonton soup makes a perfect starter. The warm broth contrasts nicely with the crispy chicken. I find 6 cups of soup serves 4 people well as an appetizer.
Garnish Ideas
Finish with a sprinkle of sliced green onions or toasted sesame seeds for visual appeal. A wedge of lime on the side lets guests add a citrusy brightness. These small touches elevate the presentation significantly. ✨
Family-Style Service
For gatherings, serve the chicken on a large platter with small bowls of dipping sauces. Let everyone help themselves—it creates a fun, interactive dining experience. I always include extra napkins for the inevitable messy fingers.
Nutrition Facts
Frequently Asked Questions
Why use vodka in the batter?
Vodka creates a lighter, crispier coating by evaporating quickly during frying. It doesn’t leave an alcohol taste but makes the batter extra crunchy. You can skip it, but the texture won’t be quite as airy.
Can I bake instead of frying?
Baking at 425°F for 20-25 minutes works, but the coating won’t be as crispy. For best results, place pieces on a wire rack over a baking sheet and flip halfway through.
How do I keep it crispy after frying?
Drain on a wire rack, not paper towels, to prevent steam buildup. Keep warm in a 200°F oven on a rack while frying batches. Avoid covering until ready to serve.
Can I make this gluten-free?
Yes! Replace the all-purpose flour with an equal amount of cornstarch. The texture will be slightly different but still crispy. Ensure all other ingredients are certified gluten-free.

- Jollof Rice Sauce Recipe: West African Tomato and Spice Infusion - September 25, 2026
- Japanese Rice Soup Recipe: Umami-Rich Comfort in a Bowl - September 25, 2026
- Homemade Cream Of Rice Recipe: Silk-Smooth Breakfast in Minutes - September 25, 2026