
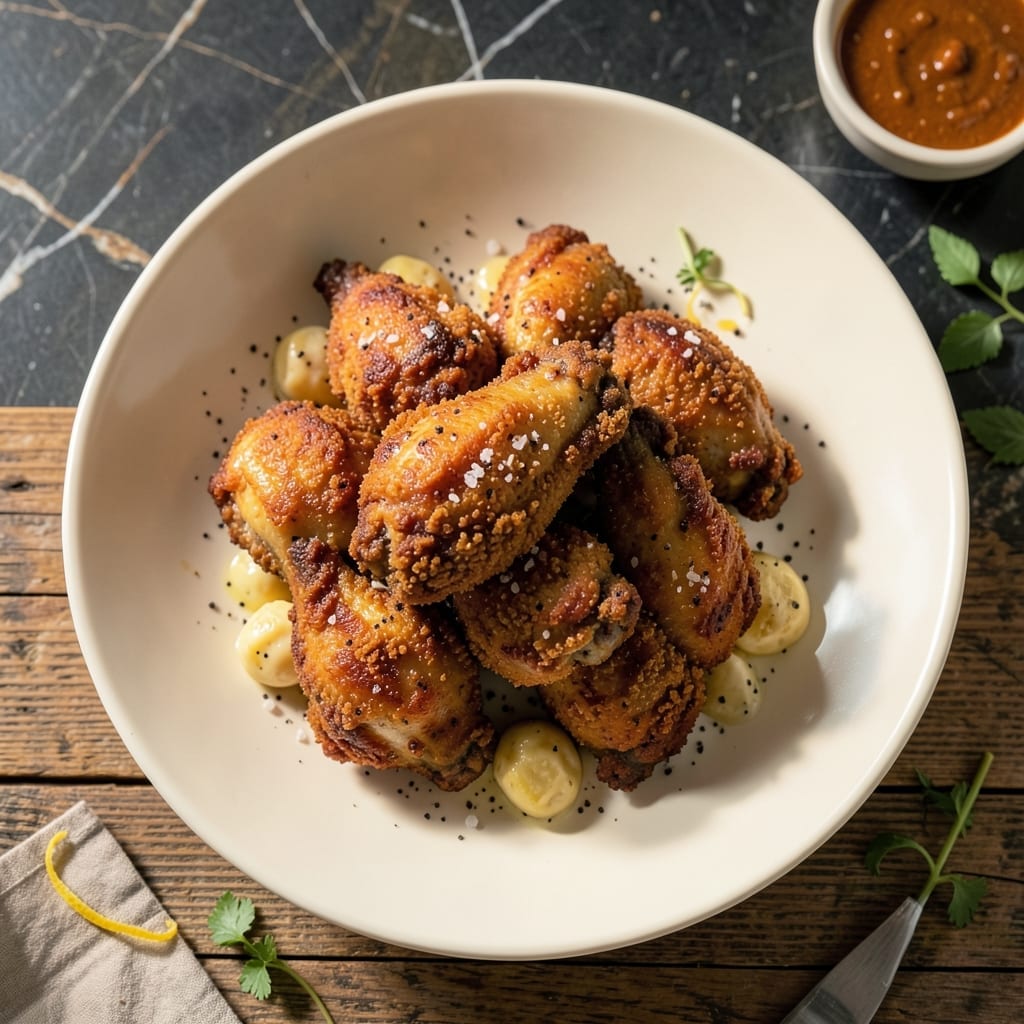
This recipe delivers golden, shatteringly crispy chicken with a juicy interior every time. I developed this method during my years at The Smoky Pig, where achieving the perfect crust was non-negotiable.
The key lies in a two-step process: a buttermilk soak for tenderness, followed by a seasoned flour coating that creates that signature crunch. High heat finishes the job, locking in moisture while ensuring the crust stays crispy.
What results is chicken with a deep golden hue outside and succulent meat inside. The contrast between the crunchy exterior and juicy bites makes this dish irresistible.
Serve hot for the best texture, with your favorite dipping sauce. This technique works for both frying and baking methods.
Ingredients for Chrispy Chicken
Pantry staples plus a buttermilk soak. That is all you need for this.
| Ingredient | Amount | Notes |
|---|---|---|
| Chicken Thighs 🍗 | 2 lb | Boneless, skin-on for best crisp |
| Buttermilk 🥛 | 2 cups | Full-fat for maximum tenderness |
| All-Purpose Flour 🌾 | 2 ½ cups | Plus extra for dredging |
| Cornstarch 🌽 | ½ cup | For extra crisp coating |
| Kosher Salt 🧂 | 1 tbsp | Diamond Crystal preferred |
| Black Pepper 🌶️ | 1 tbsp | Freshly ground for best flavor |
| Paprika 🌶️ | 2 tsp | Sweet or smoked variety |
| Garlic Powder 🧄 | 2 tsp | Not garlic salt |
| Onion Powder 🧅 | 2 tsp | Fresh ground preferred |
| Cayenne Pepper 🔥 | ½ tsp | Adjust for heat preference |
| Vegetable Oil 🫒 | 4 cups | For frying (peanut oil works too) |
| Large Eggs 🥚 | 2 whole | For extra binding in coating |
The chicken matters most here. Thighs stay juicier than breasts—look for skin-on, bone-in if you can find them (the bone adds flavor). I grab mine from Whole Foods when they have sales, but any grocery store works. The buttermilk should be full-fat (trust me on this) for that tenderizing power. If you’re in a pinch, whole milk with a splash of vinegar works, but it’s not quite the same.
No buttermilk? Whole milk plus 1 tbsp vinegar per cup gets you 80% there. Swap half the flour for cornstarch if you want extra crunch. The spices can be adjusted—add smoked paprika for depth, or skip the cayenne if heat’s not your thing. For frying, peanut oil has a higher smoke point, but vegetable oil is fine. Just don’t use olive oil—it burns at frying temps.
Leftovers keep 3-4 days in the fridge, but the crust softens. Reheat in a 400°F oven for 10-15 minutes to crisp it back up. Freezes for 1 month if you must, but fresh is always better with this one.
Why You’ll Love This Recipe
- One Bowl Wonder: I just toss the thighs in buttermilk, then the flour-cornstarch mix—minimal dishes, maximum crisp.
- That Crunch Though: The cornstarch in the coating gives it a shatteringly crisp bite every single time.
- Feeds My Crowd: I make a double batch on Sunday and we’re set for sandwiches, salads, or solo snacking all week.
- Budget Hero: Chicken thighs stay cheap, and a little flour and cornstarch go a long way to feed four.
Step-by-Step Instructions for Crispy Chicken
Here’s the method I use for that perfect crunch and juicy interior every time.
Step 1: Marinate the Chicken Thighs in Buttermilk
Place the 2 lb Chicken Thighs in a large bowl and pour over the 2 cups Buttermilk. I make sure every piece is fully submerged for maximum tenderness. The acidity in the buttermilk works to break down proteins, ensuring the meat stays moist throughout the frying process.
Cover the bowl and refrigerate for at least 4 hours, though overnight works even better. I’ve found this extended marination time makes a noticeable difference in both texture and flavor absorption.
Step 2: Prepare the Seasoned Flour Dredge
In a large shallow dish, whisk together the 2.5 cups All-Purpose Flour, 0.5 cup Cornstarch, 1 tbsp Kosher Salt, 1 tbsp Black Pepper, 2 tsp Paprika, 2 tsp Garlic Powder, 2 tsp Onion Powder, and 0.5 tsp Cayenne Pepper.
The cornstarch is my secret weapon here—it creates that ultra-crispy coating that stays crunchy long after frying. I always double-check that the spices are evenly distributed throughout the flour mixture to ensure every bite is packed with flavor.
Step 3: Coat and Fry to Golden Perfection
Remove the chicken from the buttermilk, letting any excess drip off, then dredge each piece thoroughly in the flour mixture. Press gently to ensure the coating adheres well. For extra crispiness, I dip the floured pieces back into the buttermilk and dredge again—a double-dredge technique that creates a thicker, crunchier crust.
Heat the 4 cups Vegetable Oil in a deep skillet or Dutch oven to 350°F. Working in batches to avoid crowding, carefully lower the chicken into the hot oil. Fry for 6-8 minutes per side until the coating is deep golden brown and the internal temperature reaches 165°F.
Step 4: Drain and Rest for Optimal Crispiness
Transfer the fried chicken to a wire rack set over a baking sheet or paper towels to drain. This setup allows air to circulate around the chicken, preventing it from becoming soggy. I never stack the pieces—this would trap steam and ruin the crispy texture we worked so hard to achieve.
Let the chicken rest for 5-10 minutes before serving. This brief resting period allows the juices to redistribute throughout the meat and gives the coating time to set completely. The result is chicken that’s crispy on the outside and perfectly juicy on the inside, just as promised.
Pro Tips For Making Chrispy Chicken
- Double-Dredge for Crunch: After the buttermilk soak, dredge the thighs in flour, dip back in buttermilk, then dredge again in a 2:1 flour-to-cornstarch mix—this builds the thick, shatteringly crisp crust that plain flour alone can’t deliver.
- Rest Before Frying: Let the dredged thighs sit on a wire rack for 10-15 minutes before frying; I learned this the hard way—this step keeps the coating from sliding off and guarantees it adheres like armor.
- Skip the Cold Oil: Heat your oil to 350°F before adding the chicken, and resist the urge to crowd the pan—after burning three batches, I finally figured out that dropping the temperature or overcrowding turns crispy into soggy every time.
- Salt the Buttermilk: Whisk 1 tablespoon of kosher salt into the buttermilk before soaking the thighs—sounds weird, but it works: the salt penetrates deep, seasoning the meat all the way through instead of just the surface.
Creative Variations of These Flavors
Southern Spice Rub
Swap the paprika for 2 tsp smoked paprika and add 1 tsp dried thyme to the flour mix. This Charleston-inspired twist brings a deep, smoky warmth that reminds me of my time at The Smoky Pig. The thyme adds an earthy note that pairs beautifully with the buttermilk. 🔥
Extra Crunchy Coating
For maximum crunch, replace 1 cup of flour with crushed cornflakes or panko breadcrumbs. The irregular shapes create more surface area for crispiness. I learned this trick judging BBQ contests across the Southeast.
Nashville Hot Style
After frying, brush the chicken with 2 tbsp melted butter mixed with 1 tbsp cayenne and 1 tbsp brown sugar. This sticky, spicy glaze gives you that signature Nashville heat. Serve with pickles to cut the spice.
Air Fryer Method
Spray the coated chicken lightly with oil and air fry at 375°F for 12-15 minutes, flipping halfway. You’ll get nearly the same crispiness with less oil. I use this method when I’m short on time but still want that perfect crunch.
Herb-Infused Buttermilk
Add 2 tbsp chopped fresh rosemary and 3 crushed garlic cloves to your buttermilk marinade. The herbs infuse the meat with aromatic depth. This variation works especially well with bone-in thighs from my heritage pig farm. 🌿
Gluten-Free Option
Use 2 cups rice flour and ½ cup cornstarch instead of all-purpose flour. The rice flour gives a lighter, crispier texture. I’ve tested this with great success for friends with gluten sensitivities.
Nutrition Facts
Frequently Asked Questions
What’s the best oil for frying?
Use vegetable oil or peanut oil for their high smoke points. Avoid olive oil as it burns at frying temperatures.
Can I use chicken breasts instead of thighs?
Yes, but thighs stay juicier. If using breasts, reduce cooking time to 5-6 minutes per side to prevent dryness.
How do I keep the coating crispy longer?
Drain on a wire rack, not paper towels. This prevents steam buildup that softens the crust.
Can I bake instead of fry?
Bake at 400°F for 25-30 minutes on a rack. Spray with oil first for extra crispiness.

- Mandhi Rice Recipe: Yemeni Spiced Lamb and Rice Feast - September 25, 2026
- Chuy’s Green Chili Rice Copycat Recipe: Spicy Southwest Flavor in Every Bite - September 25, 2026
- Beaten Rice Recipe: Fluffy Grains With Nutty Depth - September 25, 2026