
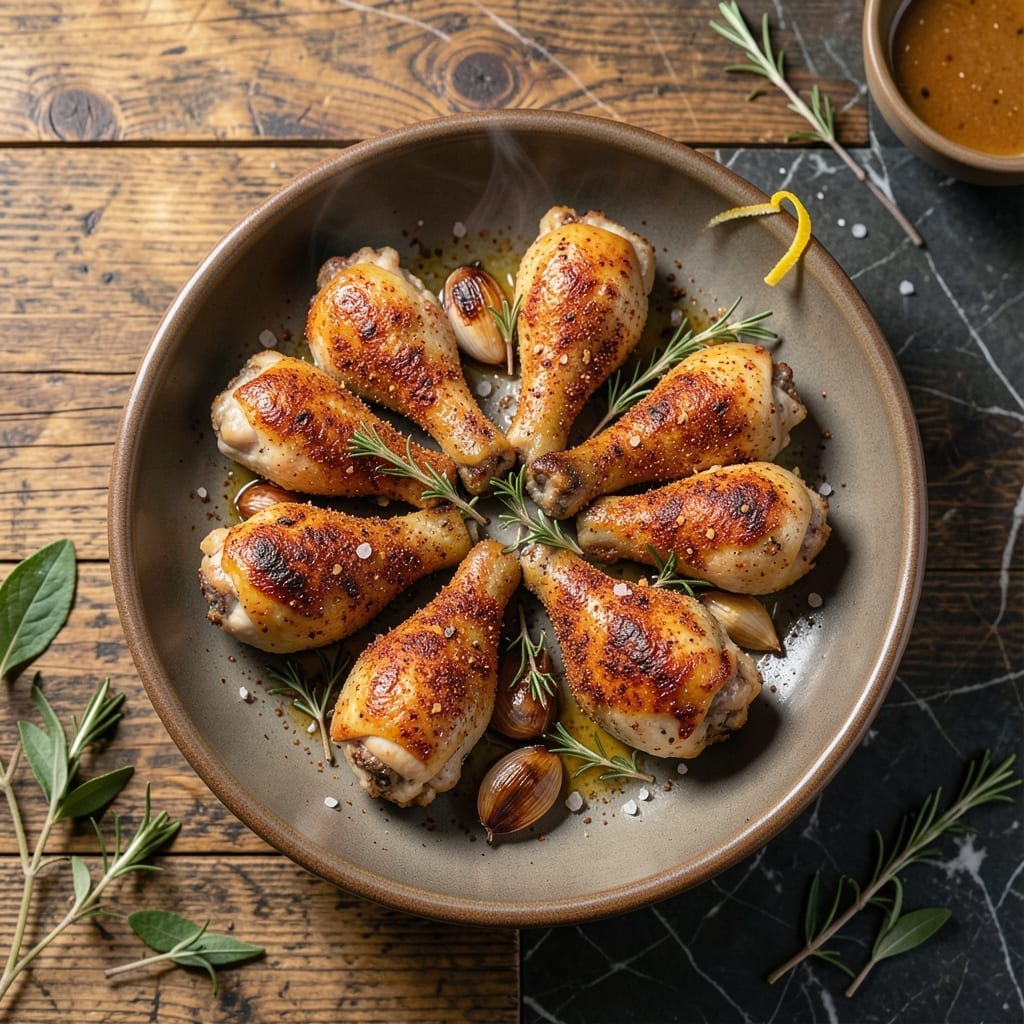
This recipe delivers crispy skin and juicy dark meat every time with a simple, proven technique.
I’ve tested countless methods for chicken legs, and the key is high heat and proper drying of the skin before cooking. This creates that perfect shatteringly crispy exterior while keeping the meat inside incredibly juicy and flavorful.
The seasoning is straightforward but effective, allowing the natural chicken flavor to shine. A hot oven ensures even cooking without drying out the meat, giving you consistent results with minimal effort.
Serve these with your favorite sides for a complete meal that’s sure to satisfy. The method is reliable and the outcome is always impressive.
Ingredients for Cooked Chicken Legs
Nothing exotic here—just chicken legs and a killer spice blend for that crispy, juicy magic.
| Ingredient | Amount | Notes |
|---|---|---|
| Chicken Legs 🍗 | 4 lbs | Split into drumsticks and thighs, skin-on |
| Kosher Salt 🧂 | 1 ½ tbsp | Diamond Crystal preferred for even coating |
| Black Pepper 🌶️ | 1 tsp | Freshly ground for best flavor |
| Garlic Powder 🧄 | 2 tsp | Not garlic salt, for depth |
| Onion Powder 🧅 | 2 tsp | Balances savory notes in seasoning |
| Smoked Paprika 🌶️ | 1 ½ tsp | Adds subtle smokiness to skin |
| Dried Thyme 🌿 | 1 tsp | Crushed between fingers to release oils |
| Dried Rosemary 🍃 | 1 tsp | Finely ground for even distribution |
| Baking Powder 🧂 | 1 tsp | For ultra-crispy skin (trust me) |
| Olive Oil 🫒 | 2 tbsp | High smoke point, for skin lubrication |
| Lemon Juice 🍋 | 1 tbsp | Freshly squeezed for brightness |
The chicken legs are the star—skin-on, bone-in is non-negotiable for both texture and flavor. I grab mine from Whole Foods or Costco (their organic legs are consistently high quality). Size matters: aim for 7-8 oz per leg so they cook evenly. If they’re wet when you buy them, pat them very dry (that’s half the battle for crispy skin). The baking powder? Sounds weird but it’s the secret to shatteringly crisp skin (don’t skip it).
No smoked paprika? Regular paprika plus a pinch of cayenne gets you close. Out of fresh lemon? White vinegar at half the amount works for the acidity. The herbs can be swapped—dried sage or marjoram instead of thyme or rosemary. If you’re using table salt instead of kosher, cut the amount by half (it’s saltier). And if your oven runs hot, check the legs 5 minutes early to avoid over-browning.
Legs keep in the fridge 3-4 days—reheat in the oven to maintain crispiness. They freeze beautifully too, up to 3 months. Pro tip: let them cool completely before storing, or the steam will make the skin soggy (worth the extra 10 minutes).
Why You’ll Love This Recipe
- One Pan Wonder: I toss the legs with salt, pepper, garlic and onion powder, pop them in the oven, and that’s it—no babysitting required.
- Crispy & Juicy: The skin gets this irresistible snap while the meat stays tender, all from just those five ingredients.
- My Sunday Meal Prep: I make a double batch on weekends and we’re set for easy lunches or quick dinners all week.
- Pocket-Friendly Feast: Chicken legs are cheap, the spices are pantry staples, and it feeds my family of four for under ten bucks.
Step-by-Step Instructions for Cooked Chicken Legs
Here’s the method I use to get that perfect crispy skin with juicy meat every time.
Step 1: Season the Chicken Legs Thoroughly
Pat the 4 lbs chicken legs completely dry with paper towels—this is crucial for crispy skin. In a small bowl, combine the 1.5 tbsp kosher salt, 1 tsp black pepper, 2 tsp garlic powder, 2 tsp onion powder, 1.5 tsp smoked paprika, 1 tsp dried thyme, 1 tsp dried rosemary, and 1 tsp baking powder.
Rub this seasoning mixture all over the chicken legs, making sure to coat every surface evenly. The baking powder might seem odd, but it helps break down proteins for extra-crispy skin. Let the seasoned chicken rest at room temperature for 30 minutes to allow the salt to penetrate.
Step 2: Prep for Oven Roasting
Preheat your oven to 425°F. While it heats, arrange a wire rack over a baking sheet. This setup allows air to circulate around the chicken legs, ensuring they crisp up evenly on all sides.
Drizzle the 2 tbsp olive oil over the seasoned chicken legs and toss to coat evenly. This thin layer of oil helps the skin brown and crisp beautifully. Place the chicken legs skin-side up on the wire rack, spacing them out so they’re not touching.
Step 3: Roast Until Crispy and Juicy
Roast the chicken legs in the preheated oven for 45-50 minutes. Don’t flip them—this method ensures the skin stays crispy while the meat cooks through. You’ll know they’re done when the internal temperature reaches 175°F and the juices run clear.
The skin should be deep golden brown and crispy, while the meat remains tender and juicy. If you notice the skin browning too quickly, tent the pan loosely with foil to prevent burning.
Step 4: Finish with Fresh Lemon Juice
Remove the chicken legs from the oven and let them rest for 5-10 minutes. This allows the juices to redistribute throughout the meat. Just before serving, drizzle the 1 tbsp lemon juice over the hot chicken legs.
The acidity from the lemon juice brightens all the flavors and cuts through the richness of the crispy skin. Serve immediately while the skin is still crispy and the meat is at its juiciest.
Pro Tips For Making Cooked Chicken Legs
- Pat Them Dry: After burning three batches, I finally figured out that drying the chicken legs with paper towels before seasoning guarantees crispier skin—water is the enemy of a good sear.
- Season Aggressively: Sounds weird, but it works: use more kosher salt and spices than you think you need, especially with bold flavors like garlic and onion powder.
- Start Hot, Finish Low: I learned this the hard way—sear the legs at 425°F for 20 minutes, then drop to 375°F to cook through without burning the spices.
- Rest Before Serving: Give them a solid 5-10 minutes under foil after cooking—skipping this means all the juices will end up on the cutting board, not in the meat.
Health Benefits of This cooked chicken legs
Protein Powerhouse
Chicken legs are packed with high-quality protein—about 28 grams per leg—which supports muscle growth and repair. This protein is complete, containing all nine essential amino acids your body needs. I find this dish particularly satisfying after a workout. 💪
Rich in Iron
Dark meat like chicken legs provides heme iron, which your body absorbs more easily than iron from plant sources. A single serving delivers about 15% of your daily iron needs, helping prevent fatigue and supporting red blood cell production.
B Vitamin Boost
This dish is loaded with B vitamins, especially B12 and niacin. These support energy metabolism and nervous system health. The 4 lbs of chicken legs in this recipe provide a significant portion of your daily B vitamin requirements.
Healthy Fats
While chicken legs contain more fat than breast meat, most of it is unsaturated fat, the heart-healthy kind. The skin adds flavor and crispiness, but you can remove it after cooking if you’re watching fat intake. I often leave half the skin on for balance.
Mineral Richness
You’ll get a good dose of zinc and selenium from this dish. Zinc supports immune function, while selenium acts as a powerful antioxidant. Together, they help protect cells from damage and support overall health. 🥗
Budget-Friendly Nutrition
Chicken legs offer exceptional nutritional value for the price. They’re often 50% cheaper than chicken breasts while providing more iron and zinc. This makes them an excellent choice for families looking to maximize nutrition on a budget.
Nutrition Facts
Frequently Asked Questions
What temperature should the oven be set to?
Preheat your oven to 425°F for perfect crispy skin. This high heat ensures even browning while keeping the meat juicy inside.
How do I know when they’re fully cooked?
Use a meat thermometer—the internal temperature should reach 175°F. The juices should run clear, and the skin will be deep golden brown.
Can I use chicken thighs instead of legs?
Yes! Bone-in, skin-on thighs work well with the same method. Adjust cooking time to 35-40 minutes since they’re smaller.
Why is the skin not crisping up?
Pat the skin completely dry before seasoning and ensure the oven is fully preheated. Crowding the pan can also cause soggy skin.

- Jollof Rice Sauce Recipe: West African Tomato and Spice Infusion - September 25, 2026
- Japanese Rice Soup Recipe: Umami-Rich Comfort in a Bowl - September 25, 2026
- Homemade Cream Of Rice Recipe: Silk-Smooth Breakfast in Minutes - September 25, 2026