
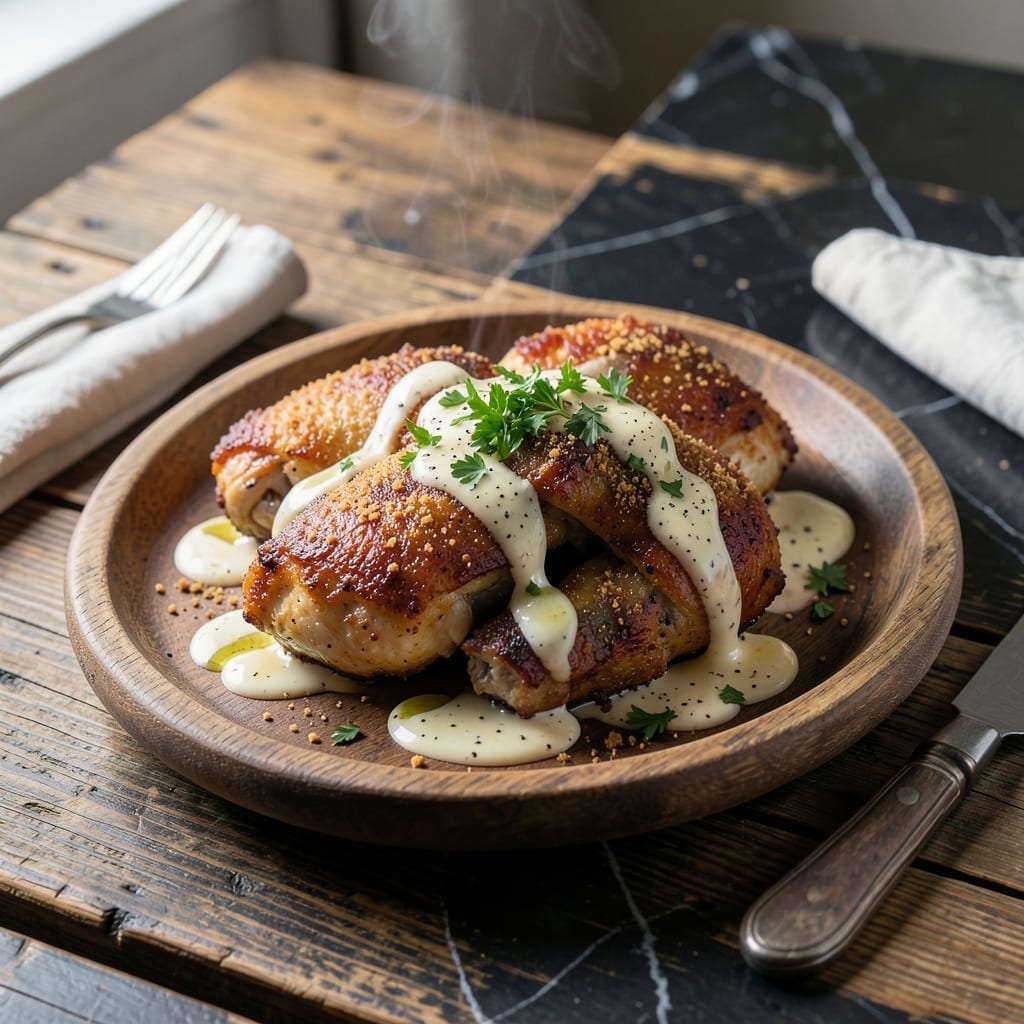
There’s something timeless about a well-made country chicken dish that brings comfort to any table.
This recipe captures the essence of homestyle cooking with simple ingredients and traditional techniques. The chicken emerges tender and juicy, with a golden-brown crust that locks in all the rustic flavors.
I’ve refined this method to ensure every bite delivers that familiar, heartwarming taste you’d expect from a classic country kitchen. The process is straightforward, but the results are anything but ordinary.
Serve it with your favorite sides for a meal that feels like home. Here’s how to make it perfectly every time.
Ingredients for Country Chicken
Rustic comfort starts with bone-in chicken, buttermilk, and a well-seasoned flour crust for timeless flavor.
| Ingredient | Amount | Notes |
|---|---|---|
| Chicken Thighs 🍗 | 2 ½ lb | Bone-in, skin-on preferred |
| All-Purpose Flour 🌾 | 1 ½ cups | For dredging, well-seasoned |
| Buttermilk 🥛 | 1 ½ cups | Full-fat for best texture |
| Large Eggs 🥚 | 2 whole | For binding the coating |
| Vegetable Shortening 🧈 | ¾ cup | For frying, or use lard |
| Garlic Powder 🧄 | 2 tsp | Freshly ground if possible |
| Onion Powder 🧅 | 2 tsp | Balances the seasoning blend |
| Paprika 🌶️ | 1 tbsp | Sweet or smoked variety |
| Salt 🧂 | 1 ½ tsp | Diamond Crystal kosher preferred |
| Black Pepper 🌶️ | 1 tsp | Freshly ground for best flavor |
| Dried Thyme 🍃 | 1 tsp | Rubbed between fingers to release oils |
| Dried Rosemary 🌿 | 1 tsp | Crushed to enhance aroma |
| Whole Milk 🥛 | ½ cup | For adjusting batter consistency |
The chicken is non-negotiable here. Bone-in, skin-on thighs deliver the juiciest results—breasts dry out too easily. Source from Whole Foods or a trusted butcher for the best quality. The buttermilk should be full-fat (the thick, tangy kind) for maximum tenderness. Organic or local if available, but standard grocery store versions work fine in a pinch.
No buttermilk? Whole milk with a tablespoon of lemon juice gets you 90% there. Swap the thighs for drumsticks if that’s what’s on hand. For the flour, self-rising flour plus a pinch of salt works as a substitute. Short on spices? Poultry seasoning at half the amount can replace the thyme and rosemary combined.
The dredged chicken can rest 10-15 minutes before frying for a crispier crust. Leftovers keep 3-4 days in the fridge, though they’re best fresh. Reheat in the oven to revive the crunch—microwaving makes them soggy.
Why You’ll Love This Recipe
- One-Bowl Wonder: I toss the chicken in buttermilk and eggs right in the mixing bowl—no extra dishes, just easy prep.
- Crispy Perfection: The shortening fries up that crust so it’s golden outside, juicy inside. Honestly, my family fights over the last piece.
- Feeds a Hungry Table: Six thighs, one batch, and everyone’s full—even my teen boys with bottomless pits for stomachs.
- Budget Keeper: Chicken thighs stay cheap, and the flour-buttermilk combo stretches further than any fancy cut.
Step-by-Step Instructions for Country Chicken
Master the technique and achieve crispy, golden-brown chicken with a moist, flavorful interior.
Step 1: Season and Prepare the Chicken Thighs
Pat the 2.5 lb Chicken Thighs dry with paper towels to remove excess moisture. I always leave the skin on for extra crispiness. Season both sides generously with 1.5 tsp Salt and 1 tsp Black Pepper, ensuring the seasoning adheres well to the skin and meat.
This drying step is crucial—it prevents the coating from sliding off during frying. I’ve found that skin-on, bone-in thighs stay juicier during cooking and develop better texture. Let the seasoned thighs rest at room temperature for 10 minutes while you prepare the coating.
Step 2: Create the Seasoned Flour and Wet Dredge
In a shallow dish, whisk together the 1.5 cups All-Purpose Flour, 2 tsp Garlic Powder, 2 tsp Onion Powder, 1 tbsp Paprika, 1 tsp Dried Thyme, and 1 tsp Dried Rosemary. I rub the dried herbs between my fingers to release their oils for maximum flavor.
In another shallow dish, whisk the 1.5 cups Buttermilk, 2 whole Large Eggs, and 0.5 cup Whole Milk until smooth. The buttermilk’s acidity tenderizes the chicken, while the eggs help the coating adhere. If the mixture seems too thick, add a splash more buttermilk, but it should coat the back of a spoon.
Step 3: Dredge and Coat the Chicken
Dip each seasoned thigh into the buttermilk mixture, letting any excess drip off. Then dredge it in the seasoned flour, pressing gently to ensure an even, thick coating. I like to shake off any loose flour—you want a good layer, but not so much that it creates a gummy texture.
Place the coated thighs on a wire rack set over a baking sheet. This setup allows air to circulate, preventing the coating from becoming soggy. Let them rest for 5-10 minutes to help the coating set before frying. This rest ensures the flour adheres properly and doesn’t flake off during cooking.
Step 4: Fry to Golden Perfection
In a large, heavy skillet or Dutch oven, melt the 0.75 cup Vegetable Shortening over medium-high heat until it reaches 350°F. Use a deep-fry thermometer for accuracy—too cool, and the chicken will absorb oil; too hot, and the outside will burn before the inside cooks.
Carefully place the thighs in the hot oil, skin-side down. Don’t overcrowd the pan—fry in batches if necessary. Cook for 8-10 minutes per side until the coating is deep golden brown and the internal temperature reaches 165°F. The oil should bubble steadily but not violently. Drain on a wire rack to keep the coating crisp.
Step 5: Rest and Serve
Transfer the fried chicken to a clean wire rack and let it rest for 5 minutes. This allows the juices to redistribute, ensuring moist meat. The coating should be crisp and shatter slightly when cut into, with a rich, golden color.
Serve immediately while hot. The contrast between the crunchy exterior and tender interior is what makes this dish special. For best results, pair with classic sides like mashed potatoes or coleslaw to complete the homestyle experience.
Pro Tips For Making Country Chicken
- Soak in Buttermilk Overnight: I learned this the hard way—giving the chicken thighs a full 12-hour buttermilk bath makes the coating stick better and the meat impossibly tender. Anything less and you’re cheating yourself.
- Heat the Shortening First: Sounds obvious, but I used to add chicken to lukewarm shortening and wonder why it absorbed oil like a sponge. Crank the heat until it shimmers, then test with a wooden chopstick—bubbles mean it’s ready.
- Dry the Chicken Well: After pulling the thighs from the buttermilk, pat them bone-dry with paper towels. My grandmother swore by this, and she was right: excess moisture is the enemy of a crispy crust.
- Double-Dredge for Crunch: Dip the floured chicken back in the buttermilk-egg mix, then coat in flour again. It’s an extra 2 minutes of work, but the result is a thicker, craggier crust that actually changes the outcome.
Perfect Pairings for This Recipe
Classic Side Dishes
I always pair this with creamy mashed potatoes—the smooth texture contrasts beautifully with the crispy chicken. Use Yukon Gold potatoes and fold in ½ cup warm buttermilk for extra richness. A simple butter lettuce salad with a tangy vinaigrette cuts through the richness.
Comforting Carbs
Buttermilk biscuits are my go-to for soaking up every last bit of flavor. I make mine with 2 cups all-purpose flour and ½ cup cold butter. For a heartier option, cornbread with 1 cup cornmeal and a touch of honey complements the savory notes perfectly. 💛
Fresh Vegetables
Coleslaw adds a refreshing crunch—I use a mix of green and red cabbage with a light mayo dressing. Green beans sautéed with 2 cloves garlic and a splash of apple cider vinegar bring brightness to the plate. These sides balance the richness without overpowering it.
Beverage Pairings
For drinks, I love sweet tea with a squeeze of lemon—it’s a Southern staple that cleanses the palate. A cold lager beer like Budweiser or Miller Lite works wonderfully too. For a non-alcoholic option, sparkling lemonade adds a refreshing fizz. 🍺
Nutrition Facts
Frequently Asked Questions
Can I use boneless thighs instead?
Yes, but bone-in stays juicier during frying. If using boneless, reduce cooking time to 6-7 minutes per side to prevent drying out. The skin helps crisp the coating, so leave it on if possible.
How do I keep the coating crispy?
Drain on a wire rack, not paper towels. This allows air circulation to prevent steam from making the crust soggy. Also, maintain oil at 350°F throughout frying.
What’s the best oil for frying?
Vegetable shortening or lard gives the most authentic flavor. Peanut or canola oil work too. Avoid olive oil—its low smoke point can burn the coating.
Can I bake instead of fry?
For a lighter version, bake at 400°F for 35-40 minutes on a wire rack. The texture won’t be as crispy, but it’s still delicious. Turn halfway through for even browning.

- Jollof Rice Sauce Recipe: West African Tomato and Spice Infusion - September 25, 2026
- Japanese Rice Soup Recipe: Umami-Rich Comfort in a Bowl - September 25, 2026
- Homemade Cream Of Rice Recipe: Silk-Smooth Breakfast in Minutes - September 25, 2026