
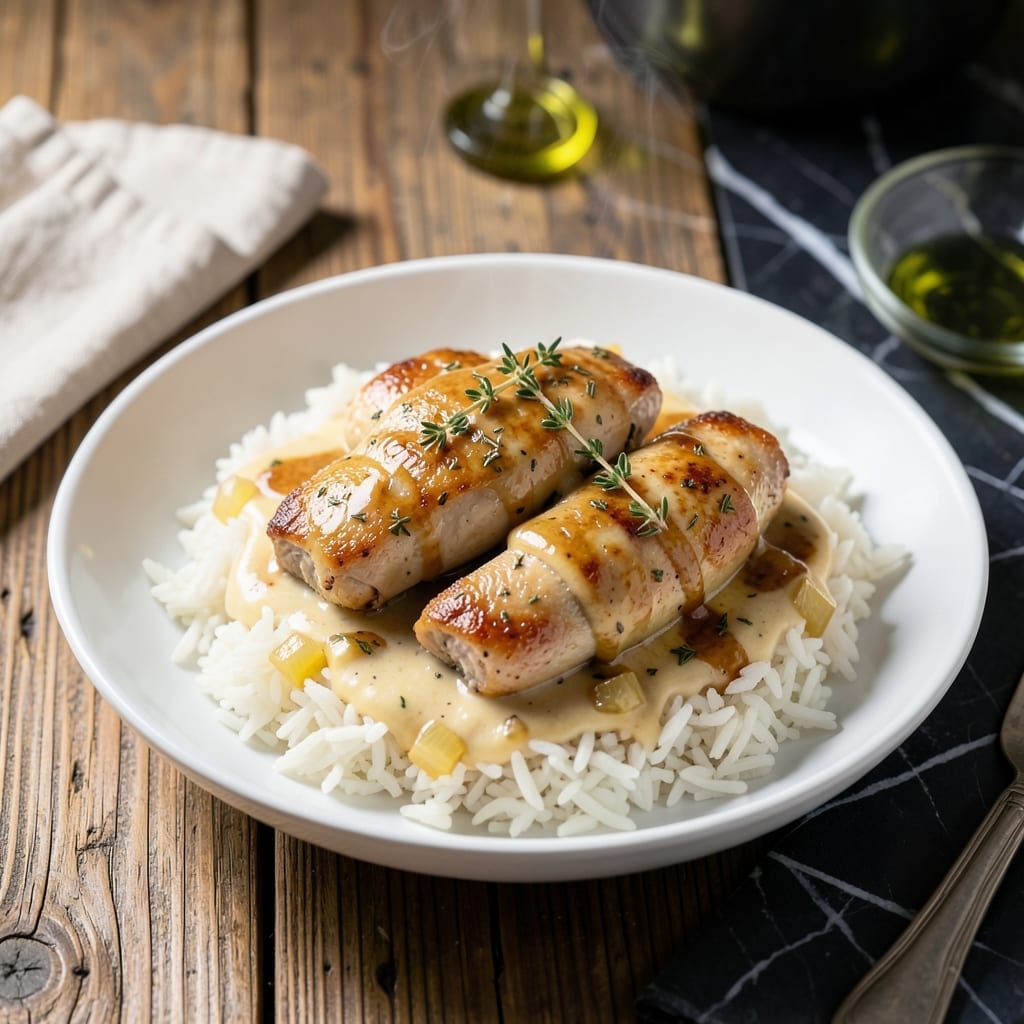
There’s a reason this one-pot meal became my go-to for busy nights. The Instant Pot transforms simple ingredients into creamy, flavorful comfort without the fuss of stovetop monitoring.
With tender chicken, perfectly cooked rice, and a velvety sauce that coats every bite, this dish delivers comfort in under an hour. No babysitting required—just set it and let the pressure cooker do the work.
Ingredients for Creamy Chicken and Rice Instant Pot
Simple, high-quality ingredients transform into creamy, comforting perfection in one pot.
| Ingredient | Amount | Notes |
|---|---|---|
| Boneless, Skinless Chicken Thighs 🍗 | 1 ½ lb | Trimmed of excess fat |
| Long-Grain White Rice 🍚 | 1 ½ cups | Uncooked, rinsed thoroughly |
| Chicken Broth 💧 | 2 ½ cups | Low-sodium preferred |
| Heavy Cream 🥛 | ½ cup | Full-fat for creaminess |
| Unsalted Butter 🧈 | 2 tbsp | Divided for sautéing and finishing |
| Yellow Onion 🧅 | 1 whole | Medium, finely diced |
| Garlic Cloves 🧄 | 3 cloves | Minced for depth of flavor |
| Dried Thyme 🌿 | 1 tsp | Or substitute fresh thyme |
| Dried Rosemary 🍃 | 1 tsp | Crushed to release aroma |
| Kosher Salt 🧂 | 1 ½ tsp | Diamond Crystal preferred |
| Ground Black Pepper 🌶️ | ½ tsp | Freshly ground preferred |
| All-Purpose Flour 🌾 | 2 tbsp | For thickening the sauce |
| Whole Milk 🥛 | ¼ cup | Optional for extra richness |
The chicken thighs are essential for that fall-apart texture—avoid breast meat as it can dry out under pressure. Costco or Whole Foods offer excellent pre-trimmed options. For the rice, jasmine or basmati work well too, but long-grain white ensures consistent results. The broth should be low-sodium to control seasoning. Always rinse the rice to remove excess starch (worth the extra minute).
No heavy cream? Half-and-half or full-fat coconut milk work in a pinch. Fresh herbs can replace dried—use three times the amount. For a gluten-free version, swap the flour for cornstarch. The butter can be omitted if needed, but the richness it adds to the sauce is hard to replicate. Trader Joe’s has great pre-minced garlic if you’re short on time.
Leftovers keep beautifully in the fridge for up to 4 days and freeze for 3 months. Reheat gently on the stovetop with a splash of broth to restore creaminess. This dish tastes even better the next day as the flavors meld (the rice soaks up more of that velvety sauce).
Why You’ll Love This Recipe
- Set It and Forget It: I toss everything in the Instant Pot, press a button, and walk away—no babysitting required. Honestly, it’s the closest thing to magic in my kitchen.
- Rich, Velvety Sauce: The mix of chicken broth, heavy cream, and butter creates this ludicrously creamy base that clings to every grain of rice and tender bite of chicken.
- Feeds My Crew Twice: Leftovers taste even better the next day, and this recipe stretches far enough for lunch the following afternoon.
- Budget-Friendly Comfort: Chicken thighs are cheaper than breasts, and a bag of rice goes a long way—this feels fancy but won’t break the bank.
Step-by-Step Instructions for Creamy Chicken and Rice
This hands-off method delivers rich, velvety texture with minimal effort and maximum flavor.
Step 1: Sauté Aromatics and Brown Chicken
Set your Instant Pot to the Sauté function. Add 1 tbsp unsalted butter and let it melt. Add the finely diced yellow onion and cook for 3-4 minutes until translucent and soft. Stir in the 3 cloves minced garlic cloves, 1 tsp dried thyme, and 1 tsp dried rosemary, cooking for 30 seconds until fragrant.
Pat the 1.5 lb boneless, skinless chicken thighs dry with paper towels, then season both sides with 1.5 tsp kosher salt and 0.5 tsp ground black pepper. Add the chicken to the pot and sear for 2-3 minutes per side until golden brown. Remove chicken and set aside.
Step 2: Build the Creamy Base
Add the remaining 1 tbsp unsalted butter to the pot, then sprinkle in the 2 tbsp all-purpose flour. Stir constantly for 1 minute to create a roux—this thickens the sauce and prevents a gummy texture. The mixture should turn a light golden color.
Slowly pour in the 2.5 cups chicken broth, whisking continuously to dissolve the roux and prevent lumps. Scrape the bottom of the pot to deglaze, ensuring all browned bits are incorporated. These fond bits add intense depth of flavor to your creation.
Step 3: Pressure Cook to Perfection
Add the 1.5 cups long-grain white rice to the pot and stir to combine. Return the seared chicken thighs to the pot, pressing them into the rice so they’re partially submerged. Secure the lid, set the valve to Sealing, and cook on High Pressure for 8 minutes.
The rice will absorb the liquid while the chicken finishes cooking. The pressure infuses every grain with the rich, savory broth and aromatic herbs. Let the pressure release naturally for 5 minutes, then quick-release any remaining pressure.
Step 4: Finish with Creamy Luxury
Open the lid and remove the chicken thighs. Stir in the 0.5 cup heavy cream and 0.25 cup whole milk until the sauce becomes smooth and velvety. The dairy enriches the dish, balancing the savory broth with a luscious, creamy finish.
Shred the chicken with two forks and return it to the pot. Stir everything together and let it sit for 2-3 minutes to thicken slightly. The sauce should coat the back of a spoon, and the rice should be tender with no bite. Adjust seasoning if needed, then serve hot.
Pro Tips For Making Creamy Chicken And Rice Instant Pot
- Sear the Chicken: Brown the chicken thighs in the Instant Pot first—about 3-4 minutes per side. I learned this the hard way: skipping this step leaves the dish tasting flat, even with all that cream and butter.
- Use the Right Ratio: Stick to a 1:1 ratio of rice to broth, and don’t exceed 1.5 cups of rice in a 6-quart pot. After a few mushy batches, I finally figured out that overcrowding is the enemy of perfect texture.
- Add Cream Last: Stir in the heavy cream after pressure cooking to prevent curdling. Sounds weird, but it works: the acidity in the broth can split the cream if it’s cooked under pressure.
- Quick Release Carefully: Let the pressure release naturally for 5 minutes, then quick release the rest. This keeps the rice from turning to mush while still saving time—yes, even if you’re impatient like me.
Essential Equipment for Perfect Results
The Instant Pot
An Instant Pot Duo 6-quart is my go-to for this recipe—it’s the perfect size for 4-6 servings and handles everything from sautéing to pressure cooking seamlessly. The sauté function is essential for building flavor with the aromatics and browning the chicken. 💡
Wooden Spoon
A sturdy wooden spoon is indispensable for deglazing the pot and scraping up all those flavorful browned bits. I prefer one with a long handle to keep my hands away from the heat. Avoid metal utensils that can scratch the non-stick coating.
Whisk
For creating a smooth roux and incorporating the flour into the butter, a balloon whisk works best. It helps prevent lumps and ensures the flour cooks evenly. A silicone whisk is a great alternative if you’re concerned about scratching your Instant Pot.
Measuring Cups
Accurate measurements are key for consistent results. I use a set of stackable measuring cups from OXO for the rice and liquids. For smaller quantities like spices, measuring spoons ensure precision without overdoing it.
Cutting Board & Knife
A sharp 8-inch chef’s knife and a stable cutting board make quick work of dicing the onion and mincing the garlic. I recommend a bamboo cutting board for its gentle surface and natural antimicrobial properties. 🔥
Two Forks
Shredding the cooked chicken is easiest with two forks—one to hold the chicken steady and the other to pull it apart. This method gives you nice, even shreds that blend perfectly into the creamy sauce.
Nutrition Facts
Frequently Asked Questions
Can I use chicken breasts instead of thighs?
Thighs stay juicier under pressure, but breasts work if cooked for only 6 minutes on high. They may dry out slightly, so add an extra 1/4 cup broth to compensate.
What if my sauce is too thin after cooking?
Simmer uncovered on Sauté mode for 3-5 minutes to thicken. For faster results, mix 1 tbsp cornstarch with 1 tbsp cold water and stir in.
Can I make this gluten-free?
Yes! Replace the flour with 2 tbsp cornstarch for thickening. Use gluten-free broth and ensure all other ingredients are certified gluten-free.
How do I prevent the rice from burning?
Deglaze the pot thoroughly after browning and ensure the rice is fully submerged in liquid. Avoid using more than 1.5 cups rice in a 6-quart Instant Pot.

- Jollof Rice Sauce Recipe: West African Tomato and Spice Infusion - September 25, 2026
- Japanese Rice Soup Recipe: Umami-Rich Comfort in a Bowl - September 25, 2026
- Homemade Cream Of Rice Recipe: Silk-Smooth Breakfast in Minutes - September 25, 2026