
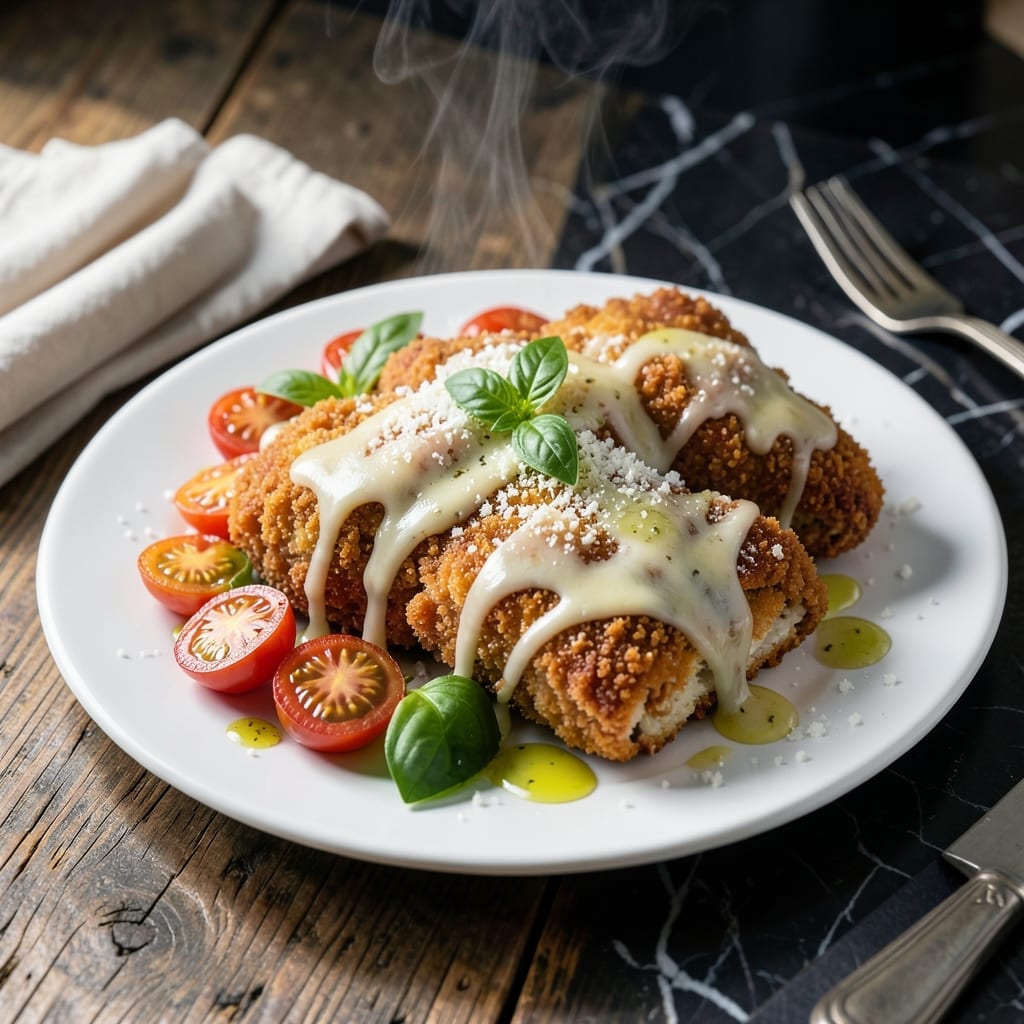
This dish delivers a crispy golden exterior with a gooey, melted cheese center that’s impossible to resist. The secret lies in the breadcrumb coating and precise baking technique.
I’ve refined this method to ensure each bite offers that perfect contrast of textures. The cheese stays perfectly melty inside while the breadcrumbs turn beautifully golden and crunchy.
What you’ll get is a professional-quality main course that looks as impressive as it tastes. The combination of crispy coating and rich cheese makes every mouthful satisfying.
Ready in under an hour, this becomes a weeknight favorite that feels special enough for guests. The results speak for themselves.
Ingredients for Crispy Cheese Chicken
Professional ingredients deliver that perfect crispy exterior with a rich, melty cheese center.
| Ingredient | Amount | Notes |
|---|---|---|
| Boneless Skinless Chicken Breasts 🍗 | 1 ½ lb | Pounded to even thickness |
| All-Purpose Flour 🌾 | ¾ cup | For initial dredging |
| Large Eggs 🥚 | 2 whole | Beaten for egg wash |
| Panko Breadcrumbs 🍞 | 1 ½ cups | For crispy coating |
| Parmesan Cheese 🧀 | ½ cup | Freshly grated from block |
| Mozzarella Cheese 🧀 | 8 oz | Shredded for melty center |
| Cheddar Cheese 🧀 | 4 oz | Shredded for extra richness |
| Olive Oil 🫒 | ¼ cup | For baking and crisping |
| Garlic Powder 🧄 | 1 tsp | For savory depth |
| Onion Powder 🧅 | 1 tsp | Enhances breadcrumb flavor |
| Dried Oregano 🌿 | 1 tsp | Italian seasoning works too |
| Salt 🧂 | 1 tsp | Diamond Crystal kosher preferred |
| Black Pepper 🌶️ | ½ tsp | Freshly ground preferred |
| Dijon Mustard 🟡 | 1 tbsp | For egg wash flavor boost |
The chicken quality is paramount for even cooking and texture. Boneless, skinless breasts from Whole Foods or Costco offer consistent thickness. Pounding to an even 1/2-inch thickness ensures uniform crisping. For the breadcrumbs, Kikkoman Panko delivers superior crunch compared to standard varieties. The cheese selection matters—freshly grated Parmesan melts more smoothly than pre-shredded.
Substitutions are possible without sacrificing texture. Chicken thighs (boneless, skinless) work well but require adjusted cooking time. For a gluten-free version, crushed cornflakes or gluten-free panko replace breadcrumbs. The cheese blend can be customized—Pepper Jack for heat or Gruyère for nutty depth. Short on Dijon? Whole-grain mustard adds similar complexity to the egg wash.
Store raw chicken in the coldest part of the fridge and use within 2 days. The breadcrumb mixture keeps in an airtight container for 1 week. Baked chicken reheats best in a toaster oven to maintain crispness. Leftovers stay fresh for 4-5 days refrigerated or freeze for 3 months.
Why You’ll Love This Recipe
- One Pan Magic: I coat the chicken in flour, egg, and panko right in the same dish—no extra bowls to wash.
- Cheesy Crunch: That parmesan in the breading gives every bite a salty, crispy edge.
- Weeknight Hero: I serve it with salads, pasta, or even stuffed in sandwiches for lunch the next day.
- Budget Friendly: Boneless chicken breasts stretch far, and panko plus parmesan keep it affordable without sacrificing flavor.
Step-by-Step Instructions for Crispy Cheese Chicken
This method ensures a golden crust and molten cheese center with every bite.
Step 1: Prepare and Season the Chicken
Begin by pounding the 1.5 lb boneless skinless chicken breasts to an even ½-inch thickness using a meat mallet. This step guarantees uniform cooking and prevents dry spots in the final dish. Place each piece between plastic wrap to avoid tearing.
Season both sides of the chicken with the 1 tsp salt and 0.5 tsp black pepper. The even seasoning ensures every bite carries balanced flavor. Set the prepared chicken aside while you create the breading stations.
Step 2: Create the Breading Stations
Set up three shallow dishes for breading. In the first, place the 0.75 cup all-purpose flour. In the second, whisk together the 2 whole large eggs with the 1 tbsp Dijon mustard until fully combined—this adds tang and helps the coating adhere.
In the third dish, combine the 1.5 cups panko breadcrumbs, 0.5 cup Parmesan cheese, 1 tsp garlic powder, 1 tsp onion powder, and 1 tsp dried oregano. The Parmesan adds umami depth while the spices create aromatic complexity.
Step 3: Bread and Stuff the Chicken
Dredge each chicken piece in the flour, shaking off excess, then dip in the egg mixture, allowing any excess to drip off. Press into the panko mixture, coating both sides thoroughly. The pressure ensures the crumbs adhere properly for maximum crispiness.
Place about 2 oz mozzarella cheese and 1 oz cheddar cheese in the center of each breast. Fold the sides over to enclose the cheese completely, then press gently to seal. This creates the signature melty center that oozes out when cut.
Step 4: Bake to Golden Perfection
Preheat your oven to 400°F. Heat the 0.25 cup olive oil in a large oven-safe skillet over medium-high heat. When shimmering, add the breaded chicken and cook for 2-3 minutes per side until the coating turns deep golden brown.
Transfer the skillet to the preheated oven and bake for 15-20 minutes until the chicken reaches an internal temperature of 165°F. The cheese should be fully melted and bubbling slightly at the edges when properly done.
Step 5: Rest and Serve Immediately
Remove the chicken from the oven and let it rest in the skillet for 5 minutes. This brief rest allows the cheese to set slightly, preventing it from all running out when you cut into it, while the crust remains crisp.
Serve immediately while hot. The exterior should maintain its golden crunch, while the interior reveals a gooey, stretchy cheese pull with every knife cut. The contrast between the crisp coating and molten center defines this dish.
Pro Tips For Making Crispy Cheese Chicken
- Dry the Chicken: Pat the boneless skinless chicken breasts completely dry with paper towels before dredging—I learned this the hard way after my first few batches turned soggy instead of crispy.
- Chill the Coating: After breading, pop the chicken in the fridge for 15 minutes before frying. Sounds weird, but it works: the cold helps the Panko and Parmesan stick better and crisp up faster.
- Skip the Overcrowding: Fry in batches with at least an inch between pieces, or the pan temperature drops and you’ll end up with steamed, greasy chicken instead of that golden crust.
- Grate Fresh Parmesan: Use freshly grated Parmesan in the breadcrumb mix—pre-shredded has anti-caking agents that make the coating less crispy and more likely to burn.
Make-Ahead Tips for This Dish
Prep Ahead Strategy
You can prep the breading stations 1 day ahead. Mix the flour, egg wash with Dijon, and panko-cheese blend separately. Store covered in the fridge. This saves 10-15 minutes on cooking day while keeping ingredients fresh. 💡
Chicken Prep
Pound and season the chicken up to 12 hours ahead. Keep it covered in the fridge. The salt will start penetrating the meat, enhancing flavor and tenderness when you cook it later.
Assemble Before Baking
Fully bread and stuff the chicken 4-6 hours ahead. Place on a parchment-lined tray, cover loosely with plastic wrap, and refrigerate. This lets the coating set, preventing crumb loss during baking.
Freezing Option
Assemble completely (breaded and stuffed), then freeze on a tray for 1 hour before transferring to a freezer bag. Cook from frozen, adding 5-7 minutes to baking time. Perfect for emergency meals.
Reheating Tips
Revive leftovers in a toaster oven at 375°F for 8-10 minutes. This restores the crispy texture better than a microwave. Avoid overcrowding to maintain that perfect crunch. 🔥
Storage Times
Cooked chicken keeps in the fridge for 4-5 days or freezes well for up to 3 months. Label with the date to track freshness. The cheese filling actually reheats beautifully, staying creamy throughout.
Nutrition Facts
Frequently Asked Questions
Can I use chicken thighs instead of breasts?
Yes! Use boneless, skinless thighs and adjust cooking time. They stay juicier but need 5-7 extra minutes to reach 165°F. Pound them to ½-inch thickness first for even crisping.
Why did my cheese leak out during baking?
Seal edges tightly and avoid overstuffing. Use 2 oz total cheese per breast max. Chill stuffed chicken for 30 minutes before baking to help the coating set.
How do I keep the coating crispy when reheating?
Use a toaster oven at 375°F for 8-10 minutes. Microwaves make it soggy. Place on a wire rack to allow air circulation underneath.

- Jollof Rice Sauce Recipe: West African Tomato and Spice Infusion - September 25, 2026
- Japanese Rice Soup Recipe: Umami-Rich Comfort in a Bowl - September 25, 2026
- Homemade Cream Of Rice Recipe: Silk-Smooth Breakfast in Minutes - September 25, 2026