
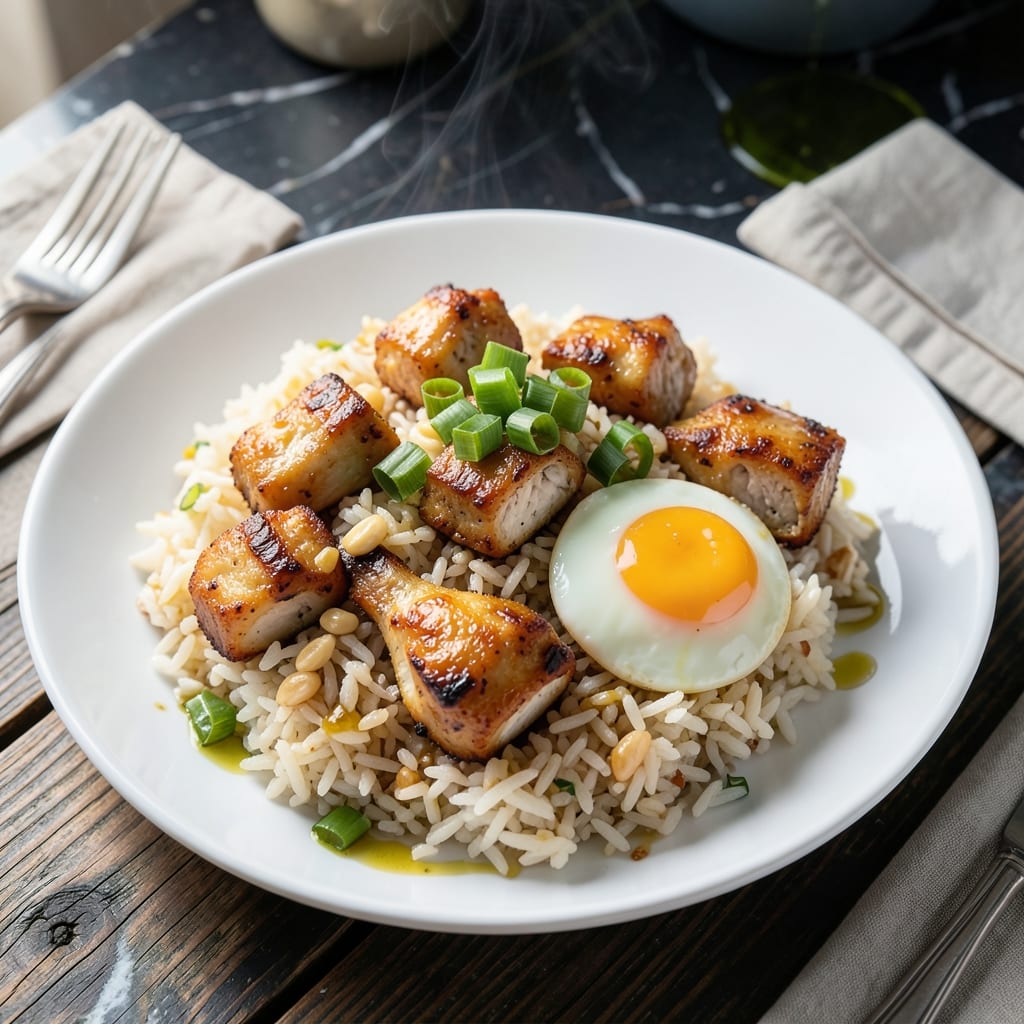
This fried rice delivers crispy chicken and garlic with every bite, using a technique I perfected in Charleston kitchens. High heat and proper timing transform simple ingredients into something extraordinary.
The secret lies in cooking the chicken in batches to avoid steaming and charring the garlic just before it meets the rice. Day-old rice is essential for achieving that signature wok-fried texture without mushiness.
Golden egg ribbons weave through each serving, adding richness and color. The dish comes together quickly once you’ve prepped your ingredients, making it ideal for busy weeknights.
Serve it hot with extra soy sauce for those who want to amplify the savory depth. This is comfort food with restaurant-quality results.
Ingredients for Crispy Garlic Chicken Fried Rice
Restaurant-quality fried rice starts with crispy chicken, charred garlic, and day-old rice for perfect texture.
| Ingredient | Amount | Notes |
|---|---|---|
| Boneless Skinless Chicken Thighs 🍗 | 1 ½ lb | Cut into 1-inch cubes |
| Day-Old Cooked White Rice 🍚 | 4 cups | Cold, preferably overnight |
| Large Eggs 🥚 | 3 whole | Lightly beaten for ribbons |
| Garlic Cloves 🧄 | 8 cloves | Minced for charring |
| Green Onions 🧅 | 4 whole | Thinly sliced, white and green parts separated |
| Soy Sauce 💧 | ⅓ cup | Low-sodium preferred |
| Oyster Sauce 🫒 | 2 tbsp | For umami depth |
| Sesame Oil 🫒 | 1 tbsp | Toasted, for finishing |
| Vegetable Oil 🫒 | ¼ cup | High smoke point for frying |
| Frozen Peas 🌱 | ¾ cup | Thawed and drained |
| Carrots 🥕 | 2 whole | Small dice, blanched |
| Fresh Ginger 🌿 | 1 tbsp | Peeled and minced |
| Kosher Salt 🧂 | ½ tsp | Plus more to taste |
| Black Pepper 🌶️ | ½ tsp | Freshly ground preferred |
| Chili Flakes 🔥 | ¼ tsp | Optional for heat |
The chicken must be bone-in, skin-on thighs for optimal crispiness—Costco or Whole Foods carry high-quality options. Day-old rice is non-negotiable; freshly cooked rice will turn mushy under high heat. For the garlic, fresh cloves are essential—avoid pre-minced jars, which lack the vibrant punch needed for charring. Look for vibrant color and firm texture when selecting ginger and garlic at the market.
No oyster sauce? Hoisin or fish sauce at half the amount works in a pinch, though the flavor profile shifts slightly. Swap chicken thighs for breasts if preferred, but expect leaner results. Frozen peas can be replaced with edamame or corn—just ensure they’re thawed and drained. For a gluten-free version, tamari instead of soy sauce maintains the umami depth without compromise.
This keeps well in the fridge for up to 4 days—reheat in a skillet to revive the crispiness. The garlic and ginger can be prepped ahead and stored in the fridge for 2 days. Cooked rice freezes beautifully for up to 3 months, making this dish a breeze for meal prep.
Why You’ll Love This Recipe
- One Pan Wonder: I love how everything—chicken, rice, eggs, garlic—comes together in a single skillet. No extra dishes, no fuss.
- Garlic Lover’s Dream: The crispy chicken and minced garlic create this deep, savory aroma that fills the kitchen. Honestly, I could eat it just for that scent alone.
- Weeknight Hero: Between us, this is my go-to when I need dinner fast. Day-old rice means no waiting, and it’s ready before the kids start asking for snacks.
- Budget Stretch: Boneless thighs and leftover rice keep costs low, and it still tastes restaurant-worthy. I’ll be real: this is the only fried rice my family requests for leftovers.
Step-by-Step Instructions for Crispy Garlic Chicken Fried Rice
Achieve perfect wok hei with this method. High heat and precise timing deliver the crispy texture promised.
Step 1: Velvet the Chicken Thighs
Cut the 1.5 lb boneless skinless chicken thighs into 1-inch cubes as specified. Toss them with 1 tablespoon of the 0.33 cup soy sauce, 1 tablespoon fresh ginger, 0.5 tsp kosher salt, and 0.5 tsp black pepper. This marinade tenderizes while adding foundational flavor.
Let the chicken sit for 15 minutes while you prep the remaining ingredients. The soy sauce will begin to break down the proteins, ensuring the pieces stay moist during the high-heat cooking process. Don’t skip this step—it’s the difference between chewy and tender chicken.
Step 2: Charr the Aromatics and Cook the Egg Ribbons
Heat a wok or large skillet over high heat until smoking. Add 0.25 cup vegetable oil and swirl to coat. Immediately add the 8 cloves minced garlic and stir constantly for 30-45 seconds until the edges turn golden brown—this creates the charred garlic flavor that defines this dish.
Push the garlic to one side and pour in the 3 whole lightly beaten eggs. Let them set for 10 seconds, then scramble gently with a spatula until they form soft, golden ribbons. Remove both the garlic and eggs to a plate—this prevents overcooking and preserves their distinct textures.
Step 3: Sear the Chicken and Vegetables
Return the wok to high heat and add the marinated chicken in a single layer. Let it sear undisturbed for 2 minutes until the bottom develops a deep golden crust. This creates the crispy texture central to the dish’s promise.
Add the 2 whole diced carrots and 0.75 cup thawed frozen peas. Stir-fry for 2-3 minutes until the chicken is cooked through and the vegetables are tender-crisp. The carrots should retain a slight bite, not turn mushy.
Step 4: Combine with Rice and Sauces
Add the 4 cups day-old cooked white rice, breaking up any clumps with your spatula. The cold rice is essential—it fries up fluffy rather than steaming into a pasty mess. Drizzle the remaining soy sauce, 2 tbsp oyster sauce, and 0.25 tsp chili flakes over the rice.
Stir-fry for 3-4 minutes until every grain is coated and the rice develops a lightly crispy texture. The wok should be hot enough that the rice sizzles audibly when tossed. This is where the wok hei (breath of the wok) flavor develops.
Step 5: Finish and Garnish
Return the reserved garlic and egg ribbons to the wok. Add the white parts of the 4 whole green onions and toss to combine. Drizzle with 1 tbsp sesame oil and stir for 30 seconds until everything is evenly incorporated and fragrant.
Transfer to a serving dish and garnish with the green onion tops. The sesame oil adds a nutty aroma that complements the charred garlic, while the green onions provide a fresh, sharp contrast. Serve immediately while the rice is at its crispiest.
Pro Tips For Making Crispy Garlic Chicken Fried Rice
- Use Cold Rice: Day-old rice from the fridge is drier and fries up crispier—fresh rice turns mushy. I learned this the hard way after making sad, soggy fried rice more times than I’d like to admit.
- Crisp the Chicken First: Cook the chicken thighs in batches over high heat until golden, then set aside. Crowding the pan steams instead of sears, and nobody wants rubbery chicken in their fried rice.
- Mince Garlic Fine: Smaller pieces of garlic brown faster and distribute better, giving you that crispy, aromatic punch in every bite. Sounds fussy, but it actually changes the outcome.
- Scramble Eggs Separately: Beat the eggs with a pinch of salt, cook them in a hot pan until just set, then chop and add back in. It’s an extra step, but it keeps them fluffy instead of disappearing into the rice.
Creative Variations of This Dish
Thai Basil Twist
Swap the green onions for 1 cup fresh Thai basil leaves, adding them at the very end. The anise-like flavor pairs beautifully with the charred garlic. I love this variation—it reminds me of street food in Charleston’s night markets. 🌿
Pineapple Sweet Heat
Add 1 cup diced fresh pineapple with the peas and carrots for a sweet, tangy contrast. The natural sugars caramelize slightly, balancing the savory soy. Use firm, slightly underripe pineapple to prevent mushiness.
Spicy Sichuan Version
Increase the chili flakes to 1 tsp and add 1 tbsp Sichuan peppercorns, toasted and ground, with the garlic. The numbing heat of Sichuan peppercorns adds a bold, authentic kick. This one’s for the heat seekers in my family. 🔥
Kimchi Fusion
Stir in 1 cup chopped kimchi with its juices during the final step. The fermented spice and tang cut through the richness. I use Mother-in-Law’s Kimchi from the Asian market—it’s the perfect funky contrast.
Lemongrass Lift
Finely mince 2 tbsp lemongrass and sauté with the garlic for a citrusy aroma. This brightens the dish and pairs well with grilled shrimp instead of chicken. A trick I picked up from a Vietnamese chef friend.
Mushroom Umami
Add 1 cup shiitake mushrooms, sliced and sautéed until golden, with the vegetables. Their earthy depth enhances the oyster sauce. Use fresh shiitakes for the best texture—they crisp up beautifully in the wok.
Nutrition Facts
Frequently Asked Questions
Why must the rice be day-old?
Fresh rice contains too much moisture and will turn mushy when stir-fried. Day-old rice dries out in the fridge, creating the perfect texture for crispy results.
Can I use chicken breast instead?
Yes, but thighs stay juicier and develop better crispiness. If using breasts, cut into small pieces and cook for 1-2 minutes less to prevent dryness.
How do I prevent the garlic from burning?
Cook it over medium-high heat first, then push it aside before adding eggs. Constant stirring for 30-45 seconds ensures charring without bitterness.
What if I don’t have a wok?
A large, heavy skillet works fine—just preheat it thoroughly. Use high heat and cook in batches to maintain temperature.

- Jollof Rice Sauce Recipe: West African Tomato and Spice Infusion - September 25, 2026
- Japanese Rice Soup Recipe: Umami-Rich Comfort in a Bowl - September 25, 2026
- Homemade Cream Of Rice Recipe: Silk-Smooth Breakfast in Minutes - September 25, 2026