
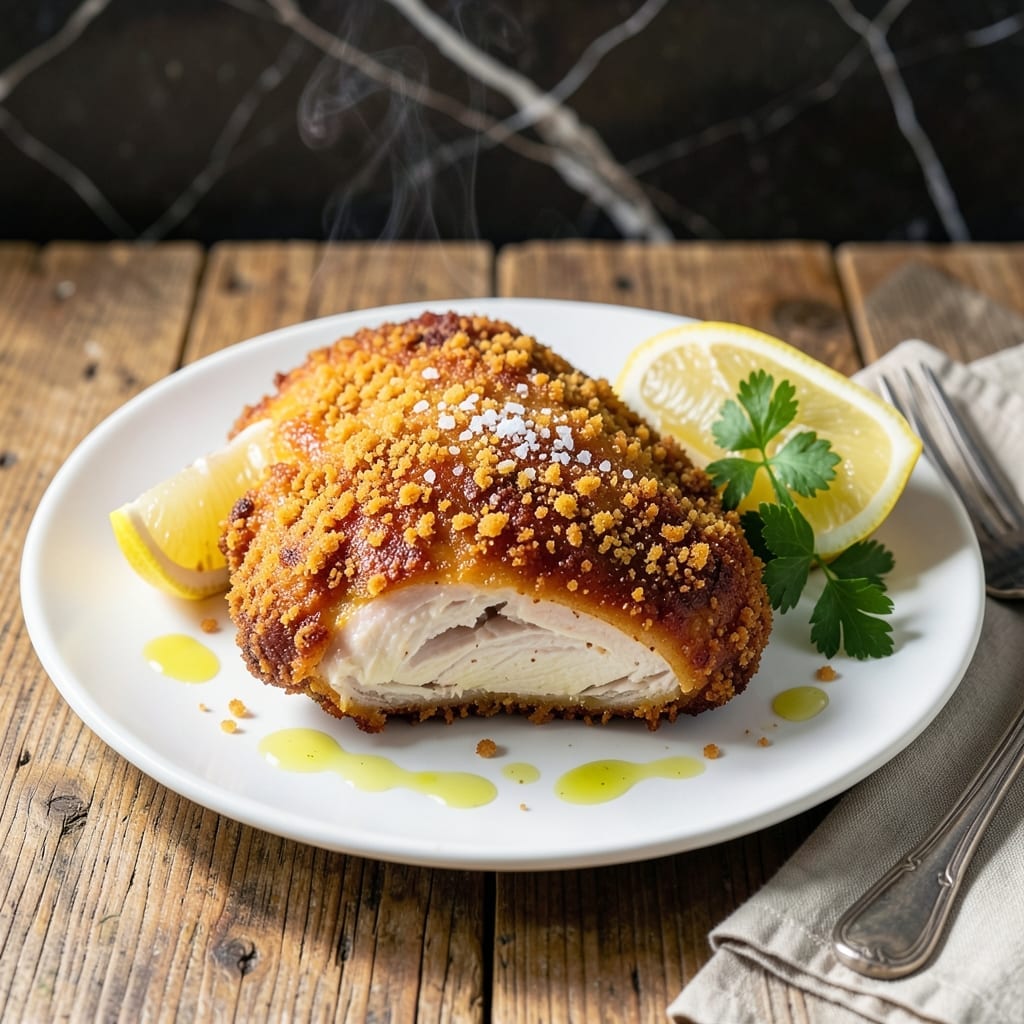
This double-coated chicken delivers golden crispiness that stays crunchy long after frying. The secret lies in a two-step breading process that creates an extra-thick, shatteringly crisp crust that locks in juicy tenderness inside.
I developed this method after years of testing to achieve restaurant-quality results at home. The first coat adheres perfectly to the chicken, while the second ensures maximum crunch with every bite. Whether you bake or fry, the technique guarantees consistent texture.
Each piece emerges with a deep golden hue and that satisfying crunch you crave. The interior remains moist and flavorful, proving that exceptional crispiness doesn’t require sacrificing tenderness.
Serve with your favorite dipping sauces and classic sides like mashed potatoes or coleslaw for a complete meal.
Ingredients for Crunchy Chicken
Double-coated magic happens with these crispy, flavorful essentials for perfect texture every time.
| Ingredient | Amount | Notes |
|---|---|---|
| Chicken Breast 🍗 | 1 ½ lb | Boneless, skinless, pounded to 1/2-inch thickness |
| All-Purpose Flour 🌾 | 1 cup | For first breading coat |
| Large Eggs 🥚 | 2 whole | Beaten for egg wash |
| Buttermilk 🥛 | ½ cup | For extra crispiness in first coat |
| Panko Breadcrumbs 🍞 | 2 cups | Japanese-style for maximum crunch |
| Cornstarch 🌽 | ¼ cup | Mixed with panko for crispier texture |
| Paprika 🌶️ | 1 tbsp | Sweet or smoked for color and flavor |
| Garlic Powder 🧄 | 1 tsp | For seasoning breading |
| Onion Powder 🧅 | 1 tsp | For seasoning breading |
| Salt 🧂 | 1 tsp | Kosher or sea salt |
| Black Pepper 🌶️ | ½ tsp | Freshly ground preferred |
| Vegetable Oil 🫒 | 2 cups | For deep frying |
| Cayenne Pepper 🔥 | ¼ tsp | Optional for subtle heat |
The chicken is everything here. Boneless, skinless breasts work best—pound them to even thickness so they cook uniformly. Grab thighs if you prefer juicier dark meat (they’ll stay moist even if slightly overcooked). For the panko, Kikkoman is my go-to brand—it’s consistently crispy and widely available at most supermarkets.
No buttermilk? Milk plus 1 tbsp vinegar or lemon juice (let it sit 5 minutes) gets you close. Swap panko for regular breadcrumbs in a pinch, but the texture won’t be as crunchy. Fresh garlic? Mince 2 cloves and mix into the flour for extra flavor. The cornstarch is key—don’t skip it (that’s what gives the coating its shatter).
Double-coated chicken keeps in the fridge for 1-2 days before cooking. Leftovers? Reheat in a 375°F oven for 10-15 minutes to revive the crunch. Freeze uncooked breaded pieces on a tray first, then transfer to a bag—they’ll keep for 3 months.
Why You’ll Love This Recipe
- Ready in 30: No fancy techniques—just dip, coat, and bake. The buttermilk and panko do all the work.
- That Perfect Crunch: Panko breadcrumbs give it a shatteringly crisp coating while the chicken stays juicy inside.
- Feeds Everyone: I make a big batch for Sunday dinner, then repurpose leftovers into salads or wraps all week.
- Pantry Staples: Between us, I always have these ingredients on hand. No last-minute grocery runs for this one.
Step-by-Step Instructions for Crunchy Chicken
Here’s the method that guarantees ultra-crispy, golden results every single time.
Step 1: Prep and Season the Chicken
Start by patting the 1.5 lb Chicken Breast completely dry with paper towels. I can’t emphasize this enough—moisture is the enemy of crispiness. Season both sides evenly with the 1 tsp Salt and 0.5 tsp Black Pepper, pressing the seasoning into the meat so it adheres well.
For even cooking and maximum surface area for that crunchy coating, pound the chicken to an even ½-inch thickness using a meat mallet. This ensures each piece cooks through at the same rate without any dry spots.
Step 2: Create the Double-Coating Station
Set up a breading station with three shallow dishes. In the first, whisk together the 1 cup All-Purpose Flour and 0.5 cup Buttermilk until smooth. This thick, glue-like mixture will create the first adhesion layer for maximum crunch.
In the second dish, beat the 2 whole Large Eggs until fully combined. In the third, mix the 2 cups Panko Breadcrumbs, 0.25 cup Cornstarch, 1 tbsp Paprika, 1 tsp Garlic Powder, 1 tsp Onion Powder, and 0.25 tsp Cayenne Pepper until evenly distributed. The cornstarch in the panko mixture is the secret to that extra-crispy texture.
Step 3: Double-Coat for Maximum Crunch
Dredge each piece of chicken through the flour-buttermilk mixture, coating completely and letting any excess drip off. Then dip it into the beaten eggs, ensuring full coverage. Finally, press the chicken firmly into the panko mixture, turning to coat all sides completely.
I like to press down gently on each piece to really work the crumbs into all the nooks and crannies. This double-coating technique creates that thick, shatteringly crisp crust that stays crunchy even after frying. Place the coated chicken on a wire rack while you finish breading the rest.
Step 4: Fry to Golden Perfection
Heat the 2 cups Vegetable Oil in a deep, heavy-bottomed skillet over medium-high heat to 350°F. Use a deep-fry thermometer to monitor the temperature—it’s crucial for that perfect golden color without burning the coating.
Carefully lower 1-2 pieces of chicken into the hot oil, depending on the size of your pan. Don’t overcrowd—the oil temperature will drop too much, resulting in greasy rather than crispy chicken. Fry for 4-5 minutes per side until deep golden brown and the internal temperature reaches 165°F.
Transfer the cooked chicken to a wire rack set over a baking sheet to drain. This allows air to circulate around the entire piece, preventing the crust from getting soggy. Let it rest for 2-3 minutes before serving to allow the juices to redistribute.
Pro Tips For Making Crunchy Chicken
- Double Dredge: Dip the chicken in flour, then buttermilk, then back in flour before the egg wash and panko—this creates extra layers for maximum crunch.
- Press the Panko: After coating, press the panko firmly into the chicken so it sticks better and forms a thicker, crispier crust.
- Rest Before Frying: Let the breaded chicken rest for 10 minutes before frying so the coating sets and doesn’t fall off in the oil.
- Use Cold Buttermilk: Keep the buttermilk ice-cold—it helps the coating cling better and keeps the chicken juicier during frying.
Wine and Beer Pairings for This Dish
Crisp White Wines
A dry Sauvignon Blanc from New Zealand cuts through the richness with its bright acidity and citrus notes. I love how the grassy, herbal undertones complement the garlic and onion in the breading. Serve chilled at 45-50°F for maximum refreshment. 🍷
Light Red Options
For red wine lovers, try a chilled Pinot Noir from Oregon. Its light body and red fruit flavors won’t overpower the chicken’s crispiness. The subtle earthiness pairs well with the paprika and cayenne in the coating.
Classic Beer Pairings
A crisp American lager like Budweiser or Coors is my go-to choice—the carbonation cleanses your palate between bites. The mild bitterness balances the richness perfectly.
Craft Beer Alternatives
For more flavor, try a wheat beer like Blue Moon with its citrus notes. Or go for a pale ale such as Sierra Nevada—its floral hops complement the breading’s spices without overwhelming them. 🍺
Non-Alcoholic Choices
Sparkling lemonade with fresh mint offers a refreshing alternative. The effervescence mimics beer’s palate-cleansing quality, while the sweetness balances any spiciness from the cayenne. Serve over ice for maximum crispness.
Nutrition Facts
Frequently Asked Questions
Why use panko instead of regular breadcrumbs?
Panko creates a lighter, crispier crust because its larger flakes absorb less oil. Regular breadcrumbs can make the coating denser and less crunchy.
Can I bake instead of fry?
Yes! Bake at 400°F on a wire rack for 20-25 minutes, flipping halfway. Spray with oil first for extra crispiness.
How do I keep it crunchy after cooking?
Place cooked pieces on a wire rack, not a paper towel. This prevents steam from making the coating soggy.
What if my coating falls off?
Press firmly when breading and let each coat set for 1-2 minutes before frying. Chill breaded pieces for 15 minutes first for better adhesion.

- Jollof Rice Sauce Recipe: West African Tomato and Spice Infusion - September 25, 2026
- Japanese Rice Soup Recipe: Umami-Rich Comfort in a Bowl - September 25, 2026
- Homemade Cream Of Rice Recipe: Silk-Smooth Breakfast in Minutes - September 25, 2026