
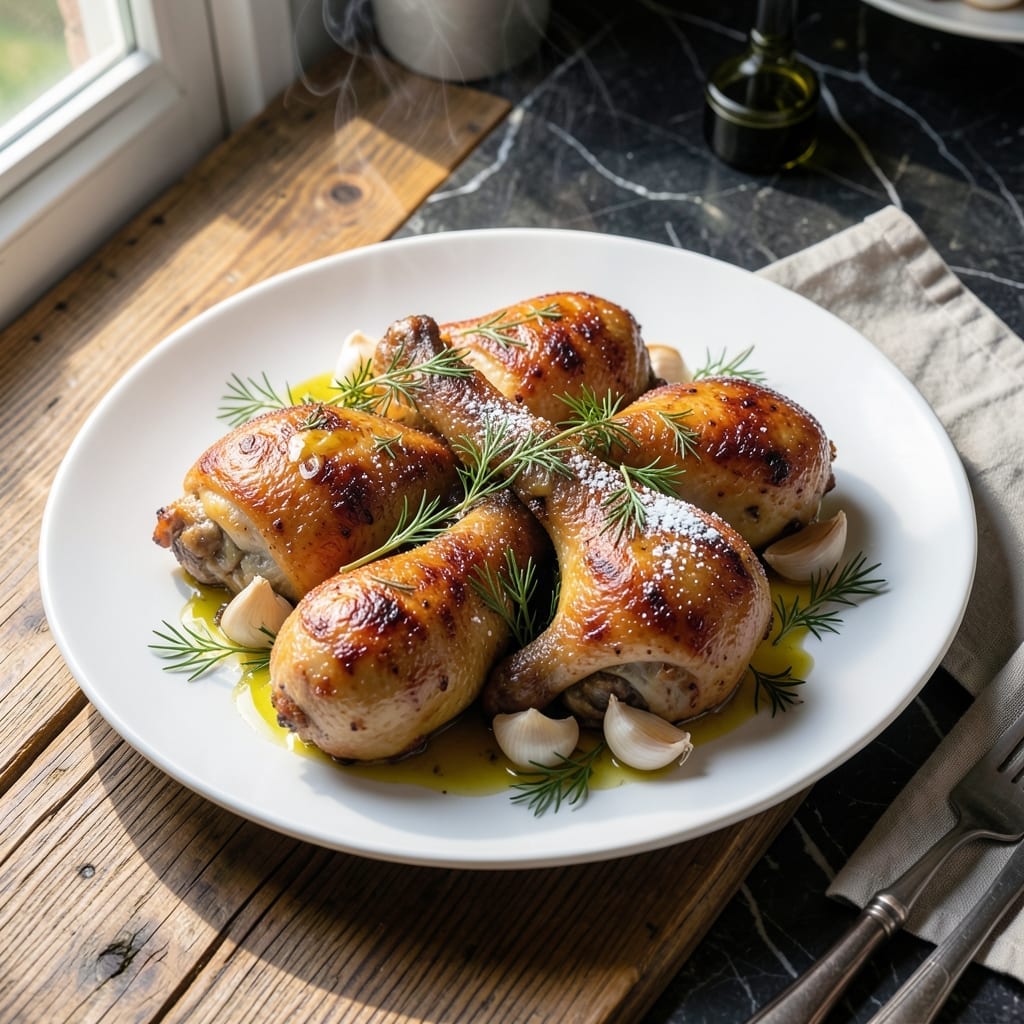
There’s something deeply satisfying about a skillet meal that brings Nordic comfort to your table. This dish combines tender chicken with a blend of herbs that define Danish home cooking.
The preparation is straightforward yet delivers restaurant-quality results. Simple ingredients come together in one pan, creating a meal that’s both hearty and elevated.
You’ll enjoy the aroma of fresh dill and thyme as the chicken sears to golden perfection. The herbs infuse every bite with that distinct Scandinavian warmth.
Serve this with buttered potatoes or rye bread to soak up every last bit of the savory juices. A complete meal that feels like a hug in food form.
Ingredients for Danish Chicken
Pantry staples meet fresh herbs for that cozy Nordic skillet magic.
| Ingredient | Amount | Notes |
|---|---|---|
| Chicken Thighs 🍗 | 1 ½ lb | Boneless, skin-on preferred |
| Fresh Dill 🌿 | ¼ cup | Chopped, stems removed |
| Fresh Thyme 🍃 | 2 tbsp | Leaves stripped from stems |
| Unsalted Butter 🧈 | 4 tbsp | For searing and basting |
| All-Purpose Flour 🌾 | ¼ cup | For light dusting |
| Garlic Cloves 🧄 | 4 cloves | Minced for depth |
| Shallot 🧅 | 1 whole | Finely diced |
| Chicken Stock 💧 | ½ cup | Low-sodium preferred |
| Dijon Mustard 🟡 | 1 tbsp | For tangy finish |
| Heavy Cream 🥛 | ¼ cup | For velvety sauce |
| Lemon 🍋 | 1 whole | Zested and juiced |
| Olive Oil 🫒 | 1 tbsp | For initial searing |
| Kosher Salt 🧂 | 1 tsp | Plus more to taste |
| Black Pepper 🌶️ | ½ tsp | Freshly ground |
The chicken thighs are the star here—skin-on, bone-in gives you that crispy, golden crust (boneless works too, just watch the cooking time). I grab mine from Whole Foods or a trusted local butcher. The fresh herbs are non-negotiable: look for bright green dill and thyme with no wilted leaves. Most grocery stores carry them year-round, but farmers markets have the best flavor in spring and summer.
No fresh dill? Dried dill at one-third the amount—but fresh really makes this dish sing. Swap thyme for rosemary if that’s what’s in your garden. Chicken stock can be vegetable stock in a pinch, though the flavor changes slightly. For the cream, full-fat is key (trust me on this one). Short on time? Use pre-minced garlic, but fresh tastes brighter.
This reheats like a dream—flavors deepen overnight. Keeps in the fridge for 3-4 days or freezes for 2 months. Leftovers make killer sandwiches on that rye bread mentioned earlier (don’t skip the butter).
Why You’ll Love This Recipe
- One Pan Wonder: I love that everything cooks together—just sear the thighs, toss in butter and herbs, and let the oven do the work.
- Herb-Butter Magic: The dill and thyme melt into the butter, creating this rich, aromatic sauce that coats every bite of tender chicken.
- Feeds a Crowd: Six thighs fit perfectly in my skillet, so it’s ideal for family dinners or when friends pop over unexpectedly.
- Leftovers? No Problem: Honestly, the flavors taste even better the next day—shred it for sandwiches or serve it cold with a salad.
Step-by-Step Instructions for Nordic Herb-Infused Chicken
Here’s how I make this dish with crispy skin and a creamy herb sauce.
Step 1: Season and Sear the Chicken Thighs
Pat the 1.5 lb chicken thighs dry with paper towels—this is non-negotiable for crispy skin. Season both sides with 1 tsp kosher salt and 0.5 tsp black pepper, pressing the seasoning into the meat so it adheres well.
Heat 1 tbsp olive oil in a large skillet over medium-high heat until shimmering. Add the chicken thighs skin-side down and sear undisturbed for 6-7 minutes until the skin is deep golden brown and crispy. Don’t peek—you’ll know it’s ready when it releases easily from the pan.
Step 2: Build the Herb and Aromatic Base
Transfer the chicken to a plate and reduce heat to medium. In the same skillet, melt 2 tbsp unsalted butter and add the 1 finely diced shallot. Cook for 2 minutes until softened, then add the 4 minced garlic cloves, 0.25 cup chopped fresh dill, and 2 tbsp fresh thyme leaves.
Stir constantly for 1 minute until the herbs become fragrant—this is where the Nordic magic happens. The aroma should be bright and fresh, not burnt. Sprinkle in the 0.25 cup all-purpose flour and stir for 30 seconds to create a light roux that thickens the sauce.
Step 3: Deglaze and Create the Creamy Sauce
Pour in the 0.5 cup chicken stock and scrape up all the browned bits from the bottom of the pan with a wooden spoon. These bits are packed with flavor. Stir in the 1 tbsp Dijon mustard, then the 0.25 cup heavy cream.
Let the sauce simmer for 3-4 minutes until it thickens enough to coat the back of a spoon. Squeeze in the juice from 1 whole lemon and add its zest for a bright, citrusy finish. Taste and adjust seasoning with more salt if needed.
Step 4: Finish and Serve
Return the chicken to the skillet, skin-side up, along with any accumulated juices. Add the remaining 2 tbsp unsalted butter and spoon the sauce over the chicken. Simmer for 2-3 minutes until the sauce is glossy and the chicken is heated through.
Serve the chicken hot, spooning extra sauce over the top. The skin should stay crispy while the meat remains juicy and tender. Each bite delivers the earthy herbs, tangy mustard, and rich cream sauce that make this dish so comforting.
Pro Tips For Making Danish Chicken
- Brown the Thighs Well: Get the skin deeply golden in the butter before adding herbs—this builds the rich base flavor that defines the dish.
- Use Room-Temp Butter: Let the unsalted butter soften for 30 minutes first so it melts evenly and coats the chicken without pooling.
- Skip Dried Herbs: Fresh dill and thyme lose their punch when dried, and their bright, grassy notes are what make this recipe sing.
- Thicken at the End: Stir in a tablespoon of flour at the finish to tighten the buttery pan sauce into a glossy, clingy consistency.
Common Mistakes When Making This Dish
Skipping the Drying Step
Never skip patting the 1.5 lb chicken thighs completely dry before seasoning. Wet skin steams instead of searing, leaving you with rubbery, pale skin instead of that deep golden brown crispiness we all love. I use paper towels and press firmly. 💡
Overcrowding the Pan
Cook the chicken in batches if needed—crowding the pan lowers the temperature, causing the meat to steam. Give each piece 2 inches of space for proper browning. This ensures even cooking and that perfect crispy skin we’re after.
Burning the Garlic
Garlic burns easily, turning bitter in seconds. After adding the 4 minced garlic cloves, keep the heat at medium and stir constantly for just 1 minute. The moment it turns golden, add the next ingredient. Burnt garlic ruins the entire dish.
Underestimating Sauce Thickness
Don’t rush the sauce—it needs 3-4 minutes of simmering to thicken properly. If it’s too thin, the flavors won’t cling to the chicken. I test by coating the back of a spoon—if it stays put, it’s ready for the chicken to return.
Neglecting the Rest
Let the chicken rest in the sauce for 2-3 minutes off heat before serving. This lets the juices redistribute and the flavors meld. Skipping this makes the meat dry and the sauce unevenly distributed.
Using Cold Cream
Always use room-temperature 0.25 cup heavy cream to prevent curdling. I take mine out of the fridge 30 minutes before cooking. Cold cream can cause the sauce to separate, leaving you with an unappetizing, broken texture. ✨
Nutrition Facts
Frequently Asked Questions
Can I use chicken breasts instead?
Yes, but adjust cooking time to 5-6 minutes per side. Breasts dry out faster than thighs, so monitor closely. The flavor will be milder since they lack the richness of dark meat.
What if I don’t have fresh herbs?
Use dried herbs at one-third the amount. For 0.25 cup fresh dill, try 1 tbsp dried. The flavor won’t be as bright, but it’ll still work in a pinch.
Can I make this ahead of time?
The dish reheats beautifully. Store in an airtight container for 3-4 days in the fridge. Reheat gently on the stove to maintain sauce consistency.
Is the sauce supposed to be thick?
Yes, it should coat the back of a spoon. If too thin, simmer for 1-2 extra minutes. If too thick, add a splash of stock to loosen it up.

- Jollof Rice Sauce Recipe: West African Tomato and Spice Infusion - September 25, 2026
- Japanese Rice Soup Recipe: Umami-Rich Comfort in a Bowl - September 25, 2026
- Homemade Cream Of Rice Recipe: Silk-Smooth Breakfast in Minutes - September 25, 2026