
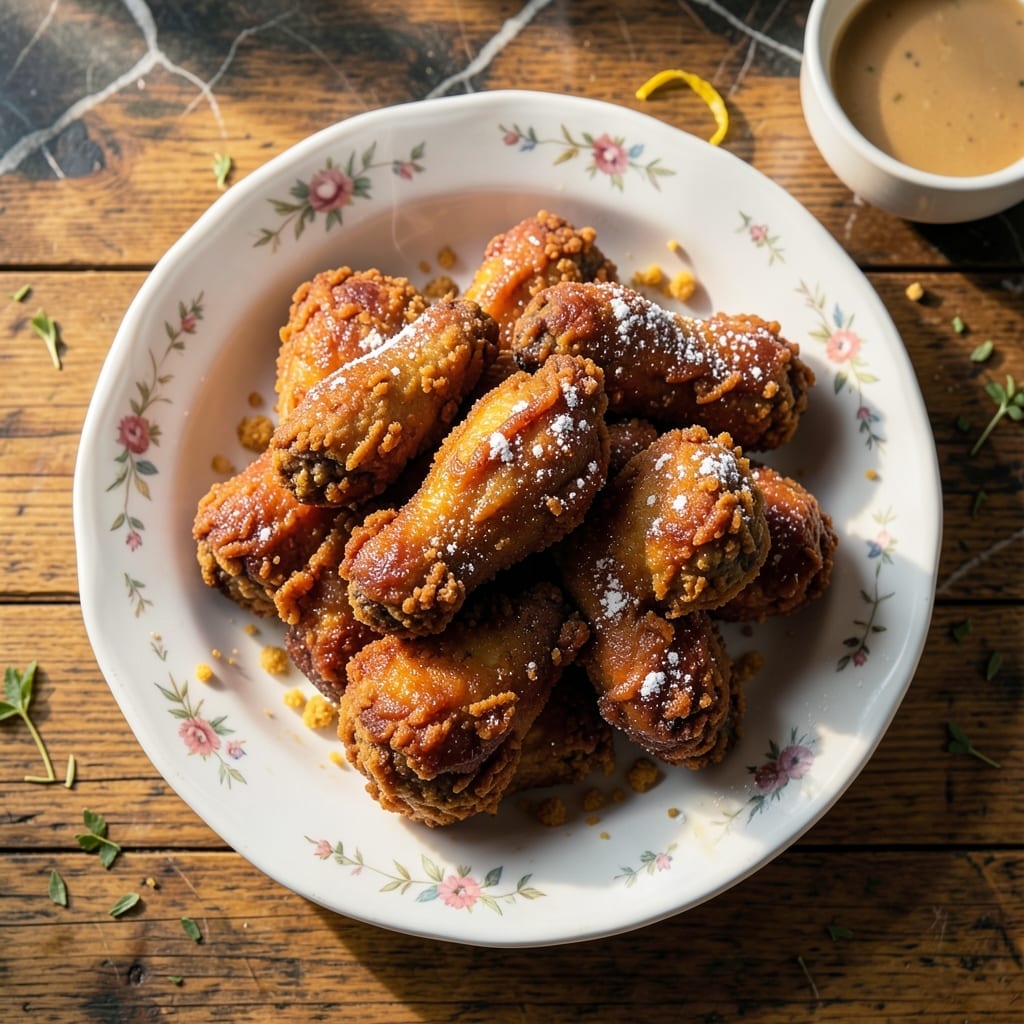
I’ve cracked the code to recreating Disney’s iconic fried chicken at home, with that signature crispy coating that shatters at first bite. This recipe captures the magic of the parks without the wait.
The secret lies in a double-dredging method and a carefully spiced flour blend that delivers unmatched crunch. A buttermilk soak ensures the chicken stays juicy inside while achieving that golden, theme-park-worthy exterior.
Cooked to a perfect 350°F until deep golden brown, each piece emerges with a coating so crispy it rivals the original. The flavor is nostalgic, familiar, and utterly satisfying.
Serve hot for the full experience, and watch it disappear faster than a FastPass line.
Ingredients for Disney Fried Chicken
These ingredients deliver that theme-park crispiness and juicy interior you remember from the parks.
| Ingredient | Amount | Notes |
|---|---|---|
| Chicken Thighs 🍗 | 2 ½ lb | Boneless, skin-on, cut into pieces |
| Buttermilk 🥛 | 2 cups | Full-fat for best tenderness |
| All-Purpose Flour 🌾 | 3 cups | Divided for double-dredging |
| Cornstarch 🌽 | ½ cup | For extra crispiness |
| Kosher Salt 🧂 | 1 tbsp | Diamond Crystal preferred |
| Black Pepper 🌶️ | 1 tsp | Freshly ground for best flavor |
| Garlic Powder 🧄 | 1 tbsp | Not garlic salt |
| Onion Powder 🧅 | 1 tbsp | Balances the spice blend |
| Paprika 🌶️ | 1 tbsp | Sweet or smoked variety |
| Cayenne Pepper 🔥 | ½ tsp | Adjust for heat preference |
| Vegetable Shortening 🫒 | 4 cups | For deep frying (Crisco recommended) |
| Large Eggs 🥚 | 2 whole | For binding the dredge |
The chicken must be skin-on, bone-in for authentic texture—thighs work better than breasts here. Costco or Sam’s Club offer bulk packs perfect for frying. For the buttermilk, full-fat is non-negotiable (the acidity tenderizes while the fat keeps it moist). The flour blend needs to be fine and fresh—King Arthur or Gold Medal are reliable. Cornstarch is the secret to that signature crunch.
No buttermilk? Whole milk plus 1 tbsp vinegar per cup works in a pinch. Swap cornstarch for arrowroot powder if needed. The spice blend can be adjusted—add 1 tsp dried thyme for depth. For frying, peanut oil (higher smoke point) is ideal, but vegetable shortening maintains that classic theme-park taste. Eggs can be omitted, but the coating won’t adhere as well.
Fry in batches to avoid crowding—this keeps the oil temp steady at 350°F. Store leftovers (if any) in the fridge for up to 4 days, but they’re best hot. Reheat in the oven on a rack to re-crisp the coating. Never microwave—soggy chicken is a disservice to the magic.
Why You’ll Love This Recipe
- I’ll be real: chicken thighs are cheap, and one batch feeds us twice—leftovers taste even better cold the next day.
- No-Fuss Coating: That buttermilk soak does half the work—just dunk, dredge, and fry while the cornstarch guarantees a shatter-crisp crust every time.
- Crispy & Juicy: The thighs stay impossibly tender inside while the salt-amplified crust delivers that theme-park crunch I crave.
- Weeknight Hero: Between us, it’s my Tuesday lifesaver: 10 minutes of prep, then hands-off frying while the kids set the table.
Step-by-Step Instructions for Theme Park Style Fried Chicken
Here’s the method. Straightforward, tested, works every time.
Step 1: Marinate the Chicken in Buttermilk
Place the 2.5 lb chicken thighs in a large bowl and pour over the 2 cups buttermilk. I always use full-fat for maximum tenderness. Make sure each piece is fully submerged—this acidic soak breaks down proteins, ensuring juicy meat.
Cover and refrigerate for at least 4 hours, but overnight is ideal. You’ll notice the buttermilk turns slightly thicker as it works its magic. This step is non-negotiable for that fall-off-the-bone texture Disney is known for.
Step 2: Prepare the Double-Dredge Seasoned Flour
In a large bowl, whisk together 3 cups all-purpose flour, 0.5 cup cornstarch, 1 tbsp kosher salt, 1 tsp black pepper, 1 tbsp garlic powder, 1 tbsp onion powder, 1 tbsp paprika, and 0.5 tsp cayenne pepper. The cornstarch is the secret to that extra crispy coating.
In a separate bowl, beat the 2 whole large eggs with ¼ cup of the buttermilk marinade to create a wash. This two-step dredging process builds layers of texture. The first coat of flour creates a base, the egg wash acts as glue, and the final flour dredge forms the crispy exterior.
Step 3: Execute the Double-Dredging Process
Remove the chicken from the buttermilk, letting excess drip off. Dredge each piece in the seasoned flour mixture, pressing firmly to adhere. Shake off excess, then dip in the egg wash, ensuring complete coverage. Finally, return to the flour mixture for a second coating.
Place the dredged pieces on a wire rack set over a baking sheet. This allows air circulation, preventing the coating from becoming soggy while you finish the batch. You should see a thick, craggy layer forming—this is what creates that signature crunch.
Step 4: Deep-Fry to Golden Perfection
In a heavy pot or Dutch oven, heat the 4 cups vegetable shortening to 350°F. Use a deep-fry thermometer for accuracy—temperature control is critical. The oil should shimmer but not smoke.
Working in batches to avoid crowding, carefully lower the chicken into the hot oil. Fry for 12-15 minutes, turning occasionally, until the coating is deep golden brown and the internal temperature reaches 165°F. The coating should audibly crackle when it hits the oil.
Drain on a wire rack (not paper towels) to maintain crispiness. The rack prevents steam from softening the underside. Let rest for 5 minutes before serving—the interior juices need time to redistribute.
Pro Tips For Making Disney Fried Chicken
- Brine the Thighs: Soak the chicken thighs in buttermilk for at least 4 hours—overnight if you can. I learned this the hard way: skipping this step leaves the meat dry and the crust doesn’t cling as well.
- Double Dredge: Dip the thighs in the flour-cornstarch mix, back into the buttermilk, then back into the dry mix. Sounds tedious, but it’s the only way to get that thick, crunchy Disney-style crust.
- Hot Oil Test: Drop a pinch of flour into the oil before frying—if it sizzles immediately, it’s ready. After burning my first batch in lukewarm oil, I now wait until it’s screaming hot, around 350°F.
- Rest on a Rack: Let the fried chicken drain on a wire rack, not paper towels. My grandmother swore by this, and she was right: it keeps the bottom crispy instead of soggy.
Storing and Reheating disney fried chicken
Refrigerator Storage
Let your chicken cool for no more than 2 hours before transferring to airtight containers. I use glass containers with locking lids to preserve that theme-park freshness. Store at 40°F or below for up to 4 days. 🥗
Freezer Storage
For longer storage, freeze cooked chicken in a single layer on a baking sheet first. Once solid, transfer to freezer bags with parchment between pieces. This prevents the coating from sticking together and lasts up to 3 months.
Oven Reheating
Preheat your oven to 400°F and place chicken on a wire rack over a baking sheet. Reheat for 10-12 minutes until crispy. This method restores the crunch better than any other. I swear by this for leftovers. 🔥
Air Fryer Method
For quick reheating, use your air fryer at 375°F for 4-5 minutes. Spray lightly with oil first to enhance crispiness. Check halfway through to ensure even heating.
Avoid the Microwave
Never microwave your fried chicken—it’ll turn the coating soggy instantly. If you must use one, place a paper towel underneath and heat in 20-second bursts, but I strongly advise against it.
Nutrition Facts
Frequently Asked Questions
What oil works best for frying?
Use vegetable shortening for authentic theme-park flavor, but peanut oil works too with its higher smoke point. Avoid olive oil—its low smoke point burns at frying temps.
Can I use chicken breasts instead?
Thighs stay juicier, but breasts work if pounded to even thickness. Reduce frying time to 10-12 minutes to prevent dryness. Always check internal temp reaches 165°F.
How do I keep the coating crispy longer?
Drain on a wire rack, never paper towels. For leftovers, reheat in a 400°F oven for 10-12 minutes to restore crunch. Skip the microwave—it ruins the texture.
Why does my coating fall off?
Common causes: skipping the egg wash or not pressing flour firmly into the meat. Let dredged pieces rest 10 minutes before frying to help adhesion.

- Jollof Rice Sauce Recipe: West African Tomato and Spice Infusion - September 25, 2026
- Japanese Rice Soup Recipe: Umami-Rich Comfort in a Bowl - September 25, 2026
- Homemade Cream Of Rice Recipe: Silk-Smooth Breakfast in Minutes - September 25, 2026