
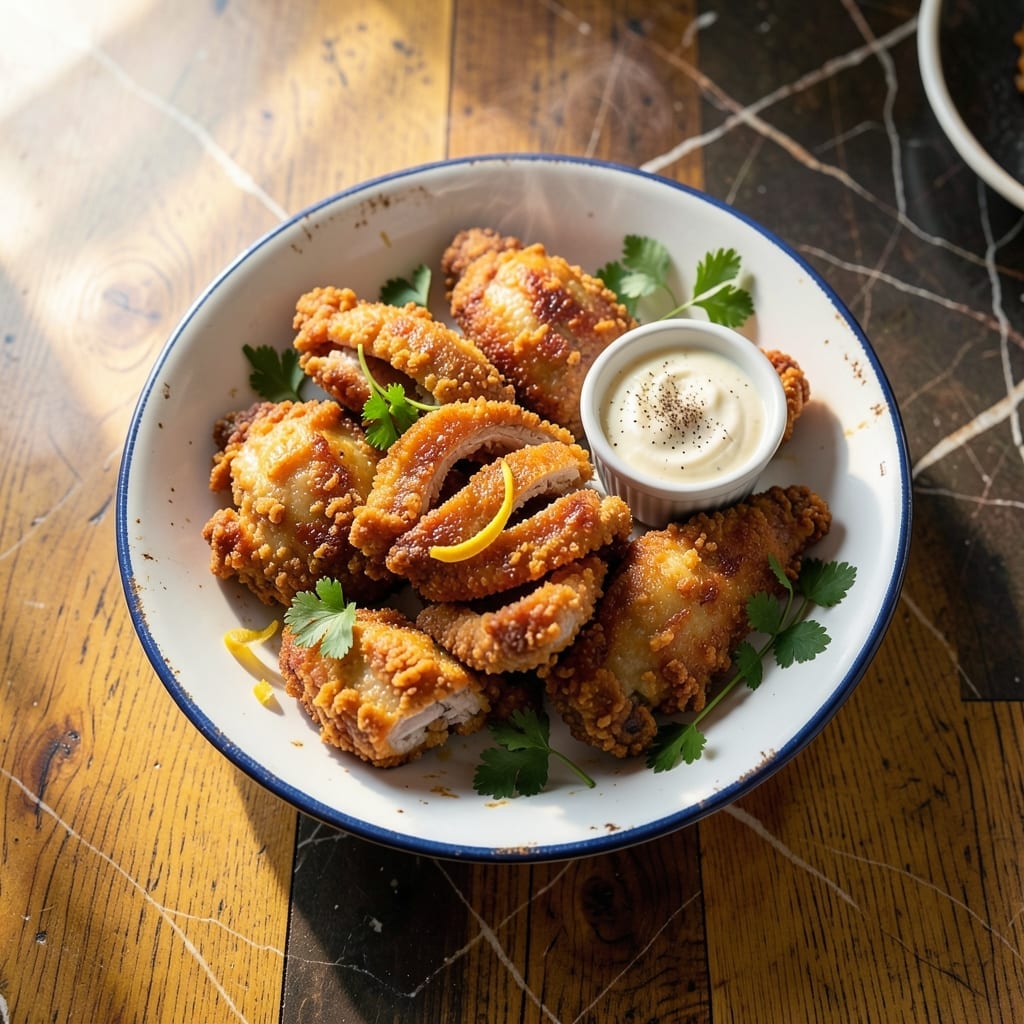
I’ve spent years chasing the exact crunch and flavor of Disneyland’s famous fried chicken, and this recipe finally delivers it at home.
This version relies on a buttermilk marinade and a double-dredge in seasoned flour to create that signature crispy, golden crust and juicy interior. The key is maintaining oil at a steady 350°F for even cooking without greasiness.
What you’ll get is chicken that’s as close to the park version as possible—tender on the inside, shatteringly crisp on the outside, and packed with savory seasoning in every bite.
Serve it hot with your favorite dipping sauces for a taste of the magic right in your kitchen.
Ingredients for Disneyland Fried Chicken
Pantry staples plus a quick stop at the butcher counter. Nothing exotic, just good stuff.
| Ingredient | Amount | Notes |
|---|---|---|
| Chicken Thighs 🍗 | 2 lb | Boneless, skinless, cut into strips |
| Buttermilk 🥛 | 2 cups | Full-fat for best marinade |
| All-Purpose Flour 🌾 | 2 ½ cups | For double dredging |
| Cornstarch 🌾 | ½ cup | For extra crispiness |
| Salt 🧂 | 1 ½ tbsp | Diamond Crystal kosher preferred |
| Black Pepper 🌶️ | 1 tbsp | Freshly ground preferred |
| Paprika 🌶️ | 1 tbsp | Sweet or smoked variety |
| Garlic Powder 🧄 | 1 tbsp | Not garlic salt |
| Onion Powder 🧅 | 1 tbsp | Fresh ground preferred |
| Cayenne Pepper 🔥 | ½ tsp | Adjust for heat preference |
| Vegetable Oil 🫒 | 4 cups | For frying, high smoke point |
| Large Egg 🥚 | 1 whole | Helps coating adhere |
The chicken makes this. Thighs stay juicier than breasts—look for skinless, boneless at Whole Foods or your local butcher. The buttermilk needs to be full-fat for the marinade to cling right (trust me on this). For the flour, all-purpose is fine, but White Lily if you can find it—it’s what they use at the park for that extra-crisp crust.
No buttermilk? Whole milk plus 1 tbsp vinegar per cup works in a pinch. Swap cornstarch for arrowroot if needed. The seasoning blend is flexible—add a pinch of MSG if you’re into that umami boost. For the oil, peanut oil is classic (higher smoke point), but vegetable or canola work too. Just don’t use olive oil—it’ll burn.
Marinate the chicken overnight if you’ve got time (worth the wait). Leftover fried chicken reheats best in the air fryer at 375°F for 5 minutes. Keeps 3-4 days in the fridge, but honestly it’s never lasted that long at my place.
Why You’ll Love This Recipe
- So Simple: I just soak the chicken in buttermilk overnight, then coat and fry—no fancy steps.
- That Crunch: The cornstarch in the flour mix gives it a shatteringly crisp crust every time.
- Feeds Everyone: I’ve served this at picnics and weeknight dinners, and it’s always the first thing gone.
- Leftovers? Yes: Honestly, the chicken stays juicy even reheated, so I make extra for easy lunches.
Step-by-Step Instructions for Theme Park Fried Chicken
Here’s how to achieve that signature crispy coating with juicy meat inside.
Step 1: Marinate the Chicken Thighs
In a large bowl, whisk together the 2 cups Buttermilk and 1 whole Large Egg until smooth. Add the 2 lb Chicken Thighs strips, ensuring each piece is fully coated. Cover and refrigerate for at least 4 hours, or overnight for maximum flavor penetration.
The buttermilk tenderizes the chicken while adding that subtle tang you expect from theme park fried chicken. Don’t skip this step—it’s what makes the meat so juicy after frying.
Step 2: Prepare the Double-Dredge Coating
In a shallow dish, combine the 2.5 cups All-Purpose Flour, 0.5 cup Cornstarch, 1.5 tbsp Salt, 1 tbsp Black Pepper, 1 tbsp Paprika, 1 tbsp Garlic Powder, 1 tbsp Onion Powder, and 0.5 tsp Cayenne Pepper. Whisk until evenly distributed.
This spice blend creates that iconic golden, crispy crust with just the right amount of warmth. The cornstarch is the secret to extra crunch—it creates a lighter, more delicate texture than flour alone.
Step 3: Coat the Chicken for Maximum Crisp
Remove the chicken from the buttermilk marinade, letting excess drip off. Dredge each piece in the flour mixture, pressing firmly to adhere. Shake off any excess, then dip back into the buttermilk, and finally dredge in the flour mixture again.
This double-dredging technique ensures a thick, craggy coating that stays crispy even after frying. Place the coated pieces on a wire rack to rest for 10 minutes—this helps the coating set before frying.
Step 4: Fry to Golden Perfection
Heat the 4 cups Vegetable Oil in a deep, heavy pot to 350°F. Use a thermometer for accuracy—this temperature ensures even cooking without burning the coating. Fry the chicken in batches to avoid overcrowding, which can lower the oil temperature.
Cook for 6-8 minutes per batch, turning occasionally, until the coating is deep golden brown and the internal temperature reaches 165°F. The chicken should float when it’s nearly done.
Transfer to a wire rack or paper towels to drain. The coating will crisp up as it cools slightly—resist the urge to pile the pieces on top of each other.
Pro Tips For Making Disneyland Fried Chicken
- Brine the Thighs: Soak the chicken thighs in buttermilk for at least 4 hours—overnight if you can. I learned this the hard way after my first batch came out dry.
- Double Dredge: Coat the chicken in flour once, dip back in buttermilk, then dredge again in flour mixed with cornstarch for that extra crispy crust.
- Hot Oil Test: Drop a pinch of flour in the oil—if it sizzles immediately, it’s ready. After burning three batches, I finally figured out this simple trick.
- Rest Before Frying: Let the dredged chicken rest for 10 minutes before frying. Sounds weird, but it works—the coating sticks better and fries up crisper.
Dietary Considerations for This Recipe
Gluten-Free Adaptation
Swap the all-purpose flour for 1:1 gluten-free baking flour (I recommend King Arthur brand). Add 1 tsp xanthan gum to help the coating bind and crisp properly. The texture will be slightly different but still delicious and safe for gluten-sensitive guests. 💪
Dairy-Free Version
Replace buttermilk with unsweetened almond milk plus 1 tbsp vinegar per cup. Use aquafaba (chickpea brine) as an egg substitute—3 tbsp replaces 1 egg. The flavor remains very close to the original.
Lower-Calorie Option
For a lighter version, bake instead of fry. Coat chicken as directed, then bake on a wire rack at 400°F for 20-25 minutes, flipping halfway. Spray with olive oil before baking for extra crispiness.
Spice-Level Adjustments
To reduce heat, omit the cayenne pepper entirely. For more kick, add ¼ tsp additional cayenne or include ½ tsp chili powder. I often adjust based on who’s eating—kids usually prefer it milder.
Allergen Notes
This recipe contains dairy (buttermilk), eggs, and gluten (flour). For nut allergies, use oat milk instead of almond milk in the dairy-free version. Always check your seasoning blends for hidden allergens. 🔍
Make-Ahead Tips
Marinate chicken up to 24 hours ahead. For best texture, fry just before serving. If pre-frying, reheat in a 375°F oven for 10-12 minutes to restore crispiness.
Nutrition Facts
Frequently Asked Questions
Why use buttermilk for marinating?
Buttermilk tenderizes the meat and keeps it juicy while adding a subtle tang. The acidity breaks down proteins, ensuring a tender bite even after frying. It also helps the coating adhere better.
Can I use chicken breasts instead of thighs?
Yes, but thighs are recommended for their juiciness. If using breasts, reduce cooking time to 5-6 minutes to prevent dryness. Brining them first can help maintain moisture.
How do I keep the coating crispy longer?
Place fried pieces on a wire rack, not paper towels, to prevent steam buildup. Reheat in a 375°F oven for 10 minutes to restore crunch if needed.
What oil works best for frying?
Peanut or vegetable oil is ideal for its high smoke point. Avoid olive oil, as it can burn at frying temperatures. Maintain oil at 350°F for even cooking.

- Jollof Rice Sauce Recipe: West African Tomato and Spice Infusion - September 25, 2026
- Japanese Rice Soup Recipe: Umami-Rich Comfort in a Bowl - September 25, 2026
- Homemade Cream Of Rice Recipe: Silk-Smooth Breakfast in Minutes - September 25, 2026