
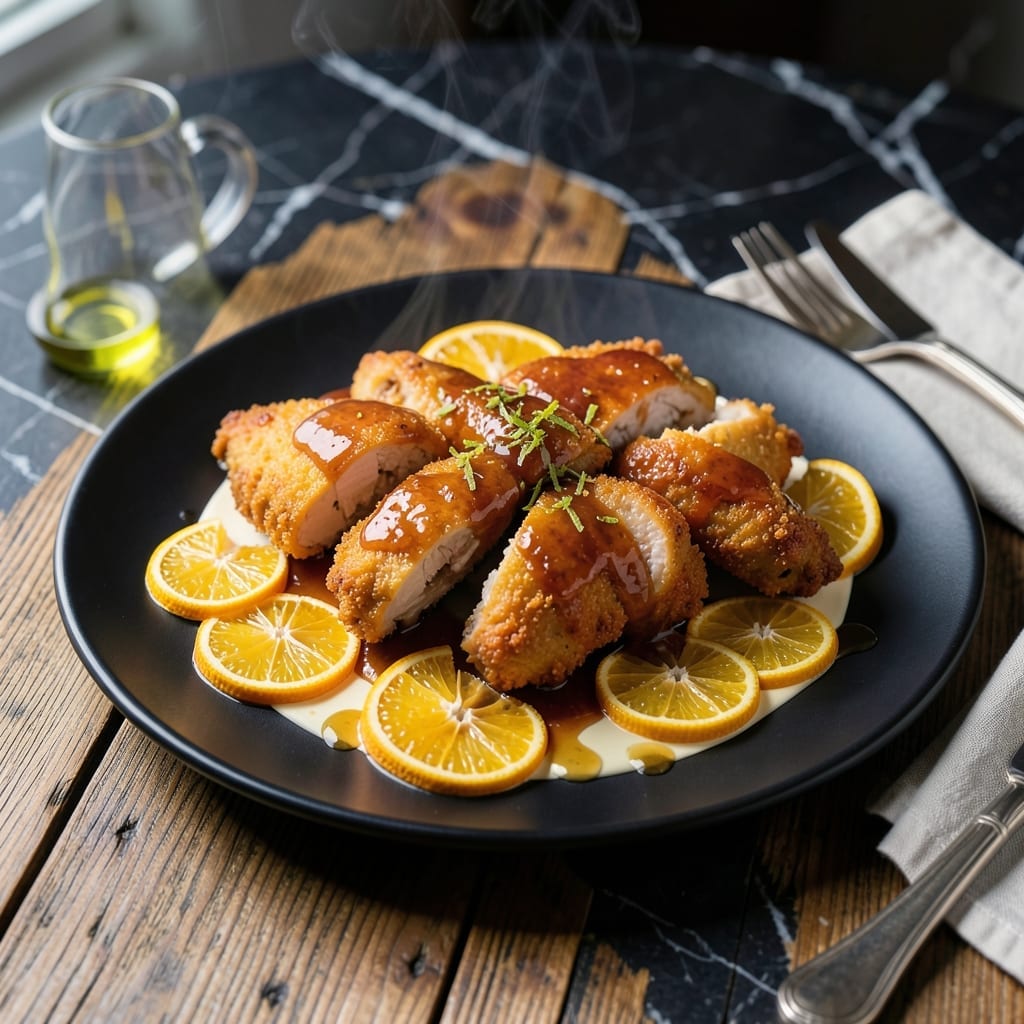
This orange chicken delivers restaurant-quality flavor in under 30 minutes—no takeout required. The secret lies in a perfectly balanced glaze that’s both tangy and sweet, with just the right amount of sticky texture to coat every piece of chicken.
I’ve streamlined the process to eliminate unnecessary steps while keeping the dish authentic. The sauce comes together quickly with fresh orange juice, soy sauce, and a touch of honey for depth. Each bite offers tender chicken pieces enveloped in a glossy, perfectly glazed finish.
Using a wok ensures even cooking and that signature crispy edge on the chicken. The high heat locks in juices while creating the ideal base for the sauce to cling to. It’s a foolproof method for achieving consistent results every time.
Serve over steamed rice with a sprinkle of sesame seeds for a complete meal that’s as satisfying as it is quick.
Ingredients for Fast Orange Chicken
Fresh ingredients come together quickly for this vibrant, restaurant-worthy dish in minutes.
| Ingredient | Amount | Notes |
|---|---|---|
| Boneless Chicken Thighs 🍗 | 1 ½ lb | Cut into bite-sized pieces |
| Fresh Orange Juice 🍊 | ¾ cup | From 2-3 large oranges |
| Orange Zest 🍊 | 1 tbsp | Finely grated |
| Soy Sauce 🥢 | ⅓ cup | Low-sodium preferred |
| Honey 🍯 | ¼ cup | For sticky glaze |
| Rice Vinegar 🍶 | 2 tbsp | Or apple cider vinegar |
| Garlic Cloves 🧄 | 3 cloves | Minced |
| Fresh Ginger 🌿 | 1 tbsp | Peeled and grated |
| Cornstarch 🌾 | ⅓ cup | For coating chicken |
| Vegetable Oil 🫒 | ½ cup | High smoke point for frying |
| Red Pepper Flakes 🌶️ | ½ tsp | Adjust for heat preference |
| Sesame Seeds 🌰 | 1 tbsp | For garnish |
| Green Onions 🧅 | 3 whole | Thinly sliced for topping |
The chicken is key here. Boneless thighs stay juicier than breasts—look for skinless at Whole Foods or your local butcher. Fresh orange juice makes a difference (bottled works in a pinch, but vibrant color means better flavor). The soy sauce should be low-sodium so you can control the salt. Cornstarch is non-negotiable for that crispy coating.
No fresh oranges? Bottled OJ at half the amount (it’s more concentrated). Swap honey for maple syrup or agave if needed. Out of rice vinegar? Apple cider vinegar works. For extra heat, add sriracha or chili paste to the sauce. The ginger can be powdered at one-third the amount, but fresh is ideal.
Store chicken in the fridge for up to 2 days before cooking. Leftovers keep for 4-5 days refrigerated or freeze for 3 months. Reheat in a skillet to maintain that crispy texture—microwaving makes the coating soggy.
Why You’ll Love This Recipe
- 20-Minute Meal: I can get this from fridge to table faster than takeout arrives. Honestly, the sauce comes together while the chicken sears.
- Zesty Sweetness: That combo of fresh orange juice and zest with honey gives it a bright, sticky-sweet flavor that beats any restaurant version.
- Feeds Everyone: It’s my go-to for weeknight dinners, potlucks, or even a quick lunchbox fill—equally good hot or cold.
- Budget Stretcher: Boneless thighs stay juicy and cost less than breasts, and a little sauce goes a long way for leftovers the next day.
Step-by-Step Instructions for Orange Chicken
This method delivers crispy chicken coated in a glossy citrus glaze with minimal effort.
Step 1: Coat and Fry the Chicken
Cut the 1.5 lb Boneless Chicken Thighs into 1-inch pieces and pat them completely dry with paper towels. Toss the chicken in the 0.33 cup Cornstarch until each piece is evenly coated and no bare spots remain.
Heat the 0.5 cup Vegetable Oil in a large skillet over medium-high heat until it shimmers. Working in batches to avoid crowding, fry the chicken for 3-4 minutes per side until golden brown and crisp. Transfer to a paper towel-lined plate.
Step 2: Sauté Aromatics for the Sauce
Carefully pour off all but 1 tablespoon of oil from the skillet. Add the 3 cloves Garlic Cloves and 1 tbsp Fresh Ginger, stirring constantly for 30 seconds until fragrant. Be careful not to let them burn.
Add the 0.5 tsp Red Pepper Flakes and cook for another 10 seconds to toast the flakes slightly. This builds the flavor base for the glaze. The garlic should be just starting to turn golden at the edges.
Step 3: Create the Orange Glaze
Pour in the 0.75 cup Fresh Orange Juice, 1 tbsp Orange Zest, 0.33 cup Soy Sauce, 0.25 cup Honey, and 2 tbsp Rice Vinegar. Stir well to combine and bring to a simmer.
Let the mixture bubble for 3-4 minutes until it thickens slightly and becomes syrupy. The glaze should coat the back of a spoon but still be pourable. Taste and adjust sweetness if needed, though the honey should provide perfect balance.
Step 4: Coat and Serve
Return all the fried chicken to the skillet with the glaze. Toss gently to coat each piece evenly, cooking for an additional 1-2 minutes until the chicken is heated through and the sauce clings beautifully.
Transfer to a serving platter and sprinkle with the 1 tbsp Sesame Seeds and 3 whole Green Onions. Serve immediately while the chicken is still crispy and the glaze is glossy. The contrast of textures is what makes this dish perfect.
Pro Tips For Making Fast Orange Chicken
- Pre-cut the chicken: Chop the boneless thighs into 1-inch pieces before cooking—they’ll cook through in 4-5 minutes instead of 10, and the sauce clings better to the smaller surfaces.
- Zest before juicing: Always zest the oranges first, then juice them—once you’ve juiced, the rind is slippery and hard to grate, and you’ll waste half the zest.
- Skip the overcrowding: Cook the chicken in batches if needed; dumping it all in at once steams the pieces instead of searing them, and you’ll end up with rubbery meat and thin sauce.
- Reduce the sauce first: Simmer the orange juice, soy sauce, and honey for 2-3 minutes before adding the chicken back in—this thickens it just enough to coat the pieces without turning into soup.
Creative Variations of This Dish
Spicy Sichuan Twist
Add 1 tbsp Sichuan peppercorns and 1 tsp chili oil to the glaze for a numbing-spicy kick. The peppercorns toast in the sauce for 1 minute before adding the chicken. This variation brings authentic Chinese takeout heat to your kitchen. 🌶️
Honey-Glazed Upgrade
Swap the honey for maple syrup and add 1 tsp vanilla extract to the sauce. This creates a deeper, caramel-like glaze that pairs perfectly with the citrus. The vanilla enhances the sweetness without overpowering.
Pineapple Sweetness
Stir in ½ cup fresh pineapple chunks during the final coating step. The fruit absorbs the sauce and adds a juicy burst with each bite. I like using Dole brand for consistent sweetness.
Low-Carb Version
Replace the cornstarch coating with almond flour for a keto-friendly crust. The texture will be slightly different but still crispy. Use ¼ cup almond flour for the same chicken quantity.
Extra Crispy
Double-coat the chicken by dipping pieces in beaten egg before the cornstarch. Fry at 350°F for 5 minutes for an ultra-crunchy exterior. This technique mimics restaurant-style texture perfectly. 💪
Kid-Friendly Mild
Omit the red pepper flakes and add 1 tbsp orange marmalade for extra sweetness. The marmalade also thickens the glaze slightly. Serve with extra orange slices on the side for dipping fun.
Nutrition Facts
Frequently Asked Questions
Can I use chicken breast instead of thighs?
Yes, but thighs stay juicier. If using breasts, reduce cooking to 2-3 minutes per side to prevent dryness. The flavor will be slightly milder but still delicious.
How do I make the sauce thicker?
Simmer the glaze for an extra 1-2 minutes beyond the recipe time. For a quick fix, mix 1 tsp cornstarch with water and stir into the sauce. It’ll thicken instantly.
What’s the best way to reheat leftovers?
Use a skillet over medium heat for 3-4 minutes, stirring occasionally. This restores crispiness better than a microwave, which makes it soggy.
Can I make this gluten-free?
Swap soy sauce for tamari and use cornstarch as directed. Ensure all other ingredients are certified gluten-free. The texture and taste remain identical.

- Jollof Rice Sauce Recipe: West African Tomato and Spice Infusion - September 25, 2026
- Japanese Rice Soup Recipe: Umami-Rich Comfort in a Bowl - September 25, 2026
- Homemade Cream Of Rice Recipe: Silk-Smooth Breakfast in Minutes - September 25, 2026