
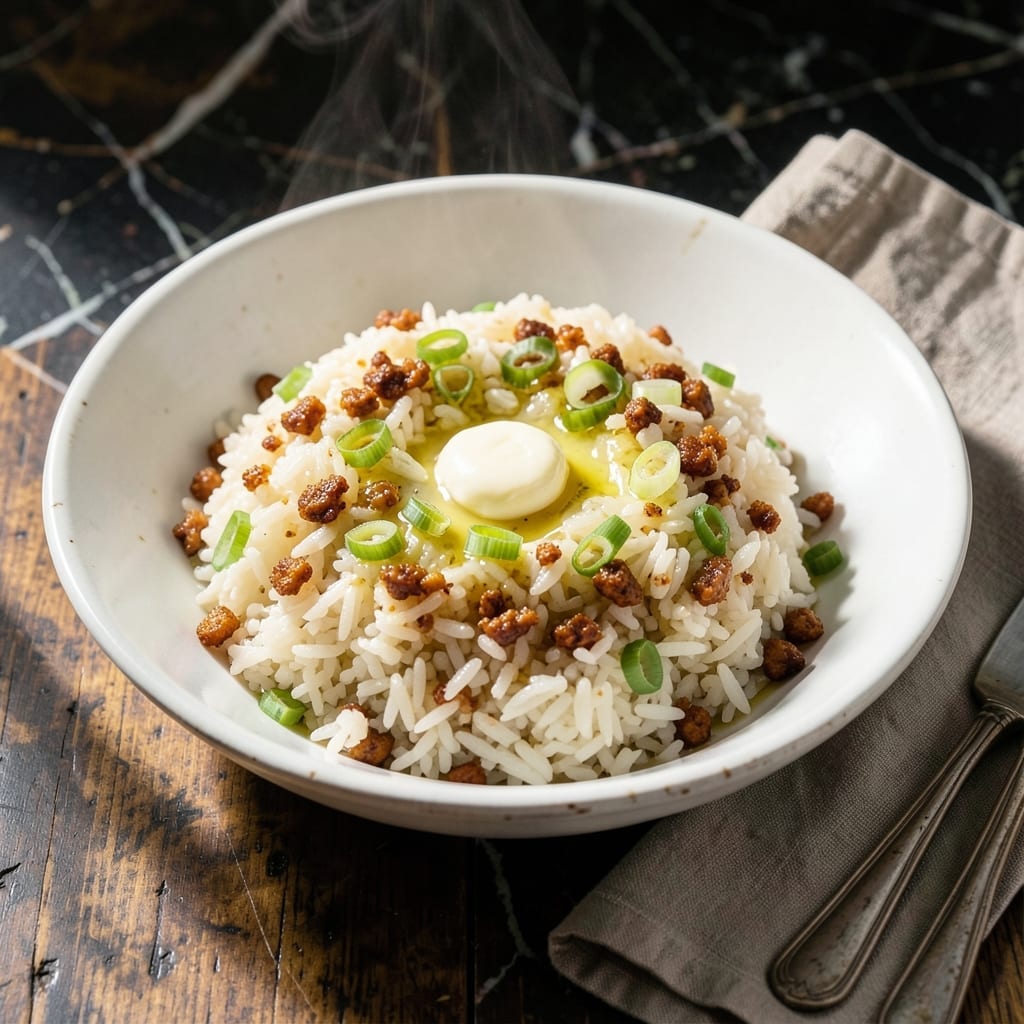
This Filipino staple transforms day-old rice into a crispy, aromatic masterpiece that elevates any meal. A breakfast essential, it pairs perfectly with eggs, meats, or as part of classic silog dishes.
The secret lies in frying minced garlic until golden, then combining it with rice cooked just right. Traditional techniques ensure each grain is infused with flavor and achieves that signature crunch.
You’ll end up with fragrant, slightly toasted rice with bits of garlic that add depth and texture. It’s simple yet deeply satisfying, proving that the best dishes often come from humble beginnings.
Ready in minutes, this dish brings authentic Filipino comfort to your table with minimal effort. Here’s how to make it right.
Ingredients for Filipino Garlic Rice
Days-old rice, garlic, and a hot pan create this Filipino breakfast classic.
| Ingredient | Amount | Notes |
|---|---|---|
| Day-Old Cooked White Rice 🍚 | 4 cups | Jasmine or long-grain preferred, chilled overnight |
| Garlic Cloves 🧄 | 8 cloves | Minced finely for even distribution |
| Neutral Cooking Oil 🫒 | ¼ cup | Vegetable or canola oil works best |
| Unsalted Butter 🧈 | 2 tbsp | Optional for richness, omit for vegan |
| Green Onions 🧅 | 3 whole | Thinly sliced for garnish |
| Sea Salt 🧂 | ½ tsp | Adjust to taste after cooking |
| Ground Black Pepper 🌶️ | ¼ tsp | Freshly cracked preferred |
| Soy Sauce 🥫 | 1 tbsp | All-purpose or light variety |
| Lime 🍋 | ½ whole | Juiced for brightness |
| Toasted Garlic Bits 🧄 | 2 tbsp | Reserved from frying for topping |
The rice is key here. Day-old jasmine or long-grain works best—it’s drier, so it fries up crispier. Most Asian markets sell it in bulk, but any grocery store will have what you need. The garlic? Fresh is non-negotiable—no jars, no shortcuts. I always grab mine from the farmers market when it’s in season (the bulbs are huge, the flavor unbeatable).
No green onions? Chives or scallions work in a pinch. Out of soy sauce? Fish sauce at half the amount adds depth (skip if vegetarian). The butter’s optional—vegan butter or more oil keeps it dairy-free without sacrificing flavor. For extra crunch, press the rice down in the pan and let it form a golden crust before flipping.
Leftover garlic rice keeps 3-4 days in the fridge, though it’s best fresh. Reheat in a dry pan to revive the crispiness. Freezing’s not ideal—it turns mushy. But honestly? It never lasts that long in my house.
Why You’ll Love This Recipe
- 5-Minute Breakfast: I can throw this together with leftover rice while my coffee brews—just garlic, butter, and a quick sizzle.
- Crispy Garlic Bites: The minced garlic fries into little golden chips that crackle between your teeth, and the butter makes it irresistibly rich.
- Pairs With Anything: It’s my go-to side for fried eggs, longganisa sausage, or even just a runny yolk on its own.
- No Waste: Day-old rice gets a second life here, so I never feel guilty about cooking extra.
Step-by-Step Instructions for Filipino Garlic Rice
Here’s the method for achieving that signature crispy texture with aromatic garlic in every bite.
Step 1: Fry the Garlic to Golden Perfection
Heat the 0.25 cup Neutral Cooking Oil in a large skillet over medium heat. Add all 8 cloves Garlic Cloves and fry for 2-3 minutes, stirring frequently, until they turn golden brown and crisp at the edges.
Watch carefully as garlic burns quickly. Using a slotted spoon, remove 2 tbsp Toasted Garlic Bits and set aside for garnish, leaving the remaining garlic and oil in the pan. This infused oil will carry deep garlic flavor throughout the dish.
Step 2: Toast the Rice for Maximum Crispiness
Add all 4 cups Day-Old Cooked White Rice to the skillet with the garlic oil. Break up any clumps with your spatula. Press the rice down firmly into the pan and let it cook undisturbed for 3-4 minutes.
You’ll hear it sizzle—that’s the sound of crispy edges forming. Resist stirring too soon; this contact with the hot pan creates the coveted crispy texture. When the bottom layer turns golden brown, it’s ready for the next step.
Step 3: Season and Create the Sauce Base
Drizzle the 1 tbsp Soy Sauce evenly over the rice. Add the 2 tbsp Unsalted Butter, 0.5 tsp Sea Salt, and 0.25 tsp Ground Black Pepper. Stir everything together, scraping up any crispy bits from the bottom.
The rice should now be uniformly coated with a glossy sheen from the soy-butter mixture. Cook for another 2 minutes, stirring constantly, until the rice is heated through and the flavors have melded.
Step 4: Finish with Brightness and Garnish
Remove the skillet from heat. Squeeze the juice from the 0.5 whole Lime over the rice and stir to distribute. The acidity cuts through the richness and brightens all the flavors.
Transfer to a serving plate and top with the reserved 2 tbsp Toasted Garlic Bits and all 3 whole Green Onions, thinly sliced. The contrast of crispy garlic, fresh green onions, and lime-kissed rice makes this dish irresistible.
Pro Tips For Making Filipino Garlic Rice
- Use Cold Rice: Day-old, cold rice from the fridge is non-negotiable—fresh rice turns mushy and sticks to the pan. I learned this the hard way after ruining two batches with warm, just-cooked rice.
- Low and Slow Garlic: Cook the minced garlic on medium-low heat until golden, not brown. After burning three batches, I finally figured out that high heat makes it bitter in seconds.
- Skip the Crowding: Spread the rice in a thin, even layer in the pan and resist the urge to stir constantly. This guarantees each grain gets crispy edges instead of steaming in a clump.
- Butter Last: Add the unsalted butter only after the garlic is cooked and the rice is heated through—about 2 minutes in. Sounds weird, but it works: the butter browns without burning, adding rich flavor without bitterness.
Best Sauces and Condiments for This Recipe
Classic Sauce Pairings
I love drizzling toyo at suka (soy sauce and vinegar) over my garlic rice for that tangy-salty kick. Mix 2 tbsp soy sauce with 1 tbsp white vinegar and a pinch of black pepper. The acidity balances the richness perfectly.
For a creamier touch, try garlic aioli—just blend ½ cup mayo with 3 minced garlic cloves and 1 tbsp lime juice. It adds a luxurious finish that pairs wonderfully with the crispy rice. 💫
Spicy Condiments
Sambal oelek or sriracha adds heat that cuts through the dish’s richness. Start with ½ tsp and adjust to taste. I keep a bottle of Huy Fong sriracha in my pantry for this exact reason.
For a Filipino twist, calamansi chili sauce brings citrusy heat. Mix 2 tbsp calamansi juice with 1 tbsp chili flakes and a touch of honey for balance.
Fresh Toppings
Fresh cilantro or parsley adds a bright, herbaceous note. Chop about ¼ cup and sprinkle right before serving. The green contrast makes the dish pop visually.
Pickled vegetables like atchara (Filipino pickled papaya) add crunch and tang. I always have a jar of Manong’s atchara in my fridge for this purpose. 🍋
Nutrition Facts
Frequently Asked Questions
Can I use freshly cooked rice instead of day-old?
Fresh rice contains too much moisture and will turn mushy when fried. For best results, use day-old rice that’s been chilled in the fridge overnight to achieve that signature crispy texture.
How do I prevent the garlic from burning?
Fry garlic over medium heat and stir constantly. Remove it from the oil as soon as it turns golden brown, which usually takes 2-3 minutes—it continues cooking even after removal.
What can I use if I don’t have soy sauce?
For a similar umami flavor, substitute with fish sauce at half the amount or coconut aminos. Skip entirely if avoiding sodium, but add extra salt to taste.
How long can I store leftovers?
Leftover garlic rice keeps well in the fridge for 3-4 days. Reheat in a dry pan over medium heat to restore crispiness, adding a splash of water if needed.

- Cream of Wild Rice Soup Recipe: Earthy Grains in Silky Broth - October 9, 2026
- Filipino Garlic Rice Recipe: Crispy Fried Aroma With Every Bite - October 9, 2026
- Gobi Manchurian Rice Recipe: Indo-Chinese Fusion in One Bowl - October 9, 2026