
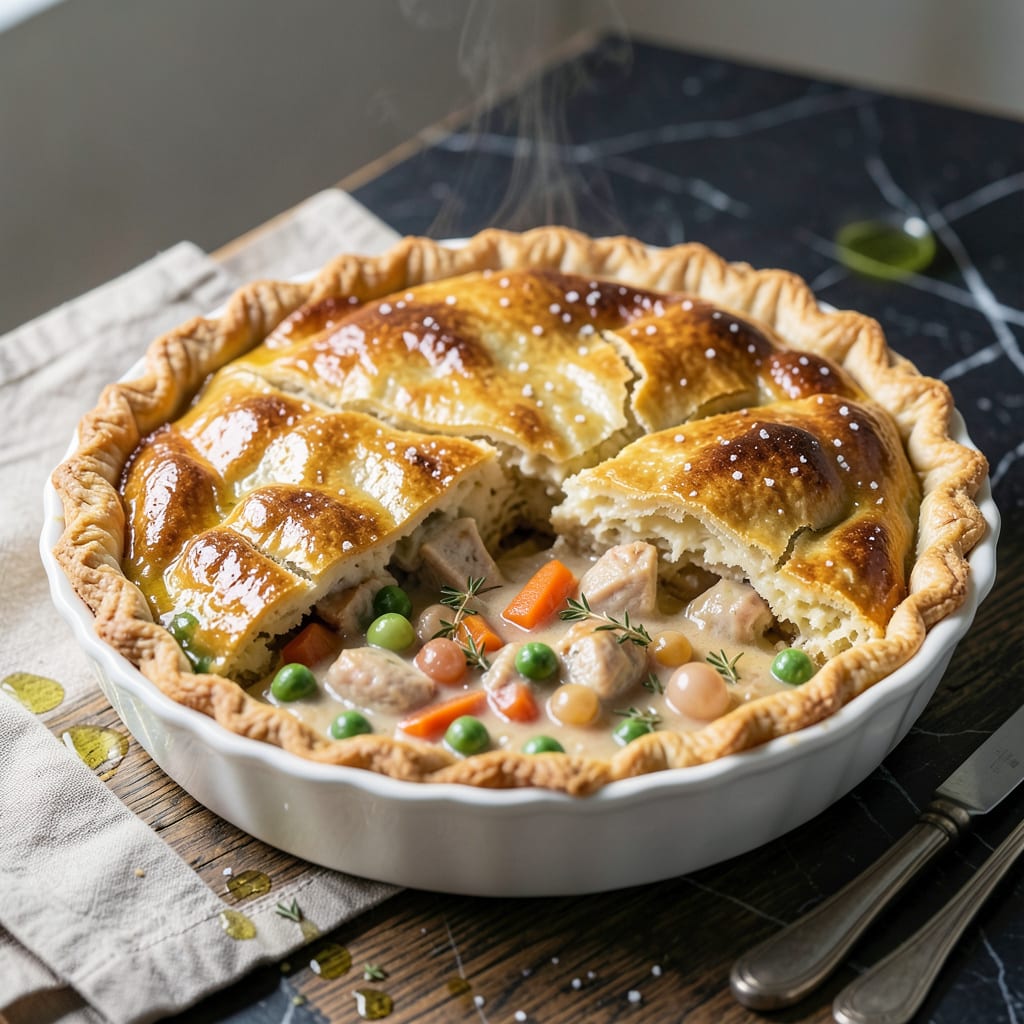
There’s nothing more satisfying than a flaky, golden crust that shatters with every bite of chicken pot pie. I’ve perfected this technique through years of testing and fine-tuning.
This method delivers buttery layers that stay crisp even after baking with the filling. The secret is in the cold ingredients and precise handling to create those perfect flakes.
Ingredients for Flaky Chicken Pot Pie Crust
Cold butter, minimal handling, and precise measurements create that perfect flaky crust for this dish.
| Ingredient | Amount | Notes |
|---|---|---|
| All-Purpose Flour 🌾 | 2 ½ cups | Plus extra for dusting |
| Unsalted Butter 🧈 | 1 cup | Cold, cubed into 1/2-inch pieces |
| Ice Water 💧 | ½ cup | Plus 1 tbsp as needed |
| Fine Sea Salt 🧂 | 1 tsp | Divided for seasoning layers |
| Granulated Sugar 🍚 | 1 tsp | Optional, enhances browning |
| Egg 🥚 | 1 whole | For egg wash finish |
| Heavy Cream 🥛 | 2 tbsp | For richer egg wash |
| Chicken Breast 🍗 | 1 ½ lb | Boneless, skinless, diced |
| Carrots 🥕 | 2 whole | Peeled and diced |
| Celery Stalks 🥬 | 2 whole | Diced, leaves included |
| Yellow Onion 🧅 | 1 whole | Finely diced |
| Garlic Cloves 🧄 | 3 cloves | Minced for filling |
| Fresh Thyme Sprigs 🌿 | 3 pieces | Leaves stripped |
| Chicken Stock 🍲 | 2 cups | Low-sodium preferred |
| Frozen Peas 🌱 | 1 cup | No need to thaw |
[recipeingredientscaler]
The butter is non-negotiable here. European-style unsalted butter with at least 82% fat content delivers superior flakiness due to lower water content. Plugrá or Kerrygold are excellent choices, available at most Whole Foods or larger supermarkets. Keep it ice-cold until the moment of use—warm butter equals tough crust. For the flour, Gold Medal or King Arthur all-purpose gives consistent results.
No unsalted butter? Salted butter works at a 1:1 ratio—just omit the added salt in the dough. Short on ice water? Vodka at half the volume creates an even flakier texture (the alcohol evaporates during baking). For the filling, rotisserie chicken saves time, or swap the vegetables for whatever’s in season. The thyme can be replaced with one-third the amount of dried.
The dough can rest overnight in the fridge (actually improves texture). Baked pie keeps 3-4 days refrigerated, though the crust is best day-of. Freeze unbaked dough discs for up to 3 months—thaw in the fridge before rolling. Always chill the dough 30 minutes before handling to prevent shrinking.
Why You’ll Love This Recipe
- I’ll be real: I always make a double batch and freeze one for next week’s pot pie.
- Five Ingredients: I love that it only needs flour, butter, ice water, salt, and a touch of sugar—no fancy pantry items.
- Buttery Layers: The cold butter creates those dreamy flaky layers that shatter with every bite.
- Freezer Friendly: I’ll be real: I always make a double batch and freeze one for next week’s pot pie.
Step-by-Step Instructions for Flaky Chicken Pot Pie Crust
Master the technique for creating perfect layers that deliver that coveted shatter with every bite.
Step 1: Chill and Prepare the Dough Ingredients
Begin by placing the 2.5 cups All-Purpose Flour, 1 tsp Fine Sea Salt, and 1 tsp Granulated Sugar in the freezer for 15 minutes. This ensures all components stay cold, which is critical for flaky layers. Cold ingredients prevent the butter from melting prematurely and blending into the flour.
Meanwhile, confirm your 1 cup Unsalted Butter is cubed into ½-inch pieces and return it to the refrigerator. The 0.5 cup Ice Water should remain icy cold—this liquid will create steam during baking, which lifts and separates the dough layers.
Step 2: Cut in the Butter Using the Pulsing Method
Transfer the chilled flour mixture to a food processor. Add the cold, cubed unsalted butter and pulse in 1-second bursts until the mixture resembles coarse crumbs with pea-sized butter pieces visible. This technique creates uneven butter distribution, which is the secret to flakiness.
Avoid over-processing—you want distinct butter flecks, not a homogeneous blend. If working by hand, use a pastry cutter or your fingertips, pressing the butter into the flour until you achieve the same pea-like texture. The visible butter pieces will melt during baking, creating those coveted air pockets.
Step 3: Hydrate the Dough with Minimal Handling
With the processor running, slowly drizzle in the 0.5 cup Ice Water through the feed tube, stopping as soon as the dough just begins to come together. It should look shaggy and slightly crumbly, not smooth. This minimal hydration prevents gluten development, ensuring a tender crust.
Turn the dough out onto a lightly floured surface and gently press it into a rough rectangle. Use a bench scraper to fold the dough in thirds, like a letter, then rotate and repeat once more. This laminating process builds additional layers without overworking the gluten. Wrap the dough in plastic and refrigerate for 1 hour before rolling.
Step 4: Roll and Shape for Optimal Flakiness
On a generously floured surface, roll the chilled dough into a 12-inch circle about ⅛-inch thick. For a double-crust pot pie, divide the dough in half and roll each portion separately. The key is even thickness—use a ruler if needed to ensure consistency.
Transfer one round to a pie dish, pressing it gently into the bottom and up the sides without stretching. Trim the edges, leaving a ½-inch overhang. For the top crust, cut decorative vents to allow steam to escape. Brush the surface with a mixture of the 1 whole Egg and 2 tbsp Heavy Cream for a golden, glossy finish.
Pro Tips For Making Flaky Chicken Pot Pie Crust
- Chill the Butter: Cut the unsalted butter into small cubes and chill it for 30 minutes before mixing—this keeps the fat cold, which is non-negotiable for that flaky texture.
- Use Ice Water: Fill a cup with water and ice cubes, then measure the liquid only. The colder the water, the less it will soften the butter when mixing.
- Skip Overworking: Stop mixing the dough as soon as it comes together. I learned this the hard way—overworking develops gluten, and that means a tough crust instead of a flaky one.
- Rest the Dough: After shaping, let the dough rest in the fridge for at least 20 minutes. This relaxes the gluten and makes rolling out way easier—yes, even if you’re impatient like me.
Troubleshooting Perfect Results
Soggy Bottom Crust
Prevent this common issue by blind-baking your bottom crust for 10-12 minutes at 375°F before adding the filling. I also brush the pre-baked crust with a thin layer of beaten egg white to create a moisture barrier. This keeps the bottom crisp even with the wet filling.
Tough Crust Texture
This usually happens from overworking the dough.
Crust Shrinking
Chill your dough for the full 1 hour before rolling, and don’t stretch it when placing in the dish. I always let my rolled dough rest on the counter for 5 minutes before transferring to prevent shrinking during baking.
Butter Melting Prematurely
If your kitchen is warm, work in 15-minute intervals with the dough returning to the fridge between steps. I keep my butter in the freezer until the moment I need it. Consider using a marble pastry board—it stays cooler than other surfaces.
Pale, Undercooked Crust
Brush with the egg wash mixture generously before baking. For extra browning, sprinkle 1 tsp granulated sugar over the top crust before the egg wash. Bake on the lower-middle rack of your oven for the most even browning. 🔥
Filling Leaking Through
Always cut steam vents in your top crust—4-5 small slits work well. I also seal the edges tightly by pressing with a fork dipped in flour. For extra insurance, place your pie dish on a baking sheet lined with parchment paper.
Nutrition Facts
Frequently Asked Questions
Why does the butter need to stay cold?
Cold butter creates steam during baking, which lifts and separates the dough layers for that perfect flakiness. If it melts too soon, it blends into the flour, resulting in a dense crust instead.
Can I use a food processor instead of cutting by hand?
A food processor works great—just pulse in 1-second bursts until you see pea-sized butter pieces. Be careful not to overmix, as this can warm the dough and toughen the crust.
How do I prevent the bottom crust from getting soggy?
Blind-bake the bottom crust for 10-12 minutes at 375°F before adding filling. Brushing it with beaten egg white also creates a moisture barrier for extra crispiness.
What’s the best way to seal the edges?
Press the top and bottom crust edges together with a fork dipped in flour. This creates a tight seal that prevents filling from leaking out during baking.

- Jollof Rice Sauce Recipe: West African Tomato and Spice Infusion - September 25, 2026
- Japanese Rice Soup Recipe: Umami-Rich Comfort in a Bowl - September 25, 2026
- Homemade Cream Of Rice Recipe: Silk-Smooth Breakfast in Minutes - September 25, 2026