
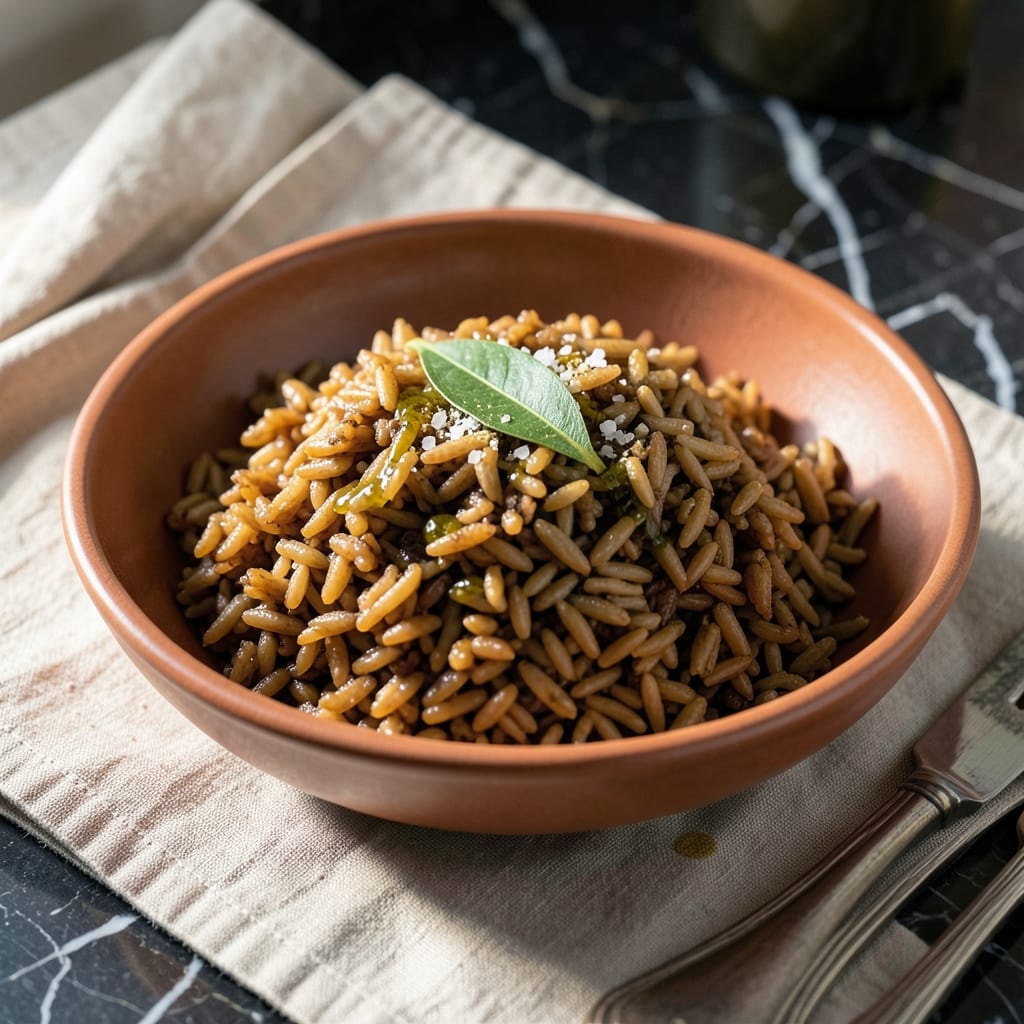
I’ve tested brown rice more times than I care to admit in my tiny Boston kitchen, always chasing that elusive light and airy texture. The secret lies in precise water ratios and a little patience.
This method delivers perfectly cooked grains every time, with no mushy or underdone bits. The key is using the right amount of water and letting the rice rest after cooking.
You’ll end up with separate, fluffy grains that hold their shape and taste nutty and sweet. It’s a simple process, but timing and technique make all the difference.
No special equipment needed—just a pot, a lid, and a fork to fluff. Here’s how to get it right.
Ingredients for Fluffy Brown Rice
Six simple ingredients for perfect brown rice with that light, airy texture you love.
| Ingredient | Amount | Notes |
|---|---|---|
| Long-Grain Brown Rice 🌾 | 1 ½ cups | Rinsed until water runs clear |
| Water 💧 | 3 ¼ cups | Filtered or tap is fine |
| Olive Oil 🫒 | 1 tbsp | Optional for extra flavor |
| Sea Salt 🧂 | ½ tsp | Fine grain preferred |
| Bay Leaf 🍃 | 1 whole | Optional for aroma |
| Garlic Powder 🧄 | ¼ tsp | Optional for depth |
The rice matters most here. Long-grain brown rice gives you separate, fluffy grains—short-grain gets sticky. I grab mine from Whole Foods bulk bins or Trader Joe’s for consistent quality. Look for bags labeled ‘long-grain’ and check the sell-by date (older rice takes longer to cook). Rinse it well—this removes excess starch that can make rice gummy.
No long-grain? Basmati or jasmine brown rice work too (adjust water slightly). Skip the bay leaf if you don’t have it—a pinch of dried thyme adds similar depth. The garlic powder is optional but worth it. For extra richness, swap the olive oil for toasted sesame oil. Want more flavor? Add a splash of vegetable broth to the cooking water.
Uncooked rice keeps in a sealed container for 6-12 months (check the package date). Cooked rice stays fresh in the fridge for 4-5 days and freezes beautifully for 3 months. Pro tip: Spread leftovers on a tray to cool quickly before storing (prevents sogginess).
Why You’ll Love This Recipe
- Set and Forget: I toss everything in one pot, cover it, and walk away—no stirring, no fuss.
- Bay Leaf Magic: That single bay leaf infuses the rice with a subtle depth I didn’t expect from such a simple ingredient.
- Meal Prep Hero: I make a big batch on Sunday and it stays fluffy in the fridge for days, ready for bowls or stir-fries.
- Budget Stretch: A pound of brown rice costs pennies and feeds my family for two meals, no side of guilt.
Step-by-Step Instructions for Fluffy Brown Rice
Here’s my method for achieving perfectly light and airy brown rice with minimal effort.
Step 1: Rinse and Prepare the Long-Grain Brown Rice
Place the 1.5 cups long-grain brown rice in a fine-mesh strainer and rinse under cold running water. I rinse until the water runs completely clear, which usually takes 30-45 seconds. This removes excess starch that can make your rice gummy instead of fluffy.
Give the strainer a good shake to remove all water before transferring the rice to your cooking pot. I’ve found this extra step prevents any residual water from throwing off the rice-to-liquid ratio we’re aiming for.
Step 2: Toast the Rice with Olive Oil and Aromatics
In a medium saucepan with a tight-fitting lid, heat the 1 tbsp olive oil over medium heat until it shimmers. Add the drained long-grain brown rice and stir to coat each grain. This toasting step adds a subtle nutty flavor that enhances the final dish.
After 1-2 minutes, when the rice starts to smell fragrant and looks slightly translucent, add the 0.5 tsp sea salt, 1 whole bay leaf, and 0.25 tsp garlic powder. Stir for another 30 seconds to distribute these flavor boosters evenly.
Step 3: Add Water and Bring to a Boil
Pour in the 3.25 cups water and give everything a good stir. The water should rise about ½ inch above the rice. Increase the heat to high and bring the mixture to a full, rolling boil. You’ll see large bubbles breaking the surface consistently.
Watch carefully during this stage—once boiling, immediately reduce the heat to low to maintain a gentle simmer. This temperature transition is crucial to prevent the rice from cooking too quickly on the outside while staying raw inside.
Step 4: Simmer Until Water Is Absorbed
Cover the saucepan with its tight-fitting lid and let the rice simmer undisturbed for 40-45 minutes. Don’t be tempted to lift the lid and check—releasing the steam can extend the cooking time and affect the fluffiness.
You’ll know it’s done when all the water has been absorbed and you see tiny holes forming in the surface of the rice. The grains should look plump and the texture should be tender when you taste a few grains. If there’s still water visible, cook for another 5 minutes with the lid on.
Step 5: Rest and Fluff for Perfect Texture
Remove the saucepan from heat and let it sit, covered, for an additional 10 minutes. This resting period allows the steam to finish cooking the rice and lets the grains separate more easily.
After resting, remove the bay leaf and discard it. Gently fluff the rice with a fork, lifting from the bottom to separate the grains. This final step creates that light, airy texture we’re after. Serve immediately while hot for the best results.
Pro Tips For Making Fluffy Brown Rice
- Soak the Rice: I learned this the hard way—rinsing then soaking long-grain brown rice for 20-30 minutes cuts the cooking time and guarantees even tenderness.
- Use Extra Water: Brown rice needs more liquid than white, about 2.5 cups water per 1 cup rice, or it turns out dry and crunchy.
- Keep the Lid On: Resist the urge to peek while cooking—every time you lift the lid, you lose steam and risk uneven cooking.
- Add Bay Leaf Late: Sounds weird, but it works: toss in the bay leaf during the last 10 minutes to infuse flavor without overpowering the rice.
Make-Ahead Tips for Leftovers
Overnight Prep
Rinse and toast the long-grain brown rice as directed, then store it in an airtight container at room temperature. I often do this step the night before—saves 10 minutes of active prep the next day. The rice stays fresh for up to 12 hours before cooking. 💡
Batch Cooking
Double or triple the recipe and cook a big batch on Sunday. Spread the finished rice on a baking sheet to cool completely before portioning. I use glass containers from my Boston neighborhood market—they stack neatly in the fridge.
Fridge Storage
Cooked rice keeps beautifully for 4-5 days in the refrigerator. Store in airtight containers with a paper towel on top to absorb excess moisture. This prevents the dreaded mushy texture we all want to avoid.
Freezer Method
Portion cooled rice into freezer bags, squeezing out all air before sealing. It freezes perfectly for up to 3 months. I label mine with the date—I learned this the hard way after a freezer mystery meal incident. ❄️
Reheating Tips
For fridge-stored rice, sprinkle 1-2 tbsp water per cup and microwave covered for 1-2 minutes. For frozen, thaw overnight in the fridge before reheating. The grains stay separate and fluffy every time.
Meal Prep Hack
Use pre-cooked rice as a base for grain bowls, stir-fries, or salads. I love tossing it with roasted veggies and a drizzle of olive oil from my Italian deli. It’s my go-to lunch for busy weeks.
Nutrition Facts
Frequently Asked Questions
Why does my brown rice turn out mushy?
Overcooking or using too much water causes this. Stick to 3.25 cups water per 1.5 cups rice and don’t peek while simmering. The steam escape affects the texture.
Can I use a rice cooker for this method?
Yes! Use the same 2:1.5 rice-to-water ratio and select the brown rice setting. Let it rest 10 minutes after cooking before fluffing.
How do I know when the rice is done?
All water should be absorbed and tiny holes will appear on the surface. Taste a few grains—they should be tender with no crunch. If unsure, cook 5 more minutes.
What if I don’t have long-grain brown rice?
Basmati or jasmine brown rice work too. Reduce water slightly to 3 cups and check at 35 minutes. The texture may vary a bit.

- Ground Beef Rice and Beans Recipe: Slow-Simmered Savory Harmony - October 17, 2026
- Guyanese Fried Rice Recipe: Caribbean Spice With Wok-Charred Aromatics - October 17, 2026
- Hakka Thunder Tea Rice Recipe: Wok-Charred Herbal Infusion - October 17, 2026