
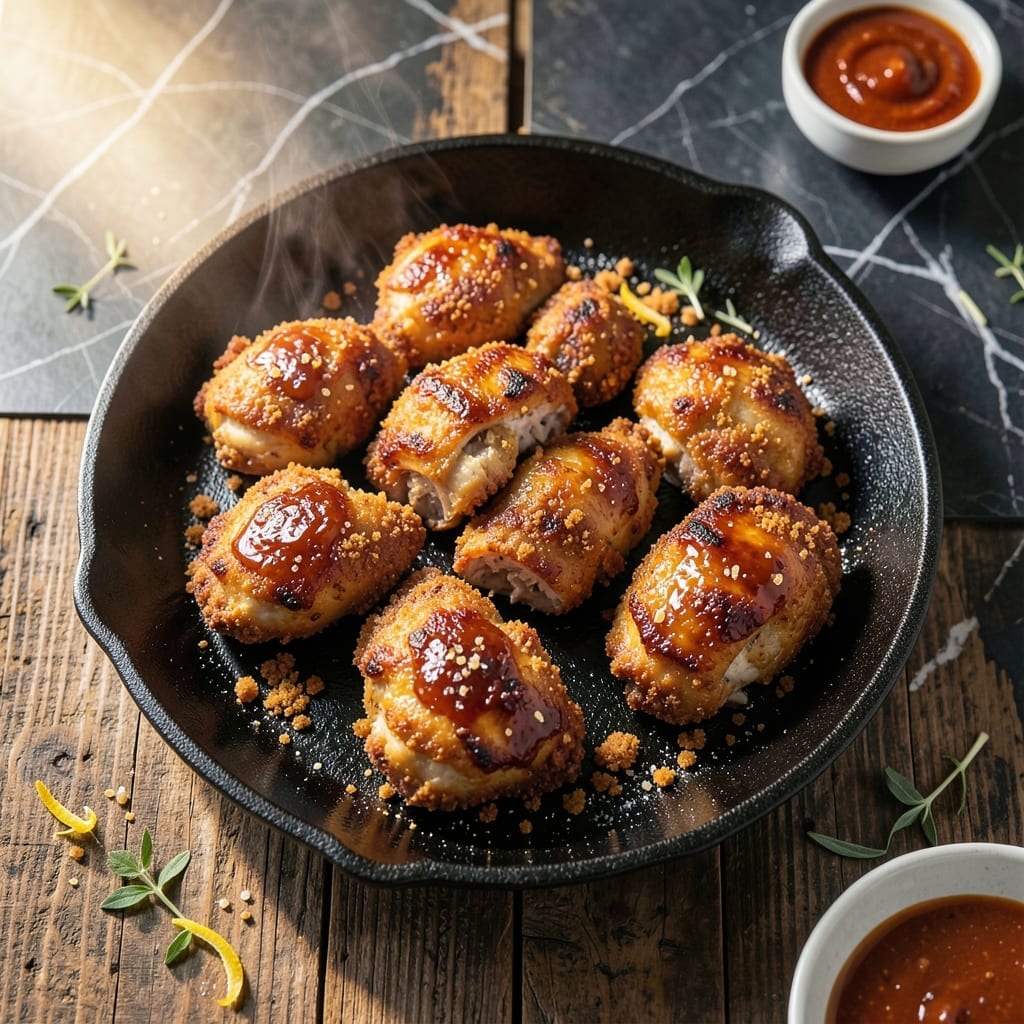
There’s nothing quite like the satisfaction of achieving double-crisp skin on fried chicken, especially when it’s finished with a smoky sweet glaze that clings to every bite. This method ensures a perfect balance of textures and flavors.
I developed this recipe to combine the best of both worlds: the crunch of fried chicken and the sticky, tangy depth of barbecue. The key lies in frying the chicken until golden, then coating it in a homemade glaze that caramelizes beautifully.
Each piece emerges with a shatteringly crisp exterior and juicy, flavorful meat underneath. The glaze adds a layer of complexity that elevates this dish beyond ordinary fried chicken.
Serve it hot for the best experience, with extra sauce on the side for dipping. This is comfort food at its finest.
Ingredients for Fried Barbecue Chicken
Double-crisp chicken meets smoky glaze in this ultimate comfort dish. Gather these for perfection.
| Ingredient | Amount | Notes |
|---|---|---|
| Chicken Thighs 🍗 | 2 ½ lb | Boneless, skin-on for maximum crispiness |
| Buttermilk 🥛 | 2 cups | Full-fat for tenderness and tang |
| All-Purpose Flour 🌾 | 2 cups | Divided for dredging and double-coating |
| Cornstarch 🌾 | ½ cup | For extra crunch in the coating |
| Granulated Sugar 🍚 | 2 tbsp | Balances the smoky glaze |
| Smoked Paprika 🌶️ | 1 tbsp | Key for that signature BBQ flavor |
| Garlic Powder 🧄 | 1 tbsp | Enhances savory depth |
| Onion Powder 🧅 | 1 tbsp | Adds aromatic base to seasoning |
| Salt 🧂 | 1 ½ tsp | Diamond Crystal kosher preferred |
| Black Pepper 🌶️ | 1 tsp | Freshly ground for boldness |
| Cayenne Pepper 🔥 | ½ tsp | Adjust to heat preference |
| Barbecue Sauce 🍯 | 1 ½ cups | High-quality smoky variety |
| Honey 🍯 | ¼ cup | For glaze stickiness and sweetness |
| Apple Cider Vinegar 🍏 | 1 tbsp | Brightens the glaze flavor |
| Vegetable Oil 🫒 | 4 cups | For deep frying, neutral flavor |
The chicken is everything here. Thighs with skin-on give you that shatteringly crisp texture—breasts dry out too fast. I grab mine from Whole Foods or the local butcher for the best quality. For the buttermilk, full-fat is non-negotiable (trust me on this). The cornstarch? That’s your secret weapon for extra crunch. Don’t skip it, even if your pantry’s low.
No buttermilk? Whole milk plus a tbsp of lemon juice or vinegar works in a pinch. Swap the smoked paprika for regular if that’s what you’ve got, but add a dash of liquid smoke to compensate. The BBQ sauce can be store-bought—Stubb’s or Sweet Baby Ray’s are solid choices. Fresh out of honey? Maple syrup or brown sugar gets you close, though the flavor shifts slightly.
This is best served fresh, hot out of the oil. Leftovers keep in the fridge for 3-4 days but lose that perfect crisp. Reheat in the oven at 375°F to revive the texture. The glaze can be made ahead—store it in the fridge for up to 1 week.
Why You’ll Love This Recipe
- One Bowl Wonder: I just toss the chicken in buttermilk, then dredge in the flour-cornstarch mix—no fancy prep or extra bowls to wash.
- Crispy Sweet Heat: The cornstarch gives it that shatter-crisp crust while the sugar in the flour caramelizes into this crave-worthy barbecue glaze.
- Feeds My Crew: I make a double batch on Sunday and we’re set for lunches all week—reheats surprisingly well in the toaster oven.
- Budget Hero: Chicken thighs stay cheap, and a little flour plus cornstarch goes a long way for a big, crowd-pleasing meal.
Step-by-Step Instructions for Fried Barbecue Chicken
This method guarantees ultra-crispy skin with a sticky-sweet glaze that will have everyone reaching for seconds.
Step 1: Marinate the Chicken Thighs in Buttermilk
Place the 2.5 lb Chicken Thighs in a large bowl and pour in all 2 cups Buttermilk. I use full-fat buttermilk because the extra richness tenderizes the meat more effectively.
Make sure every piece is fully submerged, then cover and refrigerate for at least 4 hours (overnight is even better). The buttermilk’s acidity breaks down proteins, creating that fall-off-the-bone tenderness. You’ll notice the meat plumps slightly as it absorbs the liquid.
Step 2: Create the Double-Crisp Coating
In a shallow dish, whisk together 2 cups All-Purpose Flour, 0.5 cup Cornstarch, 2 tbsp Granulated Sugar, 1 tbsp Smoked Paprika, 1 tbsp Garlic Powder, 1 tbsp Onion Powder, 1.5 tsp Salt, 1 tsp Black Pepper, and 0.5 tsp Cayenne Pepper. The cornstarch is the secret to that extra crunch.
Remove each thigh from the buttermilk, letting excess drip off, then dredge thoroughly in the flour mixture. Press firmly to adhere, then dip back in the buttermilk and coat a second time. This double-dredging creates layers of crispiness that hold up to the sauce.
Step 3: Deep-Fry to Golden Perfection
Heat 4 cups Vegetable Oil in a deep, heavy pot to 350°F. Use a thermometer—this temperature ensures the coating cooks through before browning too much. Fry the thighs in batches to avoid crowding, which would lower the oil temperature.
Cook for 12-15 minutes, turning occasionally, until the coating is a deep golden brown and the internal temperature reaches 165°F. The skin should sizzle aggressively when first added, then calm as the moisture escapes. Drain on a wire rack, not paper towels, to keep the coating crisp.
Step 4: Glaze with Smoky-Sweet Barbecue Sauce
In a saucepan, combine 1.5 cups Barbecue Sauce, 0.25 cup Honey, and 1 tbsp Apple Cider Vinegar. Simmer over medium heat for 3-4 minutes until slightly thickened. The vinegar cuts through the richness, balancing the sweetness.
While the sauce is still hot, brush it generously over the fried chicken. The heat helps the glaze adhere to every nook of the crispy coating. Serve immediately—the contrast between the crunchy exterior and sticky glaze is what makes this dish extraordinary.
Pro Tips For Making Fried Barbecue Chicken
- Double-Fry for Crisp: Fry the chicken once at 325°F until cooked through, then rest it 10 minutes and fry again at 375°F for 2-3 minutes. I learned this the hard way—single frying leaves the crust soggy under the barbecue sauce.
- Buttermilk Overnight: Soak the thighs in buttermilk for at least 12 hours, not just 30 minutes. After burning a batch with dry spots, I realized the long soak actually changes the outcome.
- Skip the Crowding: Fry in batches with at least an inch between pieces—any closer and the oil temp drops like a rock. Sounds weird, but it works: your crust won’t steam.
- Cornstarch Boost: Replace 2 tablespoons of the flour with cornstarch in your dredge. My grandmother swore by this, and she was right: it makes a real difference in the crunch.
Pro Cooking Tips for Perfect Results
Oil Temperature Control
Maintaining 350°F oil temperature is critical for that perfect crisp. I use a candy thermometer clipped to the pot for accuracy. If the oil drops below 325°F, your coating will absorb grease and turn soggy. 🌡️
Double-Dredge Technique
For maximum crunch, press the flour mixture into the meat firmly during the first dredge. The second dip in buttermilk and flour creates layered texture. Let the coated pieces rest for 10 minutes before frying to set the batter.
Frying in Batches
Never crowd the pot—fry in batches to avoid temperature drops. I use a Dutch oven as it maintains heat well. Overcrowding causes uneven cooking and greasy results. Leave 2 inches between pieces for proper circulation.
Glaze Application
Apply the glaze immediately after frying while the chicken is still hot. This helps it cling better. I brush on a first coat, let it set for 1-2 minutes, then add a second layer for extra shine and flavor. 🔥
Draining Properly
Drain on a wire rack, not paper towels, to prevent steam from softening the crust. Elevating the pieces allows air circulation on all sides. I place the rack over a baking sheet to catch drips for easy cleanup.
Resting Time
Let the glaze set for 5 minutes before serving. This prevents it from sliding off when eaten. The chicken stays crispy longer when allowed to rest briefly after frying and glazing.
Nutrition Facts
Frequently Asked Questions
Can I use boneless, skinless thighs instead?
You can, but skin-on gives the best crisp. Skinless will still taste great but won’t have that signature crunch. If using boneless, reduce frying time to 10-12 minutes to prevent drying out.
Why does the buttermilk marinade need so long?
The 4-hour soak tenderizes the meat and helps the coating adhere. Overnight is even better for maximum flavor penetration. Don’t rush this step—it’s key for juicy results.
How do I keep the coating crispy after glazing?
Apply glaze immediately after frying while chicken is hot. Use a wire rack for draining to allow air circulation. Let it rest 5 minutes before serving to set the glaze.
What’s the best oil for deep frying?
Neutral oils with high smoke points work best. Vegetable, peanut, or canola oil are all excellent choices. Avoid olive oil—its low smoke point makes it unsuitable.

- Jollof Rice Sauce Recipe: West African Tomato and Spice Infusion - September 25, 2026
- Japanese Rice Soup Recipe: Umami-Rich Comfort in a Bowl - September 25, 2026
- Homemade Cream Of Rice Recipe: Silk-Smooth Breakfast in Minutes - September 25, 2026