
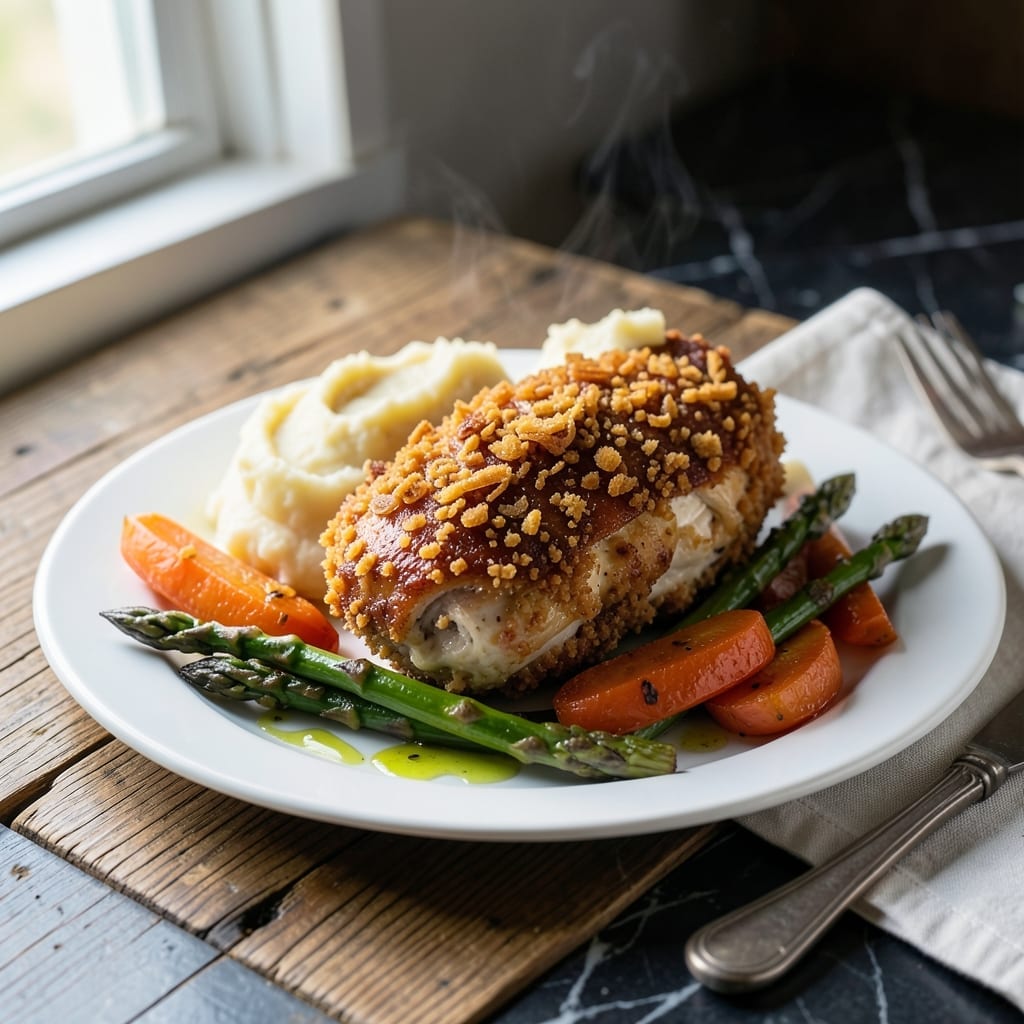
This double-coated chicken delivers crispy, goldenresults with every bite. The secret lies in the crushed fried onions, which create an extra-crunchy exterior that stays perfect even after baking.
I developed this method to ensure maximum crunch without the hassle of deep frying. The onions add texture while keeping the chicken juicy inside. A simple egg wash helps the coating adhere perfectly.
You’ll get tender chicken encased in a shatteringly crispy crust that’s packed with savory onion flavor. The double coating guarantees no bare spots—just consistent crunch from edge to edge.
Serve hot for the best texture. This technique works for both oven and air fryer methods.
Ingredients for Fried Onion Chicken
Pantry staples and crushed fried onions create that signature golden, shatteringly crispy coating.
| Ingredient | Amount | Notes |
|---|---|---|
| Chicken Breasts 🍗 | 1 ½ lb | Boneless, skinless, pounded to 1/2-inch thickness |
| All-Purpose Flour 🌾 | 1 cup | For first coating layer |
| Large Eggs 🥚 | 2 whole | Beaten for egg wash |
| Fried Onions 🧅 | 2 cups | Crushed, for crispy coating |
| Panko Breadcrumbs 🍞 | 1 cup | For extra crunch texture |
| Garlic Powder 🧄 | 1 tsp | For savory depth in coating |
| Onion Powder 🧅 | 1 tsp | Complements fried onion flavor |
| Paprika 🌶️ | 1 tsp | Smoked or sweet variety |
| Salt 🧂 | 1 tsp | Diamond Crystal kosher preferred |
| Black Pepper 🌶️ | ½ tsp | Freshly ground for best flavor |
| Buttermilk 🥛 | ½ cup | For tenderizing chicken |
| Vegetable Oil 🫒 | 2 tbsp | For baking sheet preparation |
The fried onions are non-negotiable here—French’s Crispy Fried Onions are the gold standard. Most grocery stores carry them in the canned vegetable aisle. For the chicken, boneless, skinless breasts pounded to even thickness ensure even cooking without drying out. The buttermilk tenderizes while adding subtle tang. Look for Diamond Crystal kosher salt if you want that professional kitchen precision.
No buttermilk? Whole milk plus 1 tbsp vinegar or lemon juice works in a pinch. Swap panko for regular breadcrumbs at a 1:1 ratio if needed. The paprika can be omitted, but it adds that signature golden hue. For extra flavor, add 1/2 tsp cayenne to the flour mixture. The crushed fried onions must be fine but not powdered—pulse in a food processor if they’re too coarse.
This keeps in the fridge for 3-4 days but is best served fresh. Freeze uncooked breaded chicken on a tray first, then transfer to bags for up to 3 months. Reheat in the oven or air fryer to restore that crispy texture. Always bring chicken to room temperature before coating for even adherence.
Why You’ll Love This Recipe
- Minimal Effort: I just coat, dip, and bake—no fancy techniques, and the fried onions do half the work for me.
- Crispy Perfection: That panko and fried onion crust gives every bite a satisfying crunch with a juicy center.
- Weeknight Hero: Honestly, it’s my go-to for busy evenings when I need something hearty but quick.
- Budget Friendly: Chicken breasts and pantry staples mean I can make this without breaking the bank.
Step-by-Step Instructions for Fried Onion Chicken
This double-coating method ensures maximum crunch and golden color without overcomplicating the process.
Step 1: Prepare and Season the Chicken
Begin by pounding the 1.5 lb Chicken Breasts to an even ½-inch thickness between plastic wrap. This ensures uniform cooking and prevents dry spots. Season both sides generously with the 1 tsp Salt and 0.5 tsp Black Pepper—I press the seasoning in lightly to help it adhere.
Place the chicken in a shallow dish and pour the 0.5 cup Buttermilk over it. Turn to coat completely and let it soak for 15-20 minutes. The buttermilk tenderizes the meat while adding subtle tang that balances the rich coating.
Step 2: Create the Crispy Double Coating
Set up your breading station with three shallow dishes. In the first, add the 1 cup All-Purpose Flour, 1 tsp Garlic Powder, 1 tsp Onion Powder, and 1 tsp Paprika. Whisk to combine thoroughly—this aromatic blend amplifies the onion flavor.
In the second dish, beat the 2 whole Large Eggs until uniform in color. In the third, combine the 2 cups Fried Onions (crushed lightly with your hands) and 1 cup Panko Breadcrumbs. The panko adds structural crunch while the fried onions deliver their signature flavor.
Step 3: Coat and Rest the Chicken
Remove a chicken breast from the buttermilk, letting excess drip off. Dredge it in the seasoned flour, pressing gently to create an even layer. Shake off any excess, then dip it in the beaten eggs, allowing any thick spots to drip back into the dish.
Finally, press the chicken into the fried onion-panko mixture, turning to coat completely. I apply slight pressure to ensure the coating adheres well to all surfaces. Place the coated chicken on a wire rack and let it rest for 5-10 minutes—this crucial step helps the coating set and prevents it from sliding off during cooking.
Step 4: Bake to Golden Perfection
Preheat your oven to 400°F. Line a baking sheet with parchment paper and brush it with the 2 tbsp Vegetable Oil. This prevents sticking while promoting even browning. Arrange the chicken on the prepared sheet, leaving space between pieces for proper air circulation.
Bake for 20-25 minutes, flipping halfway through, until the coating is deep golden brown and the internal temperature reaches 165°F. The chicken should sizzle slightly when you flip it—this auditory cue confirms the coating is crisping properly.
Let the chicken rest for 5 minutes before serving to allow the juices to redistribute. The coating should remain crisp even as the meat relaxes, delivering that promised double-crunch texture in every bite.
Pro Tips For Making Fried Onion Chicken
- Pound the Chicken: Use a rolling pin or meat mallet to pound the chicken breasts to an even ½-inch thickness—this guarantees they cook through at the same rate and stay juicy.
- Crush the Onions: Pulse the fried onions in a food processor or crush them by hand to finer bits so they stick better to the chicken and create a more uniform coating.
- Double Dredge: Dip each piece in flour, then egg, then panko, and repeat the egg and panko step—this extra layer makes the crust crispier and keeps it from falling off.
- Rest Before Frying: Let the breaded chicken rest on a wire rack for 10 minutes before frying—this helps the coating set so it doesn’t slide off in the oil.
Make-Ahead Tips for fried onion chicken
Prep Ahead Coating
Mix your dry ingredients—the 1 cup flour, 1 tsp each garlic powder, onion powder, and paprika—the night before. Store in an airtight container. This saves 5 minutes of prep time while keeping flavors fresh. 💡
Chicken Marinade
Combine the 0.5 cup buttermilk with chicken in a sealed container and refrigerate for up to 12 hours. The longer soak makes the meat extra tender. I often prep this before bed for an easy dinner the next day.
Breading Station Prep
Crush the 2 cups fried onions and mix with 1 cup panko up to a day ahead. Keep in a zip-top bag at room temperature. Beat the 2 eggs just before coating to prevent separation.
Freezing Uncooked
After coating, freeze chicken pieces on a tray for 1 hour, then transfer to freezer bags. They’ll keep for 3 months. No need to thaw—just add 5-10 minutes to baking time.
Reheating Tips
Revive leftovers in a 400°F oven for 10-12 minutes on a wire rack to restore crunch. The air fryer works too at 375°F for 6-8 minutes. Never microwave—it turns the coating soggy. 🔥
Day-Of Assembly
If prepping components separately, bring the chicken to room temperature for 15 minutes before coating. This ensures even cooking and better coating adhesion. I set everything out while the oven preheats.
Nutrition Facts
Frequently Asked Questions
Can I use chicken thighs instead of breasts?
Use 1.5 lb boneless, skinless thighs and reduce baking time to 15-18 minutes. Thighs stay juicier and their higher fat content enhances the crispy coating.
What if my coating falls off during baking?
This usually means the chicken wasn’t dry before coating or didn’t rest after breading. Pat the meat dry, let the coated pieces rest for 10 minutes, and ensure your oven is fully preheated to 400°F.
Can I air fry this instead of baking?
Yes! Air fry at 375°F for 12-15 minutes, flipping halfway. The hot air circulation creates even crispier results. Don’t overcrowd the basket for best texture.
How do I make this gluten-free?
Swap the flour for 1 cup gluten-free all-purpose flour and use gluten-free panko. Check that your fried onions are certified gluten-free, as some brands contain wheat.

- Jollof Rice Sauce Recipe: West African Tomato and Spice Infusion - September 25, 2026
- Japanese Rice Soup Recipe: Umami-Rich Comfort in a Bowl - September 25, 2026
- Homemade Cream Of Rice Recipe: Silk-Smooth Breakfast in Minutes - September 25, 2026