
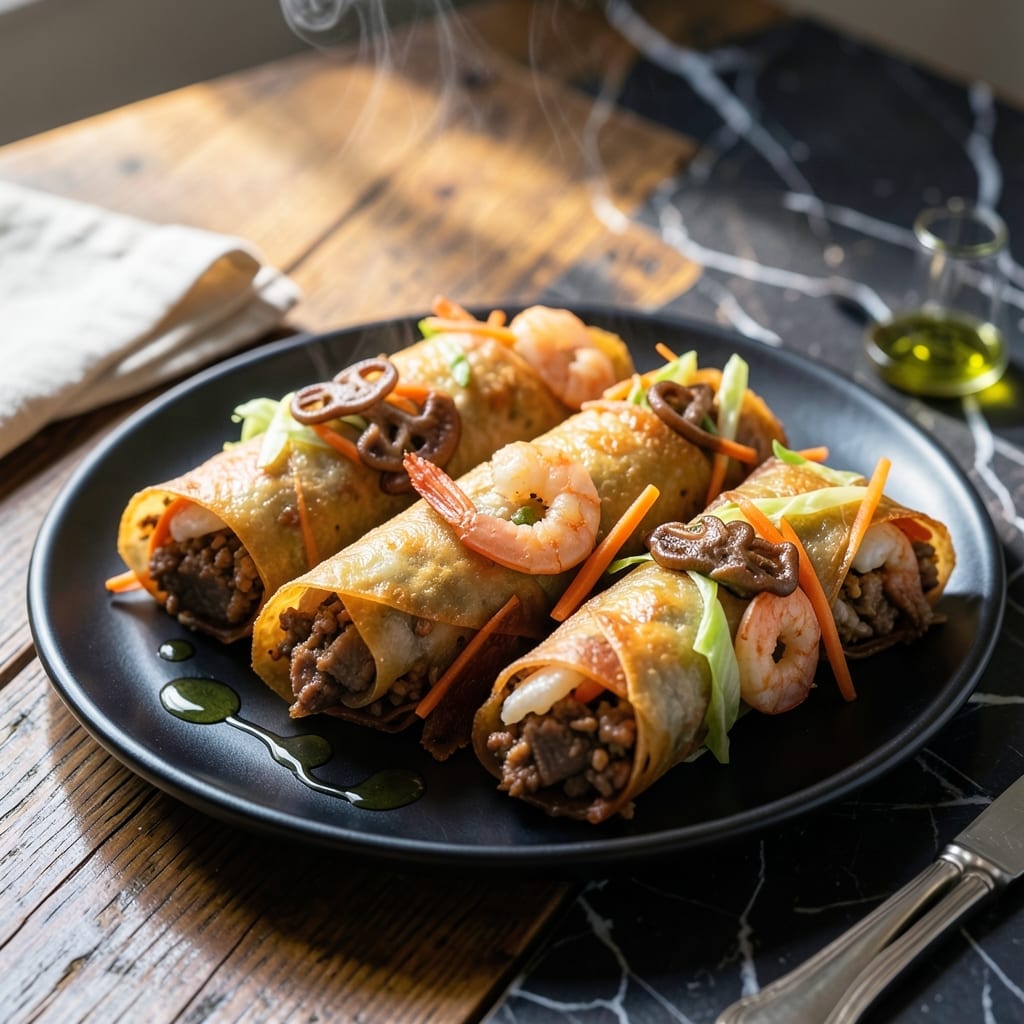
This recipe transforms simple rice paper into crispy golden shells filled with fresh, vibrant ingredients. The secret lies in proper frying technique and balanced fillings that maintain texture and flavor.
You’ll achieve restaurant-quality results at home with straightforward steps and common ingredients. The contrast between the shatteringly crunchy exterior and tender filling makes every bite satisfying.
Ingredients for Fried Rice Paper Spring Roll
Transform simple rice paper into crispy golden shells with these vibrant, fresh fillings.
| Ingredient | Amount | Notes |
|---|---|---|
| Rice Paper Wrappers 🍚 | 12 sheets | 22cm diameter, spring roll style |
| Ground Pork 🐖 | ¾ lb | Or substitute ground chicken |
| Shrimp 🦐 | ½ lb | Peeled, deveined, chopped |
| Carrots 🥕 | 2 whole | Julienne cut, about 1 cup |
| Wood Ear Mushrooms 🍄 | ½ cup | Dried, rehydrated and sliced |
| Green Cabbage 🥬 | 2 cups | Finely shredded |
| Bean Thread Noodles 🍜 | 1 oz | Cellophane noodles, rehydrated |
| Garlic Cloves 🧄 | 4 cloves | Minced finely |
| Shallots 🧅 | 2 whole | Finely minced |
| Fish Sauce 🐟 | 2 tbsp | Vietnamese preferred |
| Soy Sauce 🥢 | 1 tbsp | Light or all-purpose |
| White Pepper 🌶️ | ½ tsp | Ground, for authentic flavor |
| Sugar 🍚 | 1 tsp | Granulated white |
| Neutral Oil 🫒 | 3 cups | For deep frying, peanut or vegetable |
| Lettuce Leaves 🥬 | 8 whole | Butter or iceberg, for serving |
The rice paper wrappers are non-negotiable for that shatteringly crisp texture. Look for 22cm spring roll wrappers at Asian grocery stores—they’re thicker than standard rice paper and hold up to frying. I source mine from H Mart or 99 Ranch. The ground pork should have some fat (about 20%) for juiciness. For shrimp, wild-caught if possible, but frozen works fine—just thaw completely first.
Vegetarian? Swap pork and shrimp for shredded tofu or mushrooms. No wood ear mushrooms? Shiitake or oyster mushrooms work well. Fish sauce can be replaced with soy sauce plus a pinch of salt (though the flavor profile changes). The bean thread noodles add texture—vermicelli rice noodles are a good substitute. Always taste your filling before rolling to adjust seasoning.
Fry in batches to avoid crowding—this keeps the oil temperature stable and ensures even browning. Store uncooked rolls wrapped in damp towel and plastic wrap for up to 24 hours in the fridge. Cooked rolls are best served immediately but can be kept warm in a 200°F oven for 30 minutes without losing crispness.
Why You’ll Love This Recipe
- No Fuss Assembly: I just soak the rice paper, fill with pork and shrimp, then roll—no fancy techniques needed.
- Crispy & Savory: The pork and shrimp get this golden crunch while the wood ear mushrooms add a satisfying chew.
- Party or Pantry: I serve these at gatherings or freeze extras for a quick snack later. Honestly, they disappear either way.
- Budget Stretcher: Ground pork and a few veggies make a big batch for pennies. Between us, it’s my cheap-but-impressive trick.
Step-by-Step Instructions for Fried Rice Paper Spring Rolls
Master the technique for achieving perfectly crisp shells with these precise, professional steps.
Step 1: Prepare and Cook the Filling
Heat 1 tablespoon neutral oil in a wok or large skillet over medium-high heat. Add the 0.75 lb ground pork and cook for 3-4 minutes until lightly browned, breaking it into small pieces with a wooden spoon. The pork should lose its pink color and develop a slight crust on the edges.
Add the 0.5 lb shrimp, 2 whole shallots, and 4 cloves garlic cloves. Stir-fry for 2-3 minutes until the shrimp turn opaque and the aromatics become fragrant. Push the mixture to one side of the pan.
In the cleared space, add the 2 whole carrots, 0.5 cup wood ear mushrooms, and 2 cups green cabbage. Stir-fry for 3-4 minutes until the vegetables soften slightly but retain some crunch. Combine everything in the pan.
Step 2: Season the Filling Mixture
Add the 1 oz bean thread noodles, 2 tbsp fish sauce, 1 tbsp soy sauce, 0.5 tsp white pepper, and 1 tsp sugar to the pan. Stir well to distribute the seasonings evenly throughout the filling.
Cook for an additional 1-2 minutes, stirring constantly, until the noodles absorb some of the liquid and the mixture becomes cohesive. The filling should be moist but not watery. Transfer to a bowl and let cool completely—this prevents the rice paper from tearing during wrapping.
Step 3: Assemble the Spring Rolls
Dip one rice paper wrapper at a time into warm water for 5-8 seconds until pliable but still slightly firm. Lay it flat on a clean surface. Place about 3 tablespoons of the filling near the bottom edge, leaving a 1-inch border on all sides.
Fold the bottom edge up over the filling, then fold in the sides, and roll tightly upward, similar to a burrito. The roll should be snug but not so tight that it bursts. Repeat with the remaining 12 sheets rice paper wrappers and filling.
Step 4: Deep-Fry to Golden Perfection
Heat the 3 cups neutral oil in a deep, heavy pot to 350°F. The oil is ready when a small piece of wrapper dropped in sizzles immediately and floats to the surface. Fry the spring rolls in batches for 3-4 minutes per side, turning occasionally, until they are golden brown and crisp.
Use a slotted spoon to transfer the rolls to a paper towel-lined plate to drain excess oil. The rolls should be uniformly golden with a slight blistering on the surface—this indicates they’re cooked through and crisp.
Step 5: Serve with Lettuce Leaves
Arrange the 8 whole lettuce leaves on a serving platter. Place the fried spring rolls on top or alongside the leaves. The contrast of the crispy rolls with the cool, fresh lettuce enhances the texture and flavor of each bite.
Serve immediately while hot. The spring rolls should maintain their crispness for several minutes, but they’re best enjoyed fresh from the fryer. Any leftovers can be reheated in a 375°F oven for 5-7 minutes to restore crispness.
Pro Tips For Making Fried Rice Paper Spring Roll
- Soak Rice Paper Briefly: Dip each wrapper in warm water for just 5-8 seconds—any longer and they’ll tear when you try to roll them. I learned this the hard way after ruining three sheets in a row.
- Dry Shrimp Thoroughly: Pat the shrimp completely dry with a paper towel before chopping. Sounds tedious, but it prevents the filling from turning soggy and ruining the crisp.
- Skip Overfilling: Use about 2 tablespoons of filling per roll max. After burning a batch that burst open mid-fry, I finally accepted that less is more.
- Heat Oil Properly: Get the oil to 350°F before frying—test with a wooden chopstick (bubbles should form around it). My first few rolls absorbed oil like sponges because I rushed this step.
Pro Cooking Tips for Perfect Results
Oil Temperature Control
Maintain oil at a steady 350°F using a deep-fry thermometer. I use OXO Good Grips for accuracy. If oil smokes, it’s too hot—reduce heat immediately. Too cool, and rolls absorb oil, becoming greasy rather than crisp. 🌡️
Rolling Technique
Dip rice paper in warm water for exactly 5-8 seconds. Over-soaking makes them too soft to handle. Lay flat, add 3 tablespoons filling, then fold sides in before rolling tightly. Keep a damp towel over unused wrappers to prevent drying.
Frying in Batches
Never crowd the pot—fry 3-4 rolls at a time in 3 cups oil. Crowding drops oil temperature, causing uneven cooking. Turn rolls halfway through for even browning. Use a slotted spoon for safe removal.
Draining Properly
Transfer fried rolls to a wire rack or paper towels. Letting them sit in oil drains excess grease but can make them soggy. I prefer a rack for air circulation on all sides, maintaining crispness longer.
Resting Before Serving
Let rolls rest 2-3 minutes after frying. This allows the interior to set while the exterior stays crisp. Serve immediately on lettuce leaves for textural contrast. They’ll stay hot for 10-15 minutes in a 200°F oven. 🔥
Nutrition Facts
Frequently Asked Questions
Can I bake these instead of frying?
Baking won’t give the same crispy texture, but you can try 400°F for 15-20 minutes with oil spray. Flip halfway for even browning. The result will be less crunchy but still tasty.
How do I keep them crispy longer?
Place fried rolls on a wire rack in a 200°F oven. This allows air circulation, preventing sogginess for up to 30 minutes. Avoid stacking them.
My rolls keep bursting while frying. What’s wrong?
Overfilling or rolling too tightly causes bursting. Use 3 tablespoons max per roll and leave a 1-inch border. Seal edges firmly but don’t squeeze.
Can I make these ahead of time?
Prepare uncooked rolls, wrap in damp towel and plastic, then refrigerate for up to 24 hours. Fry just before serving for best texture.

- Five Spice Rice Recipe: Aromatic Grains With Warm Spice Balance - October 10, 2026
- Flavoured Basmati Rice Recipe: Aromatic Grains with Spiced Depth - October 10, 2026
- Fish Porridge Rice Cooker Recipe: Hands-Free Congee With Silky Depth - October 10, 2026