
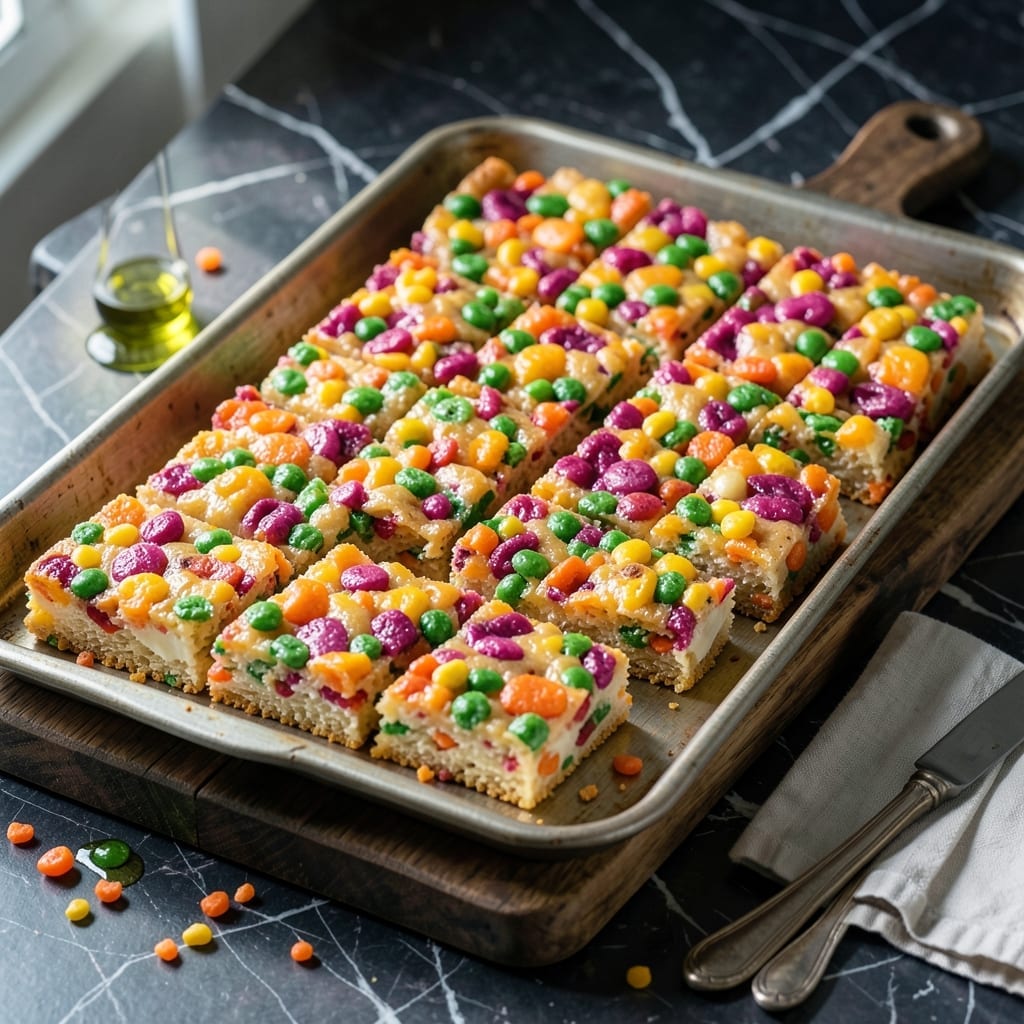
This recipe transforms a childhood cereal favorite into a vibrant, no-bake treat that delivers colorful crunch in every bite. I developed it after noticing how Fruity Pebbles add natural color and sweetness without artificial flavors.
The method is simple: melt butter and marshmallows, then fold in cereal until every piece is coated. Pressing the mixture firmly into a pan ensures bars that hold their shape when cut.
What emerges is a batch of bars with a perfect balance of crispy texture and chewy sweetness. The cereal maintains its bright colors and fruity flavor, making these as fun to look at as they are to eat.
Ideal for parties, lunchboxes, or a quick sweet fix. These set in under an hour with minimal effort.
Ingredients for Fruity Pebbles Rice Crispy Bars
Six simple ingredients deliver that nostalgic crunch with vibrant color in every bar.
| Ingredient | Amount | Notes |
|---|---|---|
| Fruity Pebbles Cereal 🥣 | 6 cups | Divided, bright colors preferred |
| Rice Krispies Cereal 🥣 | 3 cups | Classic variety works best |
| Salted Butter 🧈 | ½ cup | 1 stick, unsalted can work |
| Mini Marshmallows 🍬 | 10 oz | About 6 cups unpacked |
| Vanilla Extract 🌿 | 1 tsp | Pure extract for best flavor |
| Pinch of Salt 🧂 | 1 pinch | Balances sweetness |
The cereal is the star here. Fruity Pebbles and Rice Krispies are both essential—don’t swap one for the other. Generic brands work, but the Post versions have the best color payoff. Look for fresh boxes (check the date) since stale cereal won’t give you that signature snap. Most supermarkets stock both in the cereal aisle, and Target often has multi-packs.
Need to make this gluten-free? Gluten-free Rice Krispies are available at Whole Foods. Vegan? Use plant-based butter and Dandies vegan marshmallows. The vanilla extract can be swapped for almond extract (use half the amount), but stick with vanilla for that classic flavor. No mini marshmallows? Regular ones work, just chop them roughly.
These bars set up fast—usually 45 minutes at room temp. Store in an airtight container for up to 5 days, or freeze for 2 months. Cut into squares once fully cooled to prevent crumbling (worth the extra minute).
Why You’ll Love This Recipe
- One Bowl Wonder: I melt the butter and marshmallows together, stir in the cereals, and press—no extra bowls, no fuss.
- Sweet & Crunchy: The Fruity Pebbles add a bright, fruity snap while the Rice Krispies keep it light and crispy.
- Party or Lunchbox: I pack these for school snacks or cut them into squares for birthdays—kids and adults devour them.
- Budget Stretch: A box of cereal and a bag of marshmallows make dozens of bars, so it’s cheap and feeds a crowd.
Step-by-Step Instructions for Fruity Pebbles Rice Krispy Bars
Here’s the method. Straightforward, tested, works every time.
Step 1: Melt Butter and Prepare Marshmallow Base
In a large, heavy-bottomed pot, melt the 0.5 cup Salted Butter over low heat. I use a light-colored saucepan so I can monitor the melting process—you want the butter fully melted but not browned.
Once melted, add all 10 oz Mini Marshmallows and stir constantly with a silicone spatula. The marshmallows will begin to soften and melt after 2-3 minutes. Continue stirring until the mixture becomes completely smooth with no visible marshmallow pieces.
Remove from heat and stir in the 1 tsp Vanilla Extract and 1 pinch Pinch of Salt. The vanilla adds depth to the sweetness while the salt balances the overall flavor profile.
Step 2: Incorporate Cereals for Maximum Crunch
Working quickly while the marshmallow mixture is still hot, add 6 cups Fruity Pebbles Cereal and 3 cups Rice Krispies Cereal to the pot. I add the Fruity Pebbles first to preserve their vibrant colors, then the Rice Krispies for their signature snap.
Fold everything together gently but thoroughly using your spatula. You want every piece of cereal coated in the marshmallow mixture without crushing the flakes. The mixture will be thick and slightly sticky—this is normal.
Watch for the colors to become evenly distributed throughout the mixture. If you notice any dry cereal pieces, fold a few more times to ensure complete coverage.
Step 3: Press and Set in Pan
Transfer the mixture to a greased 9×13-inch baking pan (or line it with parchment paper for easier removal). I prefer to use my hands, lightly greased with butter or nonstick spray, to press the mixture evenly into the pan.
Press firmly but don’t compact it too tightly—you want the bars to hold together but still have that characteristic light, airy texture. Use the back of a greased spoon if you prefer not to use your hands.
Let the mixture set at room temperature for 30 minutes to 1 hour until completely firm. You’ll know it’s ready when the top looks matte rather than shiny and a light touch leaves no indentation.
Step 4: Cut and Serve
Once fully set, use a sharp knife to cut into 16 equal squares. For clean cuts, I run the knife under hot water and wipe it dry between each cut. This prevents the marshmallow from sticking to the blade.
Lift each square from the pan carefully—they should hold their shape but still have a slight give when pressed. If any edges look uneven, you can trim them for a more polished presentation.
Serve immediately or store in an airtight container at room temperature for up to 3 days. The bars are best enjoyed fresh but maintain their texture surprisingly well if properly stored.
Pro Tips For Making Fruity Pebbles Rice Crispy Bars
- Melt Butter Slowly: Use low heat to melt the butter—high heat will brown it too fast and give your bars an off flavor. I learned this the hard way after a batch tasted like caramel instead of fruity sweetness.
- Press While Warm: Press the cereal mixture into the pan immediately after mixing—waiting even 2 minutes makes it harder to shape. A buttered spatula or your clean hands work best for even pressure.
- Use Fresh Marshmallows: Stale mini marshmallows won’t melt as smoothly, leaving your bars grainy. Splurge on a fresh bag—it actually changes the texture.
- Add Vanilla Last: Stir the vanilla extract into the melted marshmallow-butter mixture just before adding the cereal. Adding it too early can make the vanilla taste harsh instead of warm and aromatic.
Make-Ahead Tips for This Dish
Prep Ahead Strategy
I always measure my 6 cups Fruity Pebbles and 3 cups Rice Krispies the night before. Store them in separate zip-top bags to maintain crispness. This saves 5 minutes of prep the next day and ensures accurate measurements. 💡
Melting Shortcut
Melt the 0.5 cup Salted Butter in the microwave using 30-second intervals at 50% power. Then add the 10 oz Mini Marshmallows and return to microwave for 1-2 minutes, stirring every 30 seconds. This method works perfectly in my small Boston kitchen.
Pan Prep
Line your 9×13-inch baking pan with parchment paper the night before. The paper should overhang the sides by 2 inches for easy lifting. I learned this trick after that infamous pot pie disaster—never again will I skip parchment.
Make-Ahead Assembly
You can fully mix and press the cereal into the pan up to 12 hours before serving. Cover tightly with plastic wrap and refrigerate. Bring to room temperature for 30 minutes before cutting for cleanest results.
Portion Control
For perfect squares every time, use a ruler to mark your pan into 16 equal sections before pressing in the mixture. Press along the lines to create natural divisions. This works especially well for school lunchbox portions.
Storage Timeline
These keep beautifully at room temperature for 3 days in an airtight container. For longer storage, freeze individual squares wrapped in wax paper for up to 2 months. Thaw overnight in the fridge. ❄️
Nutrition Facts
Frequently Asked Questions
Can I use regular marshmallows instead of mini ones?
Yes, but cut them into quarters first for even melting. Regular ones take longer to dissolve and may create uneven texture.
Why do I need both Fruity Pebbles and Rice Krispies?
Fruity Pebbles add color and sweetness while Rice Krispies provide that signature crispy texture. Using both gives the perfect balance.
How do I prevent my bars from being too sticky?
Lightly grease your hands and the spatula with butter before pressing. This prevents sticking while keeping the mixture manageable.
Can these be made gluten-free?
Use gluten-free Rice Krispies and ensure your Fruity Pebbles are certified gluten-free. The method remains the same.

- Furikake Rice Seasoning Recipe: Umami-Packed Japanese Blend for Any Meal - October 7, 2026
- Knorr Vegetable Soup Mix Rice Recipe: Savory One-Pot Side Dish - October 7, 2026
- Lebanese Lentil and Rice Soup Recipe: Mujadara-Inspired Warmth in a Bowl - October 7, 2026