
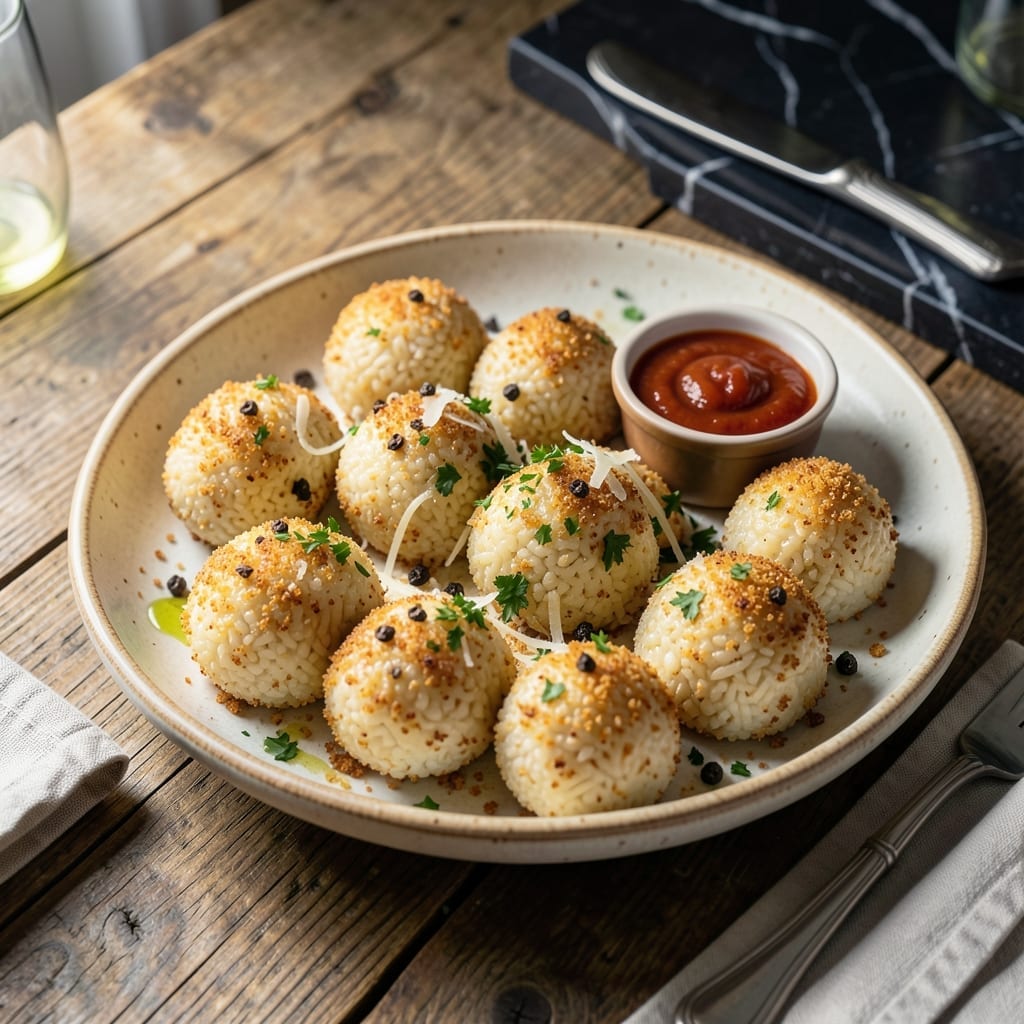
These golden arborio bites deliver the crispy texture you expect from traditional Italian rice balls. I developed this method to ensure perfect browning without drying out the center.
The secret is using cold, cooked rice and breading it just before frying. This creates a shatteringly crispy exterior while maintaining a creamy, tender interior. Each bite offers that classic contrast of textures.
Ingredients for Giada Rice Ball
Arborio rice, Parmesan, and breadcrumbs create these crispy golden bites with creamy centers.
| Ingredient | Amount | Notes |
|---|---|---|
| Arborio Rice 🍚 | 2 cups | Uncooked, for creamy texture |
| Vegetable Stock 🥫 | 4 cups | Low-sodium preferred for control |
| Parmesan Cheese 🧀 | ¾ cup | Freshly grated Parmigiano-Reggiano |
| Large Eggs 🥚 | 2 whole | Beaten for binding rice mixture |
| All-Purpose Flour 🌾 | 1 cup | For initial breading layer |
| Italian Breadcrumbs 🍞 | 2 cups | Fine, dry breadcrumbs preferred |
| Olive Oil 🫒 | 3 cups | For deep frying, neutral high-smoke-point |
| Garlic Cloves 🧄 | 2 cloves | Minced finely for flavor base |
| Yellow Onion 🧅 | ½ whole | Finely diced for aromatic base |
| Unsalted Butter 🧈 | 2 tbsp | For sautéing aromatics |
| Fresh Parsley 🌿 | ¼ cup | Chopped fine, for garnish |
| Sea Salt 🧂 | 1 tsp | Fine grain, divided as needed |
| Black Pepper 🌶️ | ½ tsp | Freshly ground preferred |
| Nutmeg 🌰 | ¼ tsp | Freshly grated for warmth |
The Arborio rice is non-negotiable here—its high starch content delivers the signature creamy interior that defines authentic arancini. Lundberg and Riseria Acquerello are premium brands, but any supermarket Arborio works. The Parmigiano-Reggiano must be freshly grated; pre-grated contains anti-caking agents that inhibit melting. For the breadcrumbs, Progresso Italian-style offers consistent texture.
No Arborio? Carnaroli or Vialone Nano are acceptable substitutes—both maintain the necessary creaminess. For a gluten-free version, swap all-purpose flour for rice flour and use gluten-free panko. The eggs can be replaced with a flax mixture (1 tablespoon ground flaxseed plus 3 tablespoons water per egg), though binding may be slightly less effective. Vegetable stock can be homemade or store-bought, but avoid overly salty varieties.
Cooked rice must chill completely (minimum 4 hours, preferably overnight) before breading to prevent crumbling. Fried arancini keep warm in a 200°F oven for up to 30 minutes. Store leftovers in the refrigerator for 3 days or freeze for 1 month—reheat in the oven to restore crispness.
Why You’ll Love This Recipe
- One-Pot Wonder: I love that the Arborio rice cooks right in the vegetable stock—no extra pots, no fuss.
- Cheesy Comfort: That Parmesan melted into the rice? It’s the kind of rich, savory bite I crave.
- Make-Ahead Magic: I roll these up in the morning, refrigerate, and fry later—perfect for busy days.
- Budget Stretcher: Honestly, Arborio rice and eggs make these feel fancy without breaking the bank.
Step-by-Step Instructions for Crispy Golden Arborio Bites
Master the technique for achieving perfectly crisp exteriors with creamy, flavorful centers every time.
Step 1: Cook Arborio Rice with Aromatics
In a medium saucepan, heat the 2 tbsp unsalted butter over medium heat. Add the 0.5 whole yellow onion and 2 cloves garlic cloves, both finely minced, and sauté until translucent, about 3-4 minutes. This builds the aromatic foundation for your rice mixture.
Add the 2 cups Arborio Rice and toast for 1-2 minutes, stirring constantly, until the grains appear slightly translucent at the edges. Pour in the 4 cups vegetable stock, add ½ tsp black pepper, and bring to a simmer. Cook, stirring occasionally, for 18-20 minutes until the rice is tender and the liquid is absorbed.
Step 2: Season and Bind the Rice Mixture
Remove the pan from heat and let the rice cool for 5 minutes. Stir in the 0.75 cup Parmesan Cheese, 1 tsp sea salt, and 0.25 tsp nutmeg. The Parmesan should melt into the warm rice, creating a creamy, cohesive base. Here’s the thing—taste at this stage and adjust seasoning if needed.
Once the mixture is cool enough to handle, add the 2 whole large eggs and mix thoroughly. The eggs act as the binding agent that holds the rice together during frying. The mixture should be sticky and hold its shape when pressed between your fingers. If it feels too loose, let it cool completely before proceeding.
Step 3: Bread the Rice Balls for Maximum Crisp
Set up a breading station with three shallow dishes. Place the 1 cup all-purpose flour in the first, beat the eggs are already incorporated so skip this, and put the 2 cups Italian breadcrumbs in the third. I’ve found that using fine, dry breadcrumbs gives the best crispy coating that adheres well to the rice.
With damp hands, form the rice mixture into 1.5-inch balls (you should get about 16). Roll each ball first in the flour, shaking off excess, then in the breadcrumbs, pressing gently to ensure full coverage. Place the breaded balls on a parchment-lined tray and refrigerate for 20 minutes to set the coating.
Step 4: Deep-Fry to Golden Perfection
In a deep, heavy-bottomed pot, heat the 3 cups olive oil to 350°F. Use a candy or deep-fry thermometer for accuracy—this temperature ensures even cooking without burning the breading. The oil should be deep enough to submerge the rice balls completely.
Working in batches to avoid overcrowding, carefully lower 4-5 rice balls into the hot oil. Fry for 3-4 minutes, turning occasionally, until they’re golden brown on all sides and crispy. Transfer to a paper towel-lined plate to drain excess oil. The interior should be creamy and hot throughout when tested.
Step 5: Serve Immediately with Fresh Garnish
These bites are best served immediately while still hot and crispy. Arrange them on a platter and sprinkle with the 0.25 cup fresh parsley, finely chopped. The parsley adds a pop of color and freshness that cuts through the richness.
Real talk: if you need to hold them for a few minutes, place them on a wire rack in a 200°F oven to maintain crispness. But they’re at their peak right out of the fryer, with that perfect contrast of crispy exterior and creamy, cheesy interior that makes this dish special.
Pro Tips For Making Giada Rice Ball
- Chill Before Rolling: After mixing the rice with eggs and Parmesan, refrigerate the mixture for 30 minutes—I learned this the hard way when my first batch kept falling apart in the oil.
- Use Cold Stock: Add ice-cold vegetable stock to the Arborio rice slowly, about 1/2 cup at a time, stirring constantly. This prevents the rice from turning mushy before it’s shaped.
- Skip Warm Eggs: Resist the urge to warm the eggs first; cold eggs bind the rice mixture better and make forming the balls much easier.
- Double-Coat for Crisp: Roll the rice balls in flour, then dip in beaten egg, and coat in flour again. This extra step gives them that golden, crispy crust Giada’s version is known for.
Troubleshooting This Recipe
Rice Too Dry
If your rice mixture seems dry after cooking, it likely needs more liquid. Stir in ¼ cup warm vegetable stock at a time until it reaches a sticky consistency. The Arborio should hold together when pressed but still be creamy. 💡
Breading Falls Off
This usually happens with warm rice. Always chill your cooked rice for 4+ hours before breading. Also, ensure each ball is fully coated in flour first—this creates a sticky base for the breadcrumbs to adhere to.
Oil Temperature Drops
Overcrowding the pot causes temperature fluctuations. Fry in small batches of 4-5 balls and maintain oil at 350°F. Use a candy thermometer for precision. Cold rice balls will also lower oil temp, so keep them chilled until ready to fry.
Greasy Results
Drain fried balls on a wire rack (not paper towels) to prevent steam from making them soggy. If they absorb too much oil, your oil may not have been hot enough—bring it back to 350°F before the next batch.
Balls Break Apart
This often means the mixture needs more binder. Add 1 extra egg or 2 tbsp grated Parmesan to help hold it together. Also, don’t rush the chilling step—20 minutes in the fridge firms up the balls before frying.
Uneven Cooking
If centers are cold while outsides are brown, your balls may be too large. Aim for 1.5-inch diameter. Also, ensure oil fully submerges them during frying for even cooking throughout. 🔥
Nutrition Facts
Frequently Asked Questions
Can I use regular rice instead of Arborio?
No, Arborio’s high starch content is essential for the creamy texture. Substitutes like Carnaroli or Vialone Nano work, but long-grain rice will yield dry, crumbly results.
How do I keep them warm before serving?
Place fried balls on a wire rack in a 200°F oven for up to 30 minutes. This prevents sogginess while maintaining crispness.
Can I bake instead of fry?
Yes, but texture differs. Bake at 400°F for 20-25 minutes, flipping halfway. They’ll be less crispy but still delicious.
Why did my rice balls fall apart?
Likely the rice wasn’t chilled enough or needed more binder. Refrigerate the mixture 4+ hours and add 1 extra egg if needed.

- Furikake Rice Seasoning Recipe: Umami-Packed Japanese Blend for Any Meal - October 7, 2026
- Knorr Vegetable Soup Mix Rice Recipe: Savory One-Pot Side Dish - October 7, 2026
- Lebanese Lentil and Rice Soup Recipe: Mujadara-Inspired Warmth in a Bowl - October 7, 2026