
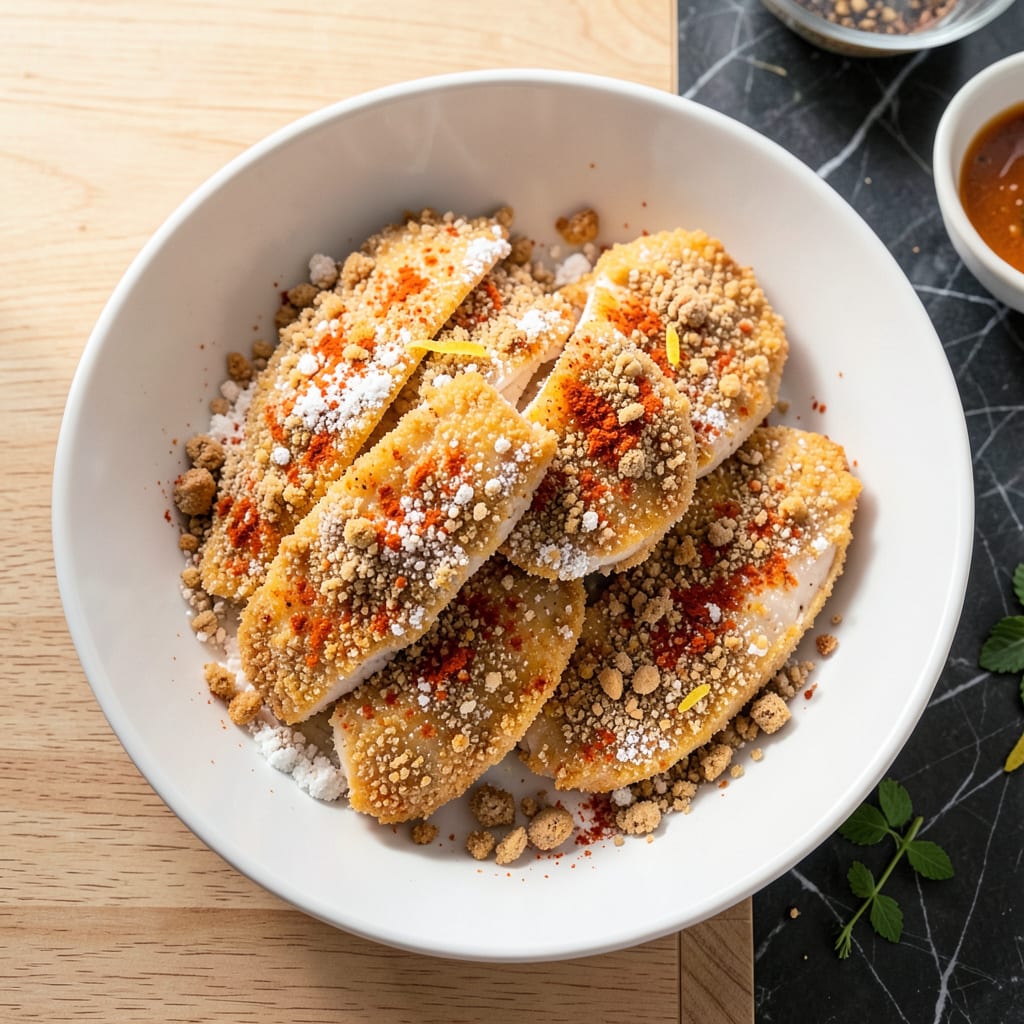
This gluten-free coating delivers a crispy, golden crust that rivals traditional versions. The secret lies in a simple blend of rice flour and cornstarch, creating the perfect texture without compromising on flavor.
Bake or pan-fry for perfectly crunchy results every time. This method ensures your chicken stays juicy inside while developing that satisfying crunch on the outside.
Ingredients for Gluten Free Chicken Coating
Twelve ingredients transform chicken into crispy, gluten-free perfection with golden results every time.
| Ingredient | Amount | Notes |
|---|---|---|
| Boneless Skinless Chicken Breasts 🍗 | 1 ½ lb | Pounded to even thickness |
| White Rice Flour 🌾 | 1 cup | Fine, unbleached preferred |
| Cornstarch 🌽 | ½ cup | For extra crispiness |
| Almond Flour 🌰 | ½ cup | Blanched, fine grind |
| Paprika 🌶️ | 1 tbsp | Sweet or smoked variety |
| Garlic Powder 🧄 | 1 tbsp | Freshly ground preferred |
| Onion Powder 🧅 | 1 tbsp | Fine, uniform texture |
| Salt 🧂 | 1 ½ tsp | Diamond Crystal kosher |
| Black Pepper 🌶️ | ½ tsp | Freshly ground preferred |
| Dried Oregano 🍃 | 1 tsp | Mediterranean variety |
| Dried Thyme 🌿 | 1 tsp | Rubbed between fingers |
| Large Eggs 🥚 | 2 whole | For binding coating |
| Olive Oil 🫒 | ½ cup | For pan-frying or baking |
[recipeingredientscaler]
The rice flour and cornstarch blend is non-negotiable for that signature crunch. Bob’s Red Mill produces reliable gluten-free flours available at Whole Foods or most supermarkets. Almond flour adds richness—opt for blanched, super-fine from Costco or Trader Joe’s for consistent texture. Ensure your spices are fresh; stale paprika loses its vibrant color and potency.
Out of almond flour? Fine cornmeal at half the quantity works, though texture differs slightly. No rice flour? Sorghum flour is the closest substitute. For egg-free binding, aquafaba or flax eggs (1 tbsp ground flax + 3 tbsp water per egg) maintain crispiness. The olive oil can be swapped for avocado oil—higher smoke point for frying.
Store unused gluten-free flours in the freezer to prevent rancidity—keeps 6-12 months. Coated chicken holds in the fridge for 1 day before cooking. Once cooked, leftovers stay crispy when reheated in a toaster oven for 3-4 days.
Why You’ll Love This Recipe
- One Bowl Mix: I just dump the rice flour, cornstarch, almond flour, and paprika in a bowl, stir, and coat—no extra dishes, no fuss.
- Crispy Perfection: That almond flour gives it this nutty, golden crunch that’s way better than regular breadcrumbs.
- Freezer Friendly: I make a double batch, freeze half, and pull it out for quick dinners when I’m too tired to cook.
- Budget Stretcher: Chicken breasts on sale plus pantry staples means this costs me under $10 to feed four.
Step-by-Step Instructions for Gluten Free Chicken Coating
Here’s the method. Straightforward, tested, works every time.
Step 1: Prepare the Chicken
Begin by pounding the 1.5 lb Boneless Skinless Chicken Breasts to an even thickness of about ½ inch using a meat mallet. This ensures uniform cooking and prevents dry spots. Place each breast between two sheets of plastic wrap for easier handling.
Pat the pounded chicken completely dry with paper towels. Moisture is the enemy of a crispy coating. I always take the extra minute to ensure every surface is dry—this small step makes a significant difference in the final texture.
Step 2: Create the Dry Coating Mixture
In a shallow bowl, whisk together the 1 cup White Rice Flour, 0.5 cup Cornstarch, and 0.5 cup Almond Flour. These three flours create the perfect gluten-free blend—rice flour provides structure, cornstarch adds crunch, and almond flour contributes richness.
Add the 1 tbsp Paprika, 1 tbsp Garlic Powder, 1 tbsp Onion Powder, 1.5 tsp Salt, 0.5 tsp Black Pepper, 1 tsp Dried Oregano, and 1 tsp Dried Thyme. Stir until all ingredients are evenly distributed and the mixture takes on a uniform color with visible herb specks.
Step 3: Set Up the Egg Wash Station
In a separate shallow bowl, whisk the 2 whole Large Eggs until fully combined. The egg wash acts as the glue that helps the dry coating adhere to the chicken. For best results, use eggs at room temperature—they spread more evenly.
Place the bowl of dry coating mixture next to the egg wash. This assembly-line setup makes the breading process more efficient. I like to position my workspace near the stove to minimize movement once the coating begins.
Step 4: Coat the Chicken
Dip each piece of chicken into the egg wash, ensuring it’s fully coated on all sides. Let any excess drip off for a moment—this prevents thick, gummy spots in your coating. Then transfer the chicken to the dry mixture, pressing gently to ensure full coverage.
For extra crispiness, I recommend a double-dip method: after the first coating, briefly return the chicken to the egg wash, then back to the dry mixture. This creates a thicker, crunchier crust. Shake off any excess flour mixture before cooking.
Step 5: Cook to Golden Perfection
Heat the 0.5 cup Olive Oil in a large skillet over medium-high heat until shimmering but not smoking. The oil is ready when a small piece of coating sizzles immediately when dropped in. Carefully add the coated chicken pieces, being careful not to crowd the pan.
Cook for 4-5 minutes per side until the coating is deep golden brown and crispy. The internal temperature should reach 165°F when measured with an instant-read thermometer. Transfer to a wire rack set over a baking sheet to maintain crispiness while resting.
Pro Tips For Making Gluten Free Chicken Coating
- Preheat the Pan: I learned this the hard way—crank that skillet to medium-high before adding the chicken, or the coating will absorb oil and turn soggy instead of crispy.
- Pat Chicken Dry: Even a little moisture on the chicken will make the almond flour and rice flour clump up instead of sticking properly, so grab a paper towel and dry each piece thoroughly.
- Skip the Overmixing: Stir the white rice flour, cornstarch, and almond flour just until combined—overworking it makes the coating dense and gummy.
- Double Dredge: Sounds like extra work, but dipping the chicken in flour mix, then egg wash, then back in the flour mix gives that restaurant-style crunch with half the effort.
Wine and Beer Pairings for gluten free chicken coating
Crisp White Wines
A chilled Sauvignon Blanc from New Zealand cuts through the richness beautifully. Its citrusy acidity balances the crispy coating perfectly. I love Kim Crawford or Oyster Bay for reliable quality at $12-15. 🍷
Light Lager Beers
For beer lovers, a crisp Mexican lager like Modelo Especial or Pacifico complements the savory spices without overpowering. The light body and subtle malt notes refresh your palate between bites.
Fruity Rosé
A dry Provence-style rosé with its delicate berry notes pairs wonderfully with the herb-forward coating. Look for Whispering Angel or Miraval at your local Total Wine. Serve at 45-50°F for best flavor.
Wheat-Free Ales
Gluten-free beer drinkers should try Omission Pale Ale or Glutenberg Blonde. These craft options have the hoppy character to stand up to the coating’s spices while keeping the meal entirely gluten-free.
Sparkling Options
For a celebratory touch, Prosecco or Cava works beautifully. The bubbles cleanse your palate, while the slight sweetness contrasts nicely with the savory chicken. I recommend La Marca Prosecco for its consistent quality.
Nutrition Facts
Frequently Asked Questions
Can I use this coating for oven baking?
Bake at 400°F for 20-25 minutes, flipping halfway. Use a wire rack on a baking sheet for crispier results. The high heat mimics frying for that golden crunch.
What can I substitute for almond flour?
Fine cornmeal works best in a 1:1 ratio. For nut-free options, try 1/4 cup additional rice flour plus 1/4 cup tapioca starch. Texture may vary slightly but stays crispy.
How do I keep the coating from falling off?
Press firmly when coating and let it rest 10 minutes before cooking. Chill the chicken 30 minutes after coating for maximum adhesion. Avoid overcrowding the pan.
Can I make this egg-free?
Yes! Use 3 tbsp aquafaba or flax eggs (1 tbsp ground flax + 3 tbsp water per egg). Both bind well and maintain crispiness.

- Jollof Rice Sauce Recipe: West African Tomato and Spice Infusion - September 25, 2026
- Japanese Rice Soup Recipe: Umami-Rich Comfort in a Bowl - September 25, 2026
- Homemade Cream Of Rice Recipe: Silk-Smooth Breakfast in Minutes - September 25, 2026