
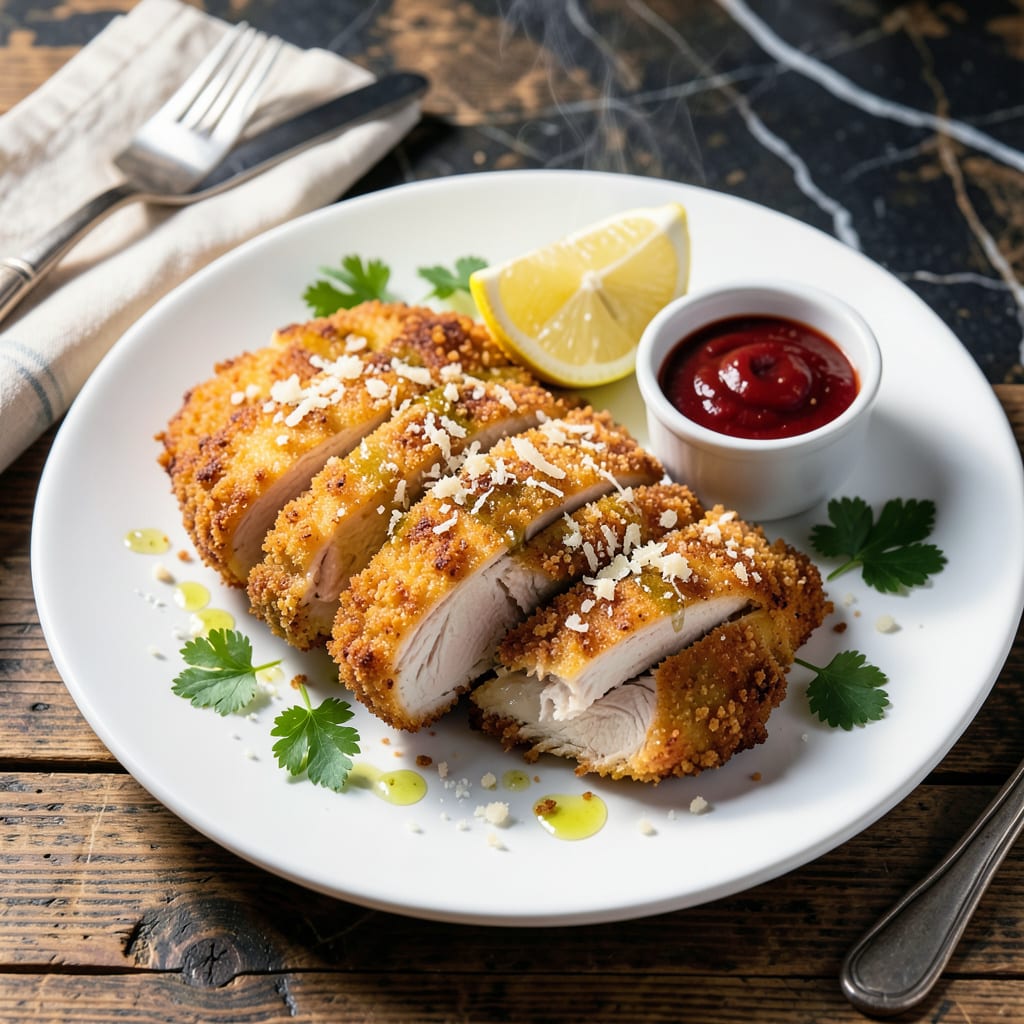
Achieving perfectly crispy chicken cutlets without gluten is absolutely possible with the right technique. This method delivers golden, crunchy results every time.
Using a simple gluten-free breading mixture and precise frying temperature ensures each cutlet cooks evenly. The secret is in the double-dredging process for maximum crunch.
Ingredients for Gluten Free Chicken Cutlet
Quality ingredients create that signature crunch without gluten. Nothing complicated, just precise execution.
| Ingredient | Amount | Notes |
|---|---|---|
| Boneless Skinless Chicken Breast 🍗 | 1 ½ lb | Pounded to 1/4-inch thickness |
| Gluten-Free All-Purpose Flour 🌾 | 1 cup | For initial dredging layer |
| Cornstarch 🌾 | ½ cup | Creates extra crispiness |
| Large Eggs 🥚 | 2 whole | Beaten for binding |
| Gluten-Free Breadcrumbs 🍞 | 2 cups | Panko-style preferred |
| Grated Parmesan Cheese 🧀 | ½ cup | Freshly grated from block |
| Garlic Powder 🧄 | 1 tsp | For seasoning breading |
| Onion Powder 🧅 | 1 tsp | For seasoning breading |
| Paprika 🌶️ | 1 tsp | Sweet or smoked variety |
| Salt 🧂 | 1 tsp | Kosher or sea salt preferred |
| Black Pepper 🌶️ | ½ tsp | Freshly ground preferred |
| Neutral Oil 🫒 | 1 ½ cups | For frying, avocado or vegetable |
| Dijon Mustard 🟡 | 2 tbsp | Optional for extra tang |
[recipeingredientscaler]
The chicken must be uniformly thin for even cooking. Costco often carries pre-pounded cutlets, but most supermarkets sell whole breasts you can pound yourself. King Arthur and Bob’s Red Mill offer reliable gluten-free flour blends. For breadcrumbs, Aleia’s or Kinnikinnick panko-style varieties deliver superior texture. Always check labels for hidden gluten in seasoning blends.
No gluten-free flour? Fine cornmeal at half the amount works in a pinch. Substitute almond flour for a nutty variation (though texture differs). Out of breadcrumbs? Crushed gluten-free cornflakes or rice cereal add crunch. The Parmesan can be omitted for dairy-free, but add 1/4 tsp extra salt to compensate. Mustard lovers can use whole grain for visible seeds.
Breaded cutlets are best fried immediately, but can rest 15 minutes before cooking. Store raw cutlets in the fridge up to 24 hours before frying. Cooked cutlets keep 3-4 days refrigerated or freeze for 2 months. Reheat in the oven for maximum crispiness.
Why You’ll Love This Recipe
- No-Fuss Coating: I just dip, dredge, and fry—no complicated steps, and the cornstarch keeps it extra crispy.
- Crispy Perfection: That golden crunch from the gluten-free breadcrumbs with a juicy chicken center? Ridiculously good.
- Weeknight Hero: Honestly, it’s my go-to for quick dinners, and the leftovers make killer sandwiches the next day.
- Budget Friendly: One pound of chicken breasts stretches into four servings, and the pantry staples do the rest.
Step-by-Step Instructions for Gluten Free Chicken Cutlets
Master this technique for restaurant-quality crispiness without a trace of gluten in sight.
Step 1: Prepare the Chicken and Breading Station
Begin by pounding the 1.5 lb Boneless Skinless Chicken Breast to an even ¼-inch thickness between sheets of plastic wrap. This ensures uniform cooking and prevents dry spots. Season both sides with the 1 tsp Salt and 0.5 tsp Black Pepper.
Set up a breading assembly line: shallow dish with 1 cup Gluten-Free All-Purpose Flour mixed with 0.5 cup Cornstarch, second dish with 2 whole Large Eggs beaten until smooth, and third dish with 2 cups Gluten-Free Breadcrumbs combined with 0.5 cup Grated Parmesan Cheese, 1 tsp Garlic Powder, 1 tsp Onion Powder, and 1 tsp Paprika.
Step 2: Execute the Three-Step Breading Process
Dredge each piece of chicken in the flour-cornstarch mixture, pressing firmly to adhere. Shake off any excess—this layer creates the foundation for crispiness. Immediately dip into the beaten eggs, allowing any excess to drip off.
Transfer to the breadcrumb mixture, pressing the crumbs into the chicken with your fingers to create an even, thick coating. For extra adhesion, I place the breaded cutlet on a wire rack for 5 minutes to set before frying. This prevents the coating from falling off during cooking.
Step 3: Pan-Fry to Golden Perfection
Heat 1.5 cups Neutral Oil in a large, heavy skillet over medium-high heat to 350°F. To test readiness, drop in a pinch of breadcrumbs—if it sizzles immediately, the oil is ready. Carefully place the breaded cutlets in the hot oil, working in batches to avoid crowding.
Fry for 3-4 minutes per side until the coating is deep golden brown and the internal temperature reaches 165°F. The crust should be audibly crisp when tapped with a spatula. Drain on a wire rack or paper towels to maintain crispiness.
Step 4: Optional Finishing Touch
For an extra flavor boost, whisk the 2 tbsp Dijon Mustard with a tablespoon of hot oil from the pan. Brush this mixture lightly over the hot cutlets immediately after frying. The residual heat will mellow the mustard’s sharpness while adding a sophisticated depth.
Serve the cutlets immediately while the crust is at its peak crispiness. The combination of the shatteringly crisp exterior and the juicy, tender chicken inside delivers the perfect gluten-free result every time.
Pro Tips For Making Gluten Free Chicken Cutlet
- Pound Evenly: Use a meat mallet to pound the chicken breasts to an even ¼-inch thickness—I learned this the hard way after my first batch cooked unevenly, with burnt edges and raw centers.
- Double Dredge: Dip each piece in the egg wash, then the gluten-free flour and cornstarch mix, back into the egg, and finally the breadcrumbs; this extra step guarantees a crunchy crust that actually sticks.
- Skip Cold Chicken: Let the chicken sit at room temperature for 15 minutes before cooking; cold meat seizes up in the pan and never browns the way you want it to.
- Use Cornstarch Slurry: Mix 1 tablespoon cornstarch into the egg wash—it thickens the coating just enough to prevent the breadcrumbs from sliding off while frying.
Essential Equipment for This Recipe
Frying Equipment
Invest in a heavy-bottomed cast iron skillet or stainless steel sauté pan for even heat distribution. I use my Lodge 12-inch skillet for consistent results. Avoid nonstick for high-heat frying as it can’t reach the ideal 350°F safely. 🔥
Temperature Control
A deep-fry/candy thermometer is essential for monitoring oil temperature. I recommend the Taylor Classic model for accuracy. Maintaining 350°F prevents greasy cutlets. Clip it to the pan side for constant visibility.
Breading Station
Use shallow dishes or pie plates for your dredging stations. I prefer stainless steel for easy cleanup. A wire cooling rack placed over a baking sheet helps drain excess oil while keeping cutlets crisp.
Oil Options
Choose a neutral oil with high smoke point. I use avocado oil for its health benefits and 480°F smoke point. Vegetable or peanut oil work well too. Avoid olive oil as its low smoke point burns at frying temps.
Prep Tools
A meat mallet with flat and textured sides helps pound chicken evenly. I use the OXO Good Grips model. Plastic wrap prevents splatter while pounding. Keep a paper towel roll handy for quick cleanups between batches. 💡
Safety Gear
Always have a splatter screen nearby to prevent oil burns. I keep tongs and a slotted spatula for safe handling. A fire extinguisher rated for grease fires should be in your kitchen for emergencies.
Nutrition Facts
Frequently Asked Questions
Can I bake these instead of frying?
Yes! Bake at 400°F for 20-25 minutes, flipping halfway. Spray lightly with oil first for extra crispiness. The texture won’t be identical, but it’s a healthier option.
Why does my breading keep falling off?
This usually happens if the chicken isn’t dry before breading or if you skip pressing the crumbs firmly. Let the egg-dipped chicken drain for 10 seconds before adding breadcrumbs.
How do I keep them crispy after cooking?
Drain on a wire rack, not paper towels, to prevent steam buildup. Reheat in the oven at 375°F for 10 minutes to revive crispiness.

- Jollof Rice Sauce Recipe: West African Tomato and Spice Infusion - September 25, 2026
- Japanese Rice Soup Recipe: Umami-Rich Comfort in a Bowl - September 25, 2026
- Homemade Cream Of Rice Recipe: Silk-Smooth Breakfast in Minutes - September 25, 2026