
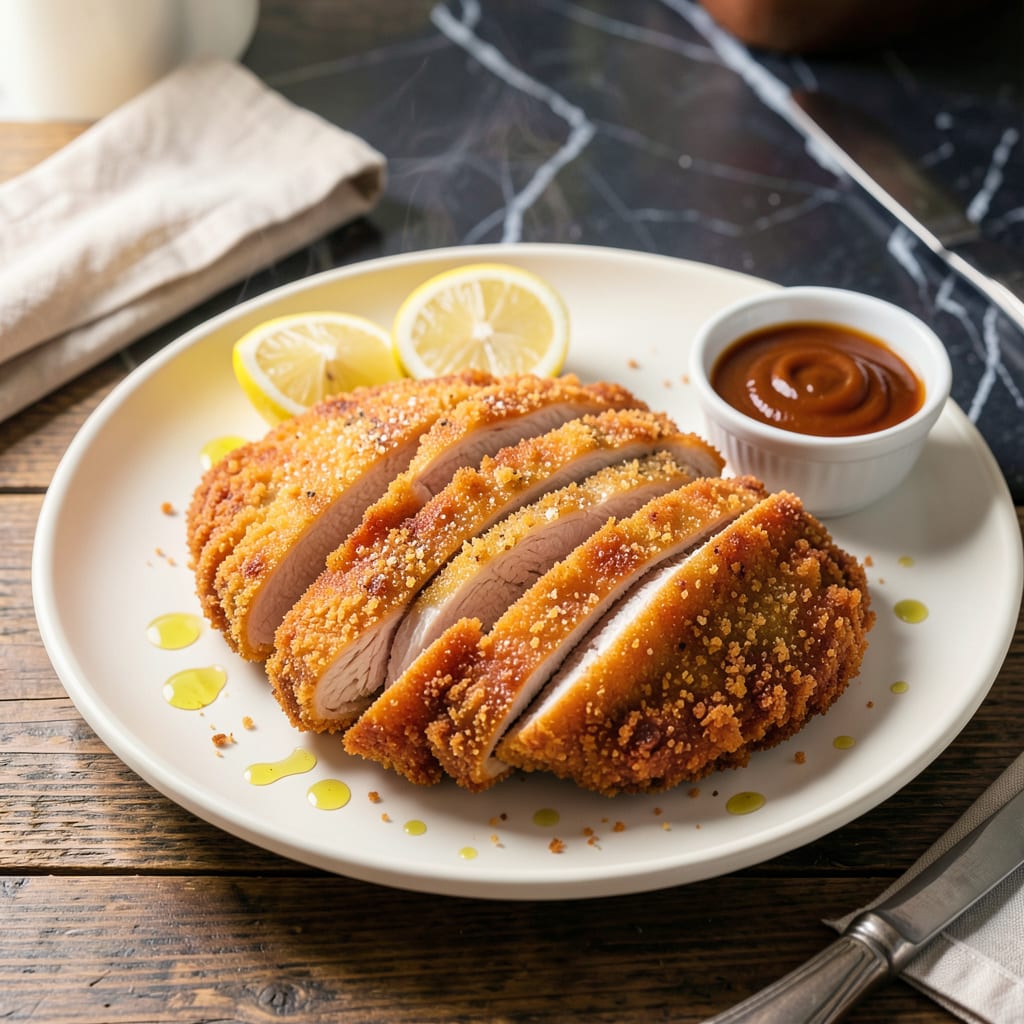
Achieving a perfectly crispy chicken katsu without gluten is simpler than you think. This recipe replaces traditional panko with gluten-free breadcrumbs, delivering the same satisfying crunch and golden finish.
With a few smart swaps and precise frying at 350°F, you’ll get tender chicken encased in a light, airy coating. The result is a dish that rivals its traditional counterpart in both texture and flavor.
Ingredients for Gluten Free Chicken Katsu
Pantry raid for gluten-free swaps. Big crunch, zero gluten, all flavor.
| Ingredient | Amount | Notes |
|---|---|---|
| Chicken Breasts 🍗 | 1 ½ lb | Boneless, skinless, pounded to 1/2-inch thickness |
| Gluten-Free Breadcrumbs 🍞 | 2 cups | Panko-style for best crunch |
| All-Purpose Gluten-Free Flour 🌾 | ½ cup | For initial dredging |
| Large Eggs 🥚 | 2 whole | Beaten for egg wash |
| Cornstarch 🌽 | 2 tbsp | Mixed into flour for crispiness |
| Garlic Powder 🧄 | 1 tsp | For seasoning the coating |
| Onion Powder 🧅 | 1 tsp | For seasoning the coating |
| Salt 🧂 | 1 tsp | Divided for chicken and coating |
| Black Pepper 🌶️ | ½ tsp | Freshly ground preferred |
| Neutral Oil 🫒 | 4 cups | For frying, like vegetable or canola |
| Tonkatsu Sauce 🍯 | ½ cup | For serving, store-bought or homemade |
| Shredded Cabbage 🥬 | 2 cups | For serving, optional garnish |
[recipeingredientscaler]
The breadcrumbs are the MVP here. Gluten-free panko from Kikkoman or Aleia’s gives that signature crunch—regular gluten-free breadcrumbs just won’t cut it. Look for fine, uniform texture (no big chunks) and check the label for added gluten. I’ve had the best luck at Whole Foods or the gluten-free aisle at Kroger. Pounding the chicken evenly is key—use a rolling pin or the flat side of a meat mallet (or a heavy pan, no judgment).
No gluten-free panko? Crushed gluten-free cornflakes work in a pinch—pulse them in a food processor first. Out of gluten-free flour? Rice flour or cornstarch alone can sub for the dredge, but the texture won’t be quite as crisp. For the tonkatsu sauce, substitute with BBQ sauce plus a splash of Worcestershire (check for gluten-free labels). The cornstarch in the flour mix is non-negotiable—it’s what gives that extra crunch.
Fry in batches to avoid crowding—keeps the oil temp steady at 350°F. Leftovers? They’ll lose some crispness, but reheat in a toaster oven or air fryer at 375°F for 5-6 minutes. Store cooked chicken in the fridge for up to 3 days, or freeze uncooked breaded cutlets for 1 month.
Why You’ll Love This Recipe
- One Pan Magic: I just coat, fry, and serve—no complicated steps, and the cornstarch keeps everything extra crispy.
- Crispy Heaven: That golden gluten-free breadcrumb crust cracks perfectly with every bite, and the chicken stays juicy inside.
- Meal Prep Hero: Honestly, it reheats beautifully for lunches, and my kids beg for it in their school boxes.
- Budget Stretcher: Chicken breasts go further with this coating, and a bag of gluten-free breadcrumbs lasts for multiple batches.
Step-by-Step Instructions for Gluten Free Chicken Katsu
Here’s the method. Straightforward, tested, works every time.
Step 1: Prep and Season the Chicken
Start by patting the 1.5 lb chicken breasts completely dry with paper towels. This is non-negotiable—any moisture will prevent the coating from adhering properly. Season both sides evenly with ½ tsp salt and ½ tsp black pepper. I like to let the seasoning sit on the meat for 5-10 minutes while I set up my breading station.
Place each breast between two sheets of plastic wrap and pound to an even ½-inch thickness using a meat mallet or rolling pin. Uniform thickness ensures even cooking, so every bite is perfectly crispy without any dry spots. You should end up with four evenly sized cutlets from the 1.5 lb of chicken.
Step 2: Set Up the Breading Station
In a shallow dish, whisk together the 0.5 cup all-purpose gluten-free flour, 2 tbsp cornstarch, 1 tsp garlic powder, 1 tsp onion powder, and remaining ½ tsp salt. The cornstarch is my secret weapon—it creates an extra-crispy crust that holds up beautifully to frying.
In a second shallow dish, beat the 2 whole large eggs until well combined. In a third dish, add the 2 cups gluten-free breadcrumbs. I spread them out evenly so each piece of chicken gets maximum crunch. The three-dish setup keeps everything organized and prevents cross-contamination between wet and dry ingredients.
Step 3: Bread and Fry the Chicken
Dredge each cutlet in the flour mixture, pressing gently to ensure full coverage. Shake off any excess—you want a thin, even layer. Then dip into the beaten eggs, allowing any excess to drip back into the dish. Finally, press into the gluten-free breadcrumbs, turning to coat completely. Press firmly so the crumbs adhere well.
Heat the 4 cups neutral oil in a large, deep skillet over medium-high heat until it reaches 350°F. Use a deep-fry thermometer for accuracy—this temperature is crucial for achieving that perfect golden-brown crust without burning. Carefully lower the breaded cutlets into the hot oil. Fry for 4-5 minutes per side until deep golden brown and the internal temperature reaches 165°F.
Step 4: Drain and Serve Immediately
Transfer the fried cutlets to a wire rack set over a baking sheet or a paper towel-lined plate. This allows air to circulate underneath, preventing the crust from becoming soggy. Don’t stack them—this traps steam and ruins your hard-earned crunch.
Serve the chicken katsu immediately while still hot and crispy. Slice into strips or leave whole, and accompany with ½ cup tonkatsu sauce for dipping. For a traditional touch, serve with 2 cups shredded cabbage on the side. The contrast of the crispy chicken with the cool, fresh cabbage is what makes this dish special.
Pro Tips For Making Gluten Free Chicken Katsu
- Pound the Chicken: Use a meat mallet to pound the chicken breasts to an even ½-inch thickness—I learned this the hard way after my first batch cooked unevenly, with burnt crust and raw centers.
- Double Coat the Cutlets: Dip in cornstarch first, then egg, then gluten-free flour, then egg again, and finally breadcrumbs. Sounds tedious, but it’s the only way to guarantee that crispy, crunchy texture gluten-free breadcrumbs often struggle to hold.
- Rest Before Frying: Let the breaded cutlets rest for 10 minutes before frying. Skipping this makes the coating slide right off—I skip it when I’m in a hurry, but the difference in adhesion is noticeable every time.
- Use Medium-High Heat: Fry at 350°F to 375°F—any hotter and the gluten-free breadcrumbs burn before the chicken cooks through. After burning two batches, I finally invested in a kitchen thermometer and never looked back.
Make-Ahead Tips for This gluten free chicken katsu
Prep Ahead Breading
You can bread the chicken up to 24 hours in advance. After coating, place cutlets on a wire rack over a baking sheet and refrigerate uncovered. This keeps the breading dry and ready for frying. I do this every time I host dinner parties. 💡
Freeze Uncooked Cutlets
For longer storage, freeze breaded cutlets flat on a baking sheet for 1 hour, then transfer to a freezer bag with parchment between layers. They’ll keep for 1 month. Fry from frozen, adding 1-2 minutes to cooking time.
Oil Prep
If frying in batches, keep the oil at 350°F between batches. I use a candy thermometer clipped to the pan for monitoring. Let the oil cool completely before storing—never pour hot oil down the drain.
Reheating Leftovers
Revive crispiness by reheating in a toaster oven or air fryer at 375°F for 5-6 minutes. The microwave will make them soggy, so avoid it. Serve with fresh shredded cabbage to maintain that perfect texture contrast.
Sauce Storage
Make tonkatsu sauce up to 1 week ahead and store in an airtight container in the fridge. The flavors meld beautifully over time. Bring to room temperature before serving for the best consistency. ❄️
Day-Of Tips
If prepping ahead, take refrigerated breaded cutlets out 30 minutes before frying. This ensures even cooking. I always set a timer to remind myself to check the oil temperature before starting.
Nutrition Facts
Frequently Asked Questions
Can I bake this instead of frying?
Yes! Bake at 400°F for 15-20 minutes, flipping halfway. The texture won’t be as crispy, but it’s a healthier option. Use a wire rack for better air circulation.
What’s the best gluten-free breadcrumb brand?
Kikkoman’s gluten-free panko is the top choice for authentic crunch. Aleia’s also works well if you can’t find Kikkoman. Avoid fine, sand-like breadcrumbs.
Why did my coating fall off?
This usually happens if the chicken isn’t dry before breading. Pat it thoroughly with paper towels, and press the crumbs firmly onto the egg wash.
Can I use chicken thighs instead?
Thighs stay juicier and are more forgiving. Pound them to ½-inch thickness and adjust cooking time to 5-6 minutes per side.

- Jollof Rice Sauce Recipe: West African Tomato and Spice Infusion - September 25, 2026
- Japanese Rice Soup Recipe: Umami-Rich Comfort in a Bowl - September 25, 2026
- Homemade Cream Of Rice Recipe: Silk-Smooth Breakfast in Minutes - September 25, 2026