
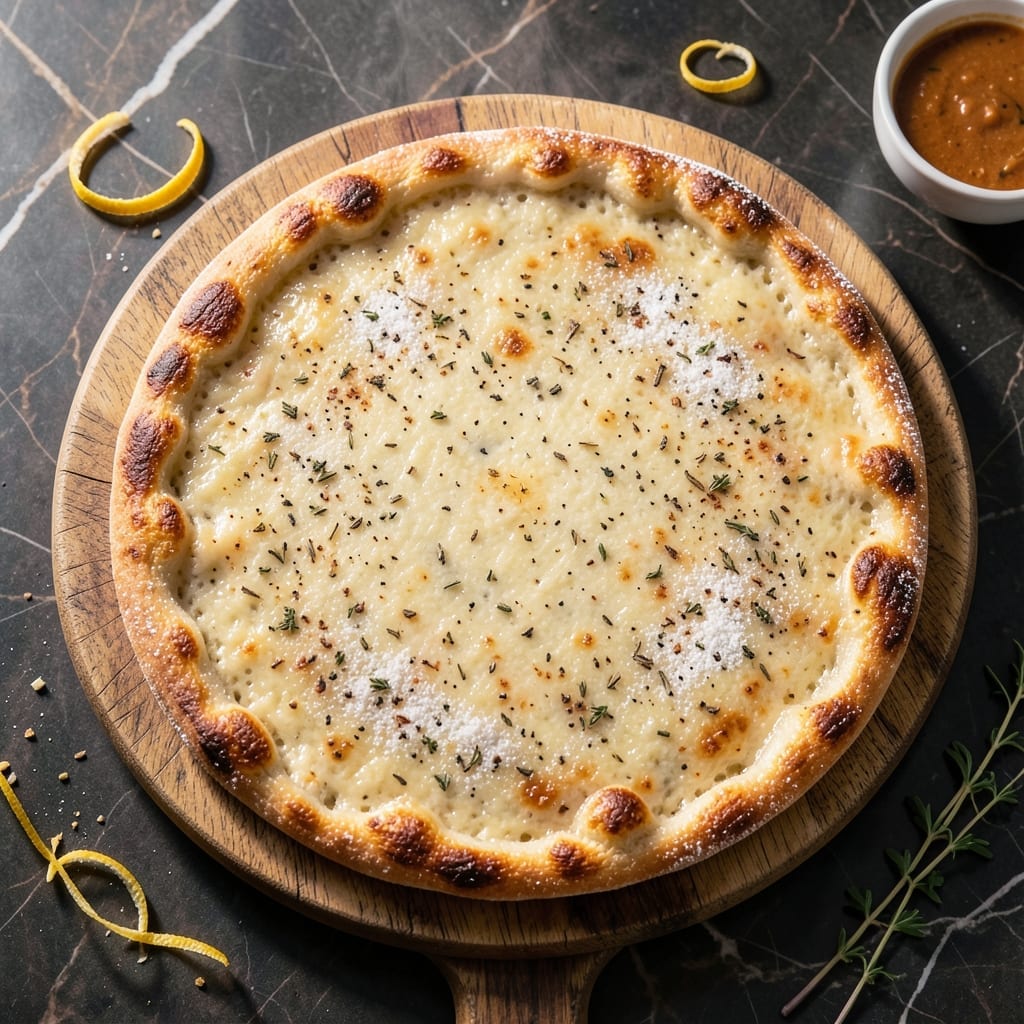
This rice flour pizza crust delivers a crispy base that holds up to any topping combination you crave. The secret lies in the perfect ratio of rice flour to starch, creating a sturdy yet tender texture without gluten.
With a simple mixing and resting process, this dough bakes into a golden, sturdy crust in under 20 minutes. It’s naturally vegan and proves that gluten-free can mean full-flavor, not compromise.
Ingredients for Gluten Free Pizza Crust Recipe Rice Flour
Pantry staples and a few special blends create this crispy, gluten-free base.
| Ingredient | Amount | Notes |
|---|---|---|
| White Rice Flour 🌾 | 2 cups | Fine grind for best texture |
| Tapioca Starch 🌾 | ½ cup | Or substitute cornstarch |
| Xanthan Gum 🧪 | 1 tsp | For elasticity, omit if sensitive |
| Baking Powder 🧂 | 1 tsp | Ensures proper rise |
| Salt 🧂 | ½ tsp | Fine sea salt preferred |
| Garlic Powder 🧄 | ½ tsp | Adds savory depth |
| Olive Oil 🫒 | 2 tbsp | Extra-virgin for richness |
| Water 💧 | ¾ cup | Warm, about 110°F |
| Apple Cider Vinegar 🍏 | 1 tsp | Helps with structure |
| Psyllium Husk Powder 🌿 | 1 tsp | Optional, for extra chew |
| Dried Oregano 🍃 | ½ tsp | For classic pizza flavor |
| Dried Basil 🌿 | ½ tsp | Complements topping choices |
The rice flour is non-negotiable here—Bob’s Red Mill or Authentic Foods are my go-tos for consistent texture. Tapioca starch (found at Whole Foods or any well-stocked supermarket) adds that perfect chew. Xanthan gum might seem fancy, but 1 tsp makes all the difference in holding everything together. Skip it only if you’re sensitive to it.
No tapioca starch? Cornstarch at a 1:1 ratio works in a pinch. Out of xanthan gum? Psyllium husk powder at the same amount can substitute, but the texture will be slightly denser. For extra flavor, add a pinch of onion powder or swap the olive oil for avocado oil—both work great.
The dough rests best at room temp for 15-20 minutes. Baked crusts keep in an airtight container for 2 days, but they’re best fresh. Freeze the dough balls for up to 1 month if you want to prep ahead.
Why You’ll Love This Recipe
- No-Fuss Mixing: I just dump the rice flour, tapioca starch, and a pinch of xanthan gum in a bowl—no fancy techniques, no waiting for dough to rise.
- Crispy Yet Tender: The combo of rice flour and tapioca starch gives that perfect snap on the edges while staying soft inside.
- Pizza Night, Anytime: Honestly, it’s my go-to for weeknight dinners, movie nights, or even when friends pop over unannounced.
- Budget-Kind Crust: A bag of rice flour costs pennies and makes multiple crusts, so I’m not breaking the bank for gluten-free goodness.
Step-by-Step Instructions for Gluten Free Pizza Crust Rice Flour
Here’s the method I use to get that perfect crispy base every single time.
Step 1: Mix the Dry Ingredients
In a large bowl, whisk together the 2 cups White Rice Flour, 0.5 cup Tapioca Starch, 1 tsp Xanthan Gum, 1 tsp Baking Powder, 0.5 tsp Salt, 0.5 tsp Garlic Powder, 0.5 tsp Dried Oregano, and 0.5 tsp Dried Basil. I always whisk for at least 30 seconds to ensure the xanthan gum distributes evenly—this prevents gummy spots.
The garlic powder, oregano, and basil add that classic pizza flavor right into the crust. Don’t skip the whisking; you want everything perfectly blended before adding the wet ingredients.
Step 2: Combine Wet Ingredients
In a separate bowl, mix the 0.75 cup Water, 2 tbsp Olive Oil, 1 tsp Apple Cider Vinegar, and 1 tsp Psyllium Husk Powder. The psyllium husk gives the crust extra chew, and the vinegar helps with structure—both are key for that perfect texture.
I use warm water (about 110°F) to help activate the psyllium husk. Let this mixture sit for 2 minutes to thicken slightly before combining with the dry ingredients. You’ll notice it develops a gel-like consistency—that’s exactly what you want.
Step 3: Form and Rest the Dough
Pour the wet mixture into the dry ingredients and stir with a wooden spoon until a thick batter forms. It should look like pancake batter but slightly thicker. If it seems too dry, add a splash more water, but don’t overdo it—the dough needs to hold its shape.
Let the dough rest for 10 minutes. This resting period allows the flours to fully hydrate and the xanthan gum to work its magic. You’ll see the dough become smoother and more elastic during this time. Cover the bowl with a damp towel to prevent drying out.
Step 4: Shape and Pre-Bake the Crust
Preheat your oven to 425°F. Line a pizza pan or baking sheet with parchment paper. Scoop the dough onto the prepared pan and use a spatula (or your hands, slightly wet to prevent sticking) to spread it into an even ¼-inch thick circle.
Bake the crust for 10 minutes before adding toppings. This pre-baking step is crucial for achieving that crispy texture. The edges should start to turn light golden brown—that’s your cue it’s ready for toppings.
Step 5: Finish Baking with Toppings
Remove the crust from the oven and add your favorite toppings. Return it to the oven and bake for another 10-12 minutes until the crust is golden brown and crispy around the edges.
For the crispiest result, I like to bake the topped pizza on the lowest oven rack. Keep an eye on it during the last few minutes to prevent over-browning. The crust should be firm enough to hold its shape when sliced, with a satisfying crunch when you take a bite.
Pro Tips For Making Gluten Free Pizza Crust Recipe Rice Flour
- Preheat the Pan: I learned this the hard way—crank your oven to 425°F and preheat the pizza pan for 10 minutes before adding the dough. Gluten-free crust needs that hot surface to crisp up properly.
- Measure Xanthan Gum: Sounds weird, but it works: use a scale for the xanthan gum—0.25 oz (about 1 tsp) per cup of rice flour. Too much makes it gummy, too little and it crumbles.
- Skip Cold Ingredients: After burning three batches, I finally figured out that room-temperature eggs (if using) and warm water blend better with rice flour. Cold ingredients make the dough dense.
- Rest the Dough: Give it a solid 20 minutes under a damp towel before rolling. My grandmother swore by this, and she was right—it keeps the crust from cracking when you stretch it.
Troubleshooting This Recipe
Dough Too Sticky
If your dough sticks to your hands, it likely needs more rice flour. Add 1-2 tbsp at a time until it reaches the right consistency. I find that slightly wet hands also help when handling the dough. Don’t overdo the flour, or your crust will be dry and crumbly. 💡
Crust Not Crispy
For a crispier crust, ensure your oven is fully preheated to 425°F before baking. Also, roll the dough as thin as ¼-inch for even cooking. Baking on the lowest rack helps achieve that golden, crispy texture.
Dough Doesn’t Hold Shape
If your dough spreads too much, it might need more xanthan gum or psyllium husk. Let it rest for the full 10 minutes to allow the binders to activate. Chilling the dough for 15-20 minutes can also improve its stability.
Gummy Interior
Overmixing or underbaking can cause a gummy center. Stir just until combined, and ensure the crust bakes for the full 10 minutes before adding toppings. A preheated pizza stone or inverted baking sheet can help distribute heat evenly.
Cracking Crust
If your crust cracks while baking, it may be too dry. Add a splash of water to the dough and let it rest again. Rolling it out between two sheets of parchment paper can prevent tearing as you shape it.
For extra insurance, brush the crust with 1 tbsp olive oil before pre-baking to keep it pliable. ✨
Nutrition Facts
Frequently Asked Questions
Can I use brown rice flour instead of white?
Yes, but the texture will be denser and grittier. White rice flour gives the lightest, crispiest result. If using brown, add 1 extra tbsp water to compensate for its coarser grind.
Why does my crust taste gritty?
This usually means the rice flour wasn’t fine enough. Always use superfine white rice flour and ensure it’s well-whisked with other dry ingredients. A 30-second whisk prevents clumps.
How do I make it extra crispy?
Pre-bake the crust for 12 minutes instead of 10, and use a pizza stone. Baking on the lowest oven rack also helps achieve maximum crispiness.
Can I make this ahead of time?
Yes! Prepare the dough, cover tightly, and refrigerate for up to 24 hours. Let it come to room temperature before shaping. For longer storage, freeze the dough ball for up to 1 month.

- Ground Beef Rice and Beans Recipe: Slow-Simmered Savory Harmony - October 17, 2026
- Guyanese Fried Rice Recipe: Caribbean Spice With Wok-Charred Aromatics - October 17, 2026
- Hakka Thunder Tea Rice Recipe: Wok-Charred Herbal Infusion - October 17, 2026