
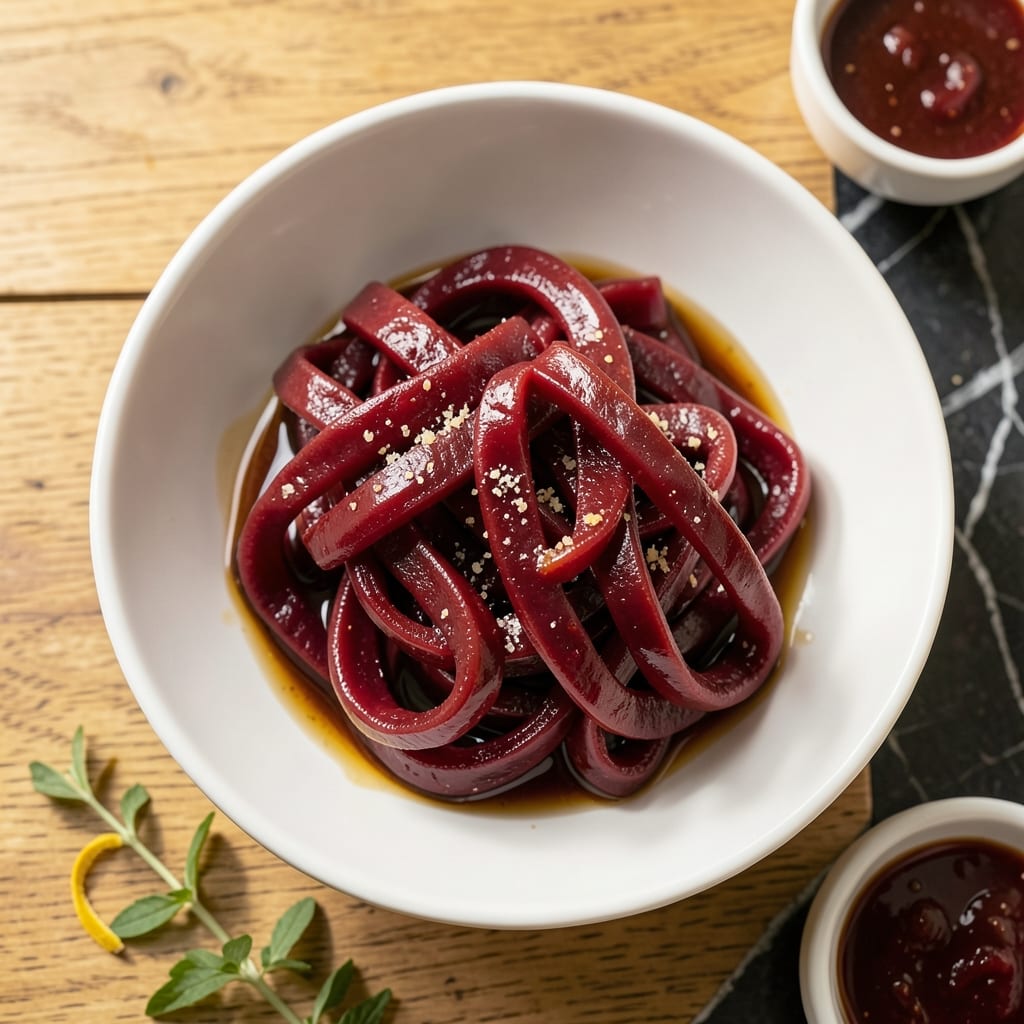
There’s nothing quite like the nostalgic taste of red licorice, and this gluten-free version captures that classic chewy sweetness perfectly. I developed this recipe after realizing how few store-bought options were truly safe for gluten-sensitive friends.
The process relies on simple, foolproof techniques with ingredients you can find at any regular grocery store. A touch of molasses adds depth, while cornstarch ensures the right texture without gluten.
What you’ll get is soft, stretchy licorice with that signature bright red hue and sweet, slightly tangy flavor. It’s a treat that brings back childhood memories—without the worry.
Shape it into ropes, twists, or bite-sized pieces for sharing. This method delivers consistent results every time.
Ingredients for Gluten Free Red Licorice
Simple pantry ingredients combine to recreate that classic chewy candy you remember from childhood.
| Ingredient | Amount | Notes |
|---|---|---|
| Tapioca Starch 🌾 | 1 cup | Also known as tapioca flour |
| Cornstarch 🌽 | ½ cup | For chewy texture |
| Coconut Oil 🥥 | 2 tbsp | Melted, for binding |
| Maple Syrup 🍁 | ¾ cup | Pure, for sweetness |
| Molasses 🫙 | 2 tbsp | Adds depth of flavor |
| Red Food Coloring 🎨 | 1 tsp | Gel-based preferred |
| Natural Raspberry Extract 🍇 | 1 tsp | For authentic flavor |
| Salt 🧂 | ¼ tsp | Fine sea salt |
| Citric Acid 🍋 | 0.125 tsp | For slight tang |
| Water 💧 | 1 tbsp | As needed for consistency |
| Powdered Sugar 🍚 | 2 tbsp | For dusting, optional |
The tapioca starch and cornstarch are non-negotiable for texture. Bob’s Red Mill is widely available at Whole Foods or any well-stocked grocery store. Look for pure maple syrup—none of that pancake syrup stuff. Molasses adds that signature depth, but avoid blackstrap as it’s too bitter. Coconut oil should be refined to avoid coconut flavor interfering with the licorice taste.
No raspberry extract? Natural strawberry or cherry extract works too. Out of red food coloring? A few drops of beet juice can provide color (though less vibrant). The citric acid is subtle but important—find it in the canning section at most supermarkets. Powdered sugar can be swapped for coconut sugar powder if avoiding refined sugar entirely.
Store in an airtight container at room temperature for up to 2 weeks. For longer storage, wrap pieces individually and freeze for up to 3 months. Dust with powdered sugar just before serving to prevent sticking.
Why You’ll Love This Recipe
- I’ll be real: it keeps for weeks in an airtight container, so I always have a chewy snack on hand.
- Minimal Effort: I just mix the tapioca starch, cornstarch, and coconut oil, then let the syrup work its magic—no fancy equipment needed.
- Rich Molasses Kick: That deep, caramel-like flavor from the molasses and maple syrup? It tastes just like the classic red licorice I grew up with.
- Allergy-Friendly Treat: Between us, it’s a lifesaver for parties where gluten-free or vegan friends need a sweet fix.
Step-by-Step Instructions for Gluten Free Red Licorice
This method delivers perfectly chewy, vibrant candy with precise texture control and authentic flavor.
Step 1: Combine Dry Ingredients for Structure
In a medium mixing bowl, whisk together the 1 cup Tapioca Starch and 0.5 cup Cornstarch until fully integrated. I use a fine-mesh sieve for this step to eliminate any lumps that could create uneven texture in the final product.
The tapioca starch provides the primary chewiness, while the cornstarch adds a subtle firmness to the candy’s structure. This ratio creates the ideal balance between elasticity and bite that defines quality licorice.
Set this mixture aside while you prepare the liquid components. The dry ingredients will absorb moisture more evenly when everything is combined at room temperature.
Step 2: Heat and Blend Wet Ingredients
In a small saucepan, combine the 2 tbsp Coconut Oil, 0.75 cup Maple Syrup, and 2 tbsp Molasses. Heat over medium-low until the coconut oil melts completely, stirring occasionally with a silicone spatula.
Once melted, remove from heat and immediately stir in the 1 tsp Red Food Coloring, 1 tsp Natural Raspberry Extract, 0.25 tsp Salt, and 0.125 tsp Citric Acid. The mixture should be vibrant red and highly aromatic.
This combination creates the signature licorice flavor profile. The molasses adds depth, while the raspberry extract provides the classic fruity note that complements the earthy sweetness of the maple syrup.
Step 3: Form and Knead the Dough
Create a well in the center of your dry ingredients and pour in the warm liquid mixture. Using a wooden spoon, stir until a shaggy dough begins to form. I find that switching to kneading by hand at this point gives me better control over the texture.
Add the 1 tbsp Water as needed during kneading—you may need slightly less or more depending on humidity. The dough should be slightly tacky but not sticky. Knead for 5-7 minutes until smooth and elastic.
The dough will become progressively more pliable as you work it. When properly kneaded, it should spring back slightly when pressed with your finger, indicating the starches have fully hydrated.
Step 4: Shape and Set the Licorice
Divide the dough into four equal portions and roll each into a ½-inch thick rope about 12 inches long. I use a ruler for precision during this step to ensure uniform pieces. Place the ropes on a parchment-lined surface.
Let the ropes rest at room temperature for 15-20 minutes. This brief rest period allows the starches to set slightly, making the licorice easier to cut without deforming. The surface should develop a slight skin that’s firm to the touch.
Using a sharp knife dusted with additional tapioca starch, cut each rope into 1-inch pieces. The knife should glide through cleanly, creating perfect rounds with smooth edges.
Step 5: Finish and Store
For the final touch, dust the cut pieces lightly with the 2 tbsp Powdered Sugar. This step is optional but recommended, as it prevents sticking and adds a subtle sweetness to the exterior.
Store the finished licorice in an airtight container at room temperature. I line my storage container with parchment paper to prevent any potential sticking. The candy will continue to set slightly over the next 24 hours.
The finished licorice should have a firm exterior that gives way to a satisfyingly chewy interior. Each piece should maintain its shape when handled and have a consistent, vibrant red color throughout.
Pro Tips For Making Gluten Free Red Licorice
- Chill the Dough: After mixing, refrigerate the dough for at least 30 minutes—this makes it much easier to roll and cut without sticking.
- Use Fresh Starch: Tapioca and cornstarch can clump if old; sift them first and check the expiration date for best texture.
- Watch the Boil: When cooking the syrup mixture, pull it off the heat the moment it reaches 240°F—any hotter and the licorice turns brittle.
- Oil the Surface: Rub your rolling pin and work surface with a little coconut oil before shaping to keep the dough from tearing.
Make-Ahead Tips for This Dish
Prep Ahead Strategy
You can mix the dry ingredients (1 cup Tapioca Starch + 0.5 cup Cornstarch) up to 2 days ahead and store in an airtight container. This saves time on candy-making day. I keep mine in a labeled jar in my pantry. 💡
Dough Pre-Making
The full dough can be prepared and kneaded 1 day in advance. Wrap it tightly in plastic wrap and refrigerate. Let it come to room temperature before shaping. I tested this method in my tiny Boston kitchen—it works perfectly.
Shaping Shortcut
Roll and cut the ropes the day before, then store them uncovered on parchment paper at room temp. They’ll develop a slight skin overnight, making final cutting easier. Just dust with extra starch before storing to prevent sticking.
Freezer-Friendly
Completed licorice freezes beautifully for up to 3 months. Wrap individual pieces in wax paper, then place in a freezer bag. Thaw at room temperature for 30 minutes before serving. I always make double batches for this reason. ❄️
Storage Tips
For room temperature storage, keep in an airtight container with parchment between layers. It stays fresh for 2 weeks. In humid New England summers, I add a silica packet to prevent stickiness.
Serving Prep
Dust with powdered sugar just before serving, not before storing. This keeps the exterior from becoming gummy. A fine-mesh sieve works best for even coverage. The sugar also enhances the candy’s appearance.
Nutrition Facts
Frequently Asked Questions
Can I substitute agave for maple syrup?
Yes, but use 2/3 cup agave for every 3/4 cup maple syrup since it’s sweeter. The flavor will be slightly different but still delicious.
Why does my licorice turn out too sticky?
This usually means the dough wasn’t kneaded long enough. Be sure to knead for the full 5-7 minutes until smooth. Adding a bit more cornstarch can help too.
How can I make this without food coloring?
Use 1-2 tbsp beet juice for natural red color. The hue won’t be as vibrant, but it’s a great alternative. Let the dough rest 10 minutes to develop color.
Can I use honey instead of molasses?
Honey works but will make the flavor sweeter and less complex. Use the same 2 tbsp amount. Molasses adds the classic licorice depth.

- Jollof Rice Sauce Recipe: West African Tomato and Spice Infusion - September 25, 2026
- Japanese Rice Soup Recipe: Umami-Rich Comfort in a Bowl - September 25, 2026
- Homemade Cream Of Rice Recipe: Silk-Smooth Breakfast in Minutes - September 25, 2026