
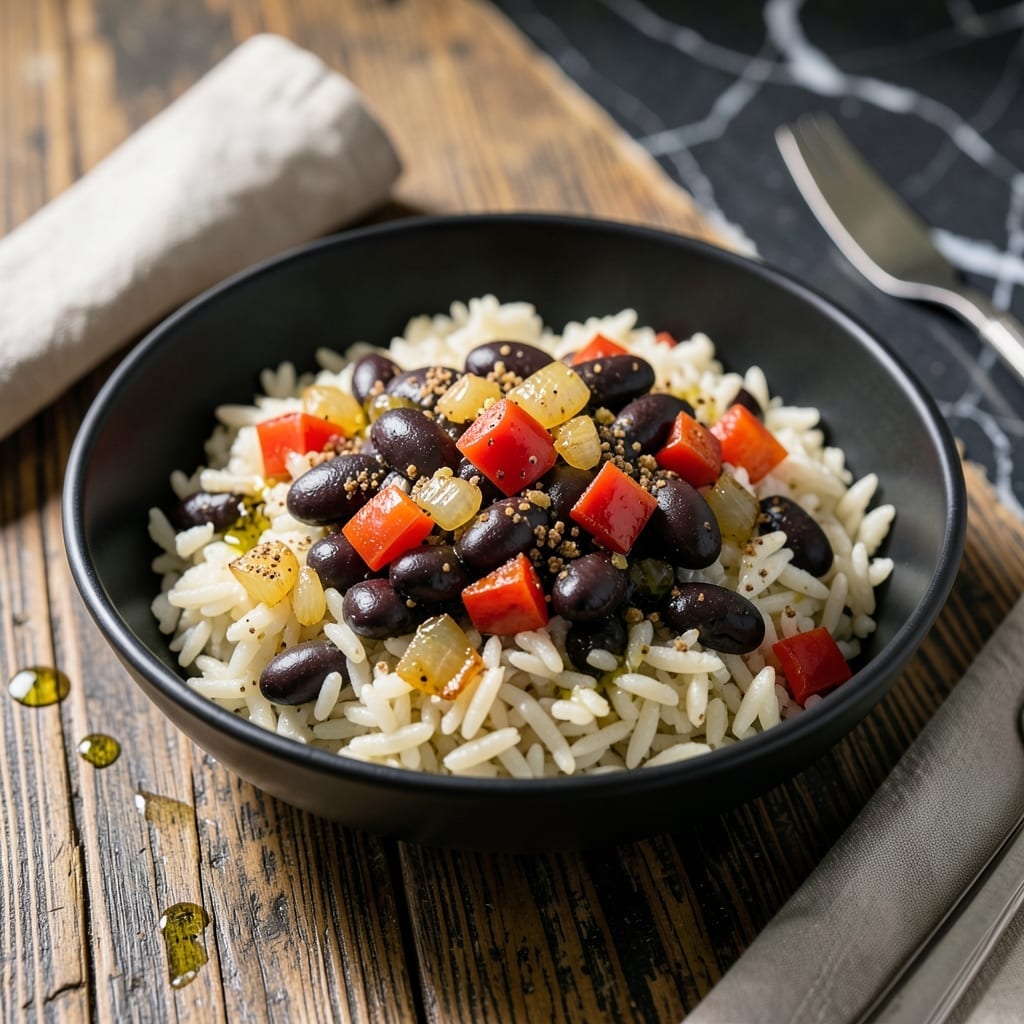
This Latin-inspired dish proves gluten-free eating never means sacrificing flavor or satisfaction. A simple combination of rice and beans transforms into a protein-packed meal with bold spices and fresh ingredients.
Perfect for busy weeknights, this recipe comes together quickly using pantry staples. The result is hearty, nourishing, and naturally free from gluten—ideal for any dietary need.
Ingredients for Gluten Free Rice and Beans
Pantry staples meet fresh produce for a bold, satisfying Latin-inspired dish with zero gluten.
| Ingredient | Amount | Notes |
|---|---|---|
| Long-Grain White Rice 🍚 | 1 ½ cups | Rinsed until water runs clear |
| Black Beans 🫘 | 2 cans | Drained and rinsed thoroughly |
| Red Bell Pepper 🌶️ | 1 whole | Diced into 1/4-inch pieces |
| Yellow Onion 🧅 | 1 whole | Finely diced for even cooking |
| Garlic Cloves 🧄 | 4 cloves | Minced for maximum flavor |
| Ground Cumin 🌿 | 1 ½ tsp | Toasted lightly for depth |
| Smoked Paprika 🌶️ | 1 tsp | Adds authentic Latin smokiness |
| Dried Oregano 🍃 | 1 tsp | Mexican oregano preferred |
| Bay Leaf 🍃 | 1 whole | Removed before serving |
| Vegetable Broth 💧 | 2 cups | Low-sodium for control |
| Lime 🍈 | 1 whole | Zested and juiced |
| Fresh Cilantro 🌿 | ½ cup | Chopped, stems removed |
| Extra-Virgin Olive Oil 🫒 | 2 tbsp | Divided for cooking and finishing |
| Sea Salt 🧂 | 1 tsp | Adjust to taste at end |
| Freshly Ground Black Pepper 🌶️ | ½ tsp | Coarse grind preferred |
The beans are the protein backbone here. Goya or Eden Organic brands offer consistent quality, but any canned black bean works if drained well. For rice, jasmine or basmati add fragrance, though long-grain white is traditional. The vegetable broth should be certified gluten-free—Imagine or Pacific Foods are reliable choices. Fresh cilantro and lime are non-negotiable for that bright finish.
No black beans? Pinto beans or red kidney beans work equally well. Out of fresh cilantro? Fresh parsley at double the amount fills the gap. Smoked paprika missing? Regular paprika plus a pinch of cayenne mimics the smokiness. The bell pepper can be swapped for poblano for milder heat. For extra richness, a splash of coconut milk stirred in at the end adds creaminess without dairy.
Leftovers keep beautifully—actually improve as flavors meld. Store in an airtight container for 4-5 days in the fridge or freeze for 3 months. The rice may firm up when chilled; a splash of water and quick reheat restores its texture. Always taste for salt after reheating, as flavors concentrate over time.
Why You’ll Love This Recipe
- One Pot Meal: I throw everything in together—rice, beans, peppers—and walk away. Honestly, it doesn’t get simpler.
- Garlicky Depth: The garlic and onions bloom in the pot, turning the rice into something ridiculously good.
- Meal Prep Hero: I make a big batch Sunday and it tastes even better Wednesday. Between us, leftovers never get old.
- Budget Stretcher: A pound of rice and a can of beans feed my family for days. I’ll be real: it’s my wallet’s favorite recipe.
Step-by-Step Instructions for Latin-Inspired Rice and Beans
Master the technique behind this authentic dish with precise timing and sensory cues.
Step 1: Sauté Aromatic Base for Depth of Flavor
Heat 1 tablespoon extra-virgin olive oil in a large pot over medium heat. Add the diced yellow onion and cook for 4-5 minutes until translucent and just beginning to caramelize at the edges. This develops the sweet foundation for your dish.
Add the diced red bell pepper and cook for another 3-4 minutes until softened. Stir in the minced garlic cloves and cook for 30 seconds until fragrant—don’t let it brown. The garlic should perfume the air without turning bitter.
Step 2: Bloom Spices and Toast the Rice
Stir in the ground cumin, smoked paprika, and dried oregano. Cook for 1 minute to toast the spices, releasing their essential oils. The mixture should become deeply aromatic, with the cumin’s earthiness coming to the forefront.
Add the rinsed long-grain white rice and stir to coat each grain with the spiced oil. Cook for 2 minutes, stirring constantly, until the rice becomes slightly opaque and nutty in aroma. This toasting step prevents the grains from becoming mushy during cooking.
Step 3: Simmer with Beans and Broth
Pour in the 2 cups vegetable broth and add the drained black beans, bay leaf, sea salt, and freshly ground black pepper. Stir well and bring to a boil. The liquid should look richly colored from the spices and vegetables.
Once boiling, reduce heat to low, cover, and simmer for 18-20 minutes until the rice is tender and the liquid has been absorbed. Check at 15 minutes—the rice should be nearly done with just a slight bite. Resist the urge to stir during cooking, as this can break the rice grains.
Step 4: Finish and Rest for Optimal Texture
Remove from heat and let sit covered for 5 minutes. This steam-finishing step ensures the rice cooks evenly throughout. Discard the bay leaf and gently fluff the rice with a fork to separate the grains.
Stir in the remaining 1 tablespoon extra-virgin olive oil, the zest and juice of the lime, and half the chopped fresh cilantro. The lime’s acidity brightens the earthy flavors, while the cilantro adds freshness. Taste and adjust seasoning with additional sea salt if needed.
Pro Tips For Making Gluten Free Rice And Beans
- Rinse the Rice: I learned this the hard way—unrinsed long-grain rice turns gummy. Swirl it in cold water until the water runs clear, then drain well.
- Bloom the Spices: Cook minced garlic and diced onion in oil for 2-3 minutes until fragrant before adding anything else. This builds the base flavor that makes the dish sing.
- Skip Canned Beans: Sounds weird, but dry black beans soaked overnight and simmered with a bay leaf taste richer than canned—plus you control the sodium.
- Rest Before Serving: After cooking, let the rice and beans sit covered for 5 minutes. This lets the flavors meld and the rice absorb any last bits of liquid.
Essential Equipment for gluten free rice and beans
Core Cookware
I always reach for my 5-quart Dutch oven—Le Creuset or Lodge enameled cast iron are perfect. The heavy base prevents scorching during the 18-20 minute simmer, while the tight lid traps steam for even cooking.
Rice Rinsing Tool
A fine-mesh strainer is essential for rinsing the 1.5 cups rice until the water runs clear. I use OXO Good Grips with a 2-quart capacity—it fits nicely in my sink and the handle stays cool. 💧
Spice Prep
For toasting the cumin, paprika, and oregano, a wooden spoon works best. It won’t scratch your pot and lets you stir constantly during that critical 1-minute blooming phase.
Knife and Board
Use an 8-inch chef’s knife and plastic cutting board for the onion, bell pepper, and garlic. A sharp Wüsthof makes quick work of dicing, and plastic won’t dull your blade like glass or stone.
Serving Essentials
Once finished, a rice paddle or wooden spoon helps fluff without crushing the grains. I serve mine in a stoneware bowl to keep it warm through second helpings. 🍽️
Nutrition Facts
Frequently Asked Questions
Can I use brown rice instead of white?
Yes, but adjust the liquid to 2.5 cups and simmer for 40-45 minutes. Brown rice needs more time to soften, so check at 35 minutes and add extra broth if needed.
What if I don’t like cilantro?
Skip it or replace with flat-leaf parsley. For a different twist, try fresh mint or green onions for brightness without the cilantro flavor.
Can I make this in a rice cooker?
Sauté aromatics first, then transfer to the cooker with rice, beans, broth, and spices. Use the standard 1:2 rice-to-liquid ratio and cook as usual.
Why did my rice turn out mushy?
Likely over-stirring or too much liquid. Avoid stirring after adding broth, and ensure the lid stays on during the 18-20 minute simmer.

- Five Spice Rice Recipe: Aromatic Grains With Warm Spice Balance - October 10, 2026
- Flavoured Basmati Rice Recipe: Aromatic Grains with Spiced Depth - October 10, 2026
- Fish Porridge Rice Cooker Recipe: Hands-Free Congee With Silky Depth - October 10, 2026