
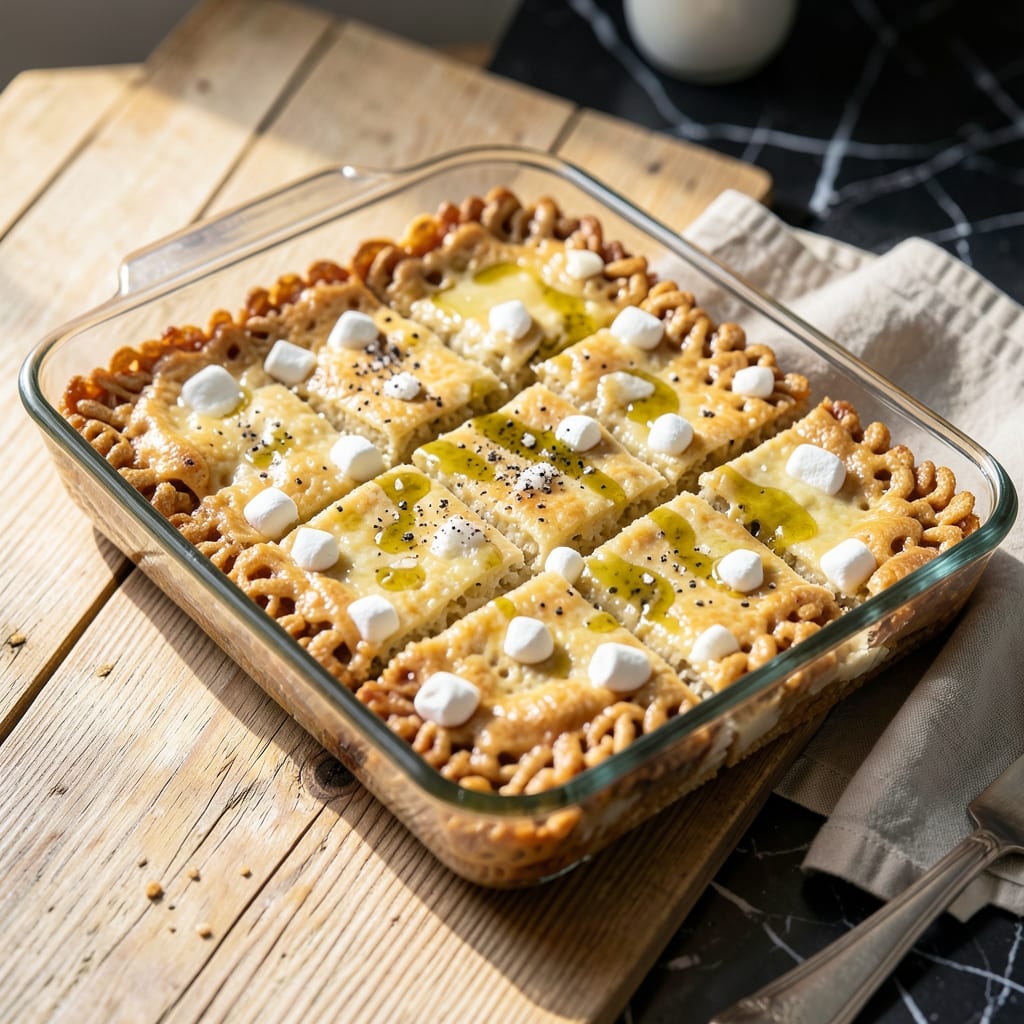
These treats bring back childhood memories with a modern gluten-free twist. The secret lies in using certified gluten-free crispy rice cereal and carefully selected marshmallows to ensure perfect texture without compromise.
What makes this version special is the precise ratio of butter to marshmallows, creating that signature gooey consistency that holds the cereal together beautifully. The process takes less than 15 minutes from start to finish.
The result is a batch of golden, chewy squares with that familiar snap when you bite into them. Each piece delivers the nostalgic taste and texture you remember, now accessible to everyone.
Perfect for lunchboxes, parties, or whenever you need a sweet pick-me-up. Here’s how to make them at home.
Ingredients for Gluten Free Rice Krispie Treats
Eight ingredients bring back nostalgic flavors with a gluten-free twist. Simple, fast, and delicious.
| Ingredient | Amount | Notes |
|---|---|---|
| Certified Gluten-Free Crispy Rice Cereal 🌾 | 6 cups | Check label for certification |
| Mini Marshmallows 🍬 | 10 oz | Use vegetarian marshmallows |
| Unsalted Butter 🧈 | ½ cup | 1 stick, cut into pieces |
| Vanilla Extract 🌿 | 1 tsp | Pure extract preferred |
| Sea Salt 🧂 | ¼ tsp | Fine grain for even distribution |
| Light Corn Syrup 💧 | 2 tbsp | Optional for extra chewiness |
| Coconut Oil 🥥 | 1 tsp | For greasing the pan |
| Powdered Sugar 🍚 | 2 tbsp | For dusting, optional |
The crispy rice cereal must be certified gluten-free—regular brands won’t cut it. I grab mine from Whole Foods or Sprouts, but most grocery stores now carry a gluten-free version. For marshmallows, Dandies or Trader Joe’s brands are vegetarian-friendly and hold up well. The butter should be unsalted so you control the salt level—Kerrygold is my go-to for that rich, creamy flavor (worth the splurge).
No corn syrup? Skip it—the treats will still hold together, just slightly less sticky. For a vegan twist, swap butter for Earth Balance and use vegan marshmallows. Vanilla extract can be imitation in a pinch, but pure extract adds depth. If you’re out of powdered sugar, a light dusting of cinnamon works too (surprisingly good).
Store in an airtight container at room temperature for up to 3 days. For longer storage, wrap individual squares in parchment and freeze for 2 months. They soften slightly when thawed, but that gooey texture is still perfect.
Why You’ll Love This Recipe
- One Bowl Magic: I melt the butter, toss in the marshmallows, and stir in the cereal—no extra dishes, no fuss.
- That Vanilla Kiss: The splash of vanilla extract turns the gooey marshmallow-butter mix into something ridicoulsy good.
- Party or Lunchbox: I pack these for school snacks or slice them into squares for potlucks—always a hit.
- Stays Fresh: Honestly, they keep for days in an airtight container, so I can make a batch on Sunday and forget about dessert all week.
Step-by-Step Instructions for Gluten Free Rice Krispie Treats
Here’s the method I’ve perfected for gooey, melt-in-your-mouth squares with that classic crispy texture.
Step 1: Prepare the Pan and Melt the Butter
Grease an 8×8-inch baking dish thoroughly with the 1 tsp Coconut Oil. I use a paper towel to spread it evenly, including the corners—this ensures the treats won’t stick. In a large saucepan, melt the 0.5 cup Unsalted Butter over low heat until fully liquid and just beginning to foam.
Watch carefully—you don’t want the butter to brown. As soon as it’s melted, stir in the 2 tbsp Light Corn Syrup and 0.25 tsp Sea Salt. The corn syrup adds extra chewiness, while the salt balances the sweetness perfectly.
Step 2: Melt the Marshmallows into a Smooth Mixture
Add all 10 oz Mini Marshmallows to the melted butter mixture. Stir constantly with a heatproof spatula over low heat until every marshmallow is fully melted. This takes about 5-7 minutes—be patient and keep the heat low to avoid scorching.
Once melted, remove the saucepan from heat and stir in the 1 tsp Vanilla Extract. The mixture should be glossy and smooth. If it looks grainy, continue stirring off the heat until it’s silky. The vanilla adds depth, so don’t skip it.
Step 3: Combine with Crispy Rice Cereal
Working quickly, add all 6 cups Certified Gluten-Free Crispy Rice Cereal to the marshmallow mixture. Use a spatula to fold everything together until the cereal is evenly coated. You’ll notice the mixture thickens as it cools, so don’t delay.
If the cereal isn’t fully coated, gently press it into the mixture with the spatula. Avoid overmixing, as this can make the treats dense. The cereal should glisten with the marshmallow mixture, and the texture should be sticky but manageable.
Step 4: Press into the Pan and Set
Transfer the mixture to the prepared baking dish. Use the spatula or lightly greased hands to press it evenly into the pan. I like to press down firmly to compact the treats—this helps them hold their shape when sliced.
Let the treats cool at room temperature for 30 minutes until fully set. Resist the urge to cut into them too soon; they need time to firm up. You’ll know they’re ready when the top is no longer sticky to the touch.
Step 5: Dust with Powdered Sugar and Serve
If desired, dust the top of the treats with 2 tbsp Powdered Sugar. I use a fine-mesh sieve for an even, light coating. This step is optional but adds a pretty finish and a touch of extra sweetness.
Cut into squares with a sharp knife. For clean cuts, dip the knife in hot water between slices. Serve at room temperature—the treats will be chewy, gooey, and perfectly crispy all at once.
Pro Tips For Making Gluten Free Rice Krispie Treats
- Melt Butter Slowly: Use low heat when melting the butter to prevent browning—burnt butter will make your treats taste bitter. I learned this the hard way after ruining a batch with overzealous heat.
- Use Fresh Marshmallows: Skip the stale mini marshmallows; they won’t melt as smoothly. Fresh ones guarantee that gooey texture that holds the cereal together properly.
- Press While Warm: Don’t wait for the mixture to cool before pressing it into the pan—it sets fast. Work quickly while it’s still warm and pliable for even, easy shaping.
- Add Vanilla Last: Stir in the vanilla extract after removing the marshmallow mixture from the heat. High heat can dull its flavor, and you want that aromatic punch to shine through.
Serving Suggestions for Leftovers
Party Platter Style
Arrange these treats on a decorative platter with parchment paper for a no-mess presentation. I like to stack them in a pyramid shape, alternating directions for visual interest. A small bowl of powdered sugar on the side lets guests add extra sweetness.
Lunchbox Friendly
Cut into smaller 1-inch squares for perfect lunchbox portions. Wrap each piece individually in parchment paper to prevent sticking. They hold up well at room temperature for 4-6 hours, making them ideal for school or work. 💡
Dessert Bar Setup
Create a DIY topping bar with chocolate chips, sprinkles, and crushed nuts in small bowls. Let guests customize their treats while the mixture is still warm. This works great for birthday parties or family gatherings.
Gift Giving Idea
Package cooled treats in clear cellophane bags tied with ribbon for a homemade gift. Add a handwritten tag with the recipe name and date. These stay fresh for 3 days at room temperature, perfect for delivering to neighbors or friends.
Holiday Presentation
Use holiday-themed cookie cutters to shape the treats before they set completely. For Christmas, try star or tree shapes. For Halloween, pumpkin or ghost cutters work beautifully. Press firmly and remove cutters carefully to maintain clean edges.
Ice Cream Topping
Crumble cooled treats over vanilla ice cream for a crunchy, gooey topping. The contrast of temperatures and textures is amazing. I recommend using 1-2 treats per serving to avoid overwhelming the ice cream. 🔥
Nutrition Facts
Frequently Asked Questions
Can I use regular Rice Krispies instead of gluten-free?
No, regular Rice Krispies contain malt barley, which has gluten. Always use certified gluten-free crispy rice cereal to ensure safety for those with sensitivities. Brands like Nature’s Path or Three Wishes work perfectly.
Why did my treats turn out hard instead of gooey?
This usually happens if the marshmallow mixture was overcooked or the cereal wasn’t fully coated. Use low heat and stir constantly while melting marshmallows. Work quickly to mix in the cereal before it cools.
How do I make these vegan as well?
Swap butter for Earth Balance or coconut oil, and use vegan marshmallows like Dandies. Ensure all ingredients, including cereal, are labeled vegan. The texture remains just as chewy and delicious.
How long do these stay fresh?
Store in an airtight container at room temperature for up to 3 days. For longer storage, freeze individual squares wrapped in parchment for up to 2 months.

- Furikake Rice Seasoning Recipe: Umami-Packed Japanese Blend for Any Meal - October 7, 2026
- Knorr Vegetable Soup Mix Rice Recipe: Savory One-Pot Side Dish - October 7, 2026
- Lebanese Lentil and Rice Soup Recipe: Mujadara-Inspired Warmth in a Bowl - October 7, 2026