
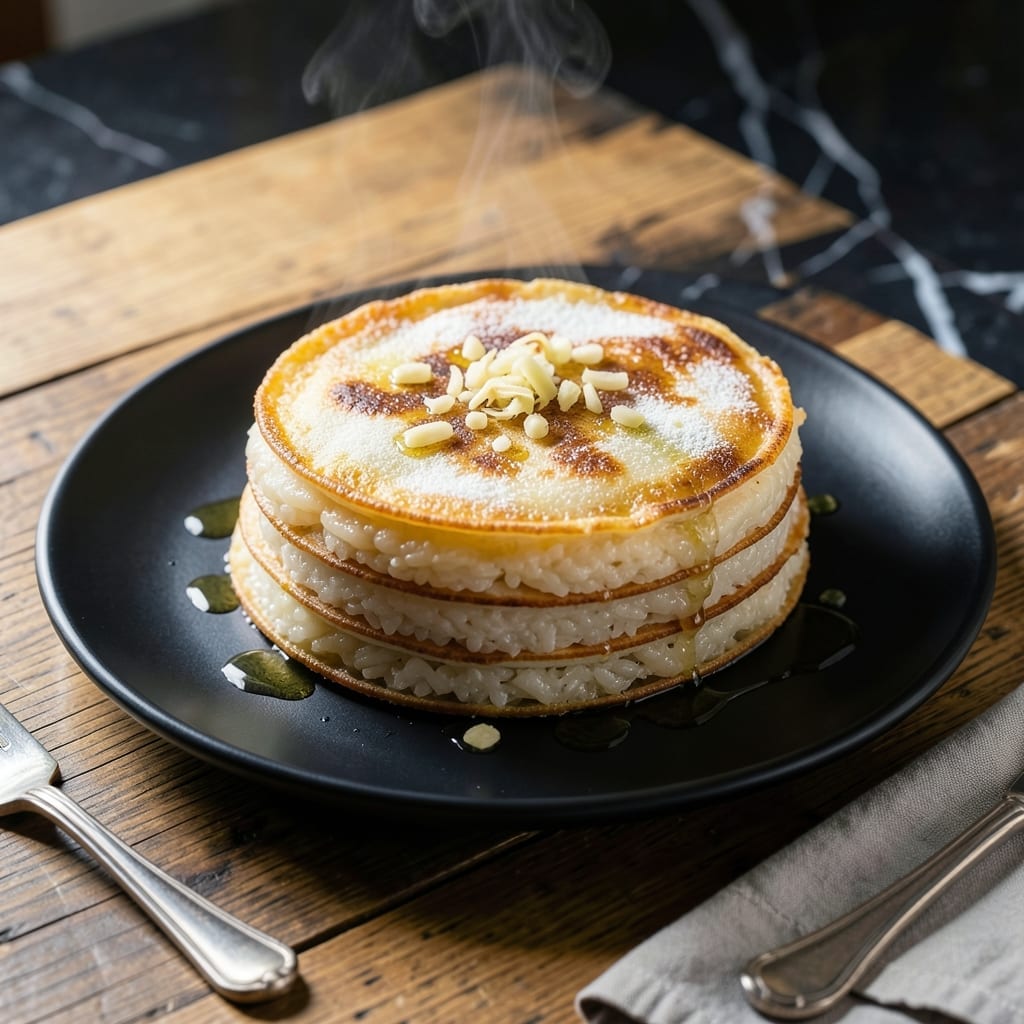
This recipe transforms simple glutinous rice into crispy-edged pancakes with centers so soft they melt in your mouth. The contrast between textures makes every bite unforgettable.
I’ve perfected the technique to ensure the exterior gets golden and crispy while the inside stays tender. The process is straightforward, delivering professional results with minimal effort.
Ingredients for Glutinous Rice Pancake
Simple ingredients transform into golden crispy-edged pancakes with meltingly soft centers.
| Ingredient | Amount | Notes |
|---|---|---|
| Glutinous Rice 🌾 | 2 cups | Soaked overnight, short-grain |
| Water 💧 | 4 cups | For soaking rice |
| All-Purpose Flour 🌾 | ¼ cup | For binding crispy edges |
| Cornstarch 🌾 | 2 tbsp | For extra crispiness |
| Salt 🧂 | ½ tsp | Fine sea salt preferred |
| Neutral Oil 🫒 | ½ cup | For frying, high smoke point |
| Scallions 🧅 | 4 whole | Thinly sliced for garnish |
| Garlic Cloves 🧄 | 3 cloves | Minced for flavor base |
| Sesame Oil 🫒 | 1 tbsp | Toasted, for finishing |
| Soy Sauce 🥄 | 2 tbsp | Low-sodium preferred |
| Maple Syrup 🍁 | 1 tbsp | For slight sweetness |
| Rice Vinegar 🍚 | 1 tbsp | For tangy balance |
| Red Pepper Flakes 🌶️ | ¼ tsp | Adjust for heat preference |
The glutinous rice is non-negotiable for authentic texture—short-grain only. Asian markets often carry it as sweet rice or sticky rice. Overnight soaking ensures the grains soften properly. The neutral oil should have a high smoke point, like avocado or vegetable oil. For the crispy edges, cornstarch is key, but arrowroot powder works in a pinch.
No maple syrup? Agave nectar or coconut sugar offers similar sweetness. Skip the soy sauce? Tamari or coconut aminos are solid substitutes. If you’re avoiding gluten, swap the all-purpose flour for rice flour or tapioca starch. The red pepper flakes can be omitted entirely, or amped up if you like heat.
Cooked pancakes keep well in the fridge for 3-4 days in an airtight container. Reheat in a dry skillet to revive the crispness. The batter itself can be prepped a day ahead—just give it a good stir before cooking. Freezing isn’t recommended, as the texture suffers.
Why You’ll Love This Recipe
- Minimal Effort: I just soak the rice overnight, blend with water, and mix in the flour—no fancy techniques.
- Crispy Chewy Magic: That golden crust with the soft, sticky center from the glutinous rice? I make extra just for that bite.
- Breakfast to Dinner: Honestly, I serve these for brunch with syrup or as a savory side with herbs and soy sauce.
- Wallet-Friendly Feast: A bag of rice and pantry staples stretch far, and leftovers reheat beautifully for lazy mornings.
Step-by-Step Instructions for Glutinous Rice Pancake
Master the technique for achieving the perfect contrast of soft interiors and crispy edges with this method.
Step 1: Soak and Blend the Glutinous Rice
Begin by draining the 2 cups Glutinous Rice that has soaked overnight in the 4 cups Water. The grains should appear plump and slightly translucent, indicating proper hydration. Transfer the drained rice to a blender or food processor.
Pulse the rice with 0.25 cup All-Purpose Flour, 2 tbsp Cornstarch, and 0.5 tsp Salt until you achieve a smooth, thick batter. The consistency should resemble heavy cream. Scrape down the sides as needed to ensure even blending. This step creates the foundation for both the pillowy texture and crispy edges.
Step 2: Prepare the Aromatic Base
Finely mince the 3 cloves Garlic Cloves and thinly slice the 4 whole Scallions, keeping the white and green parts separate. The white portions will infuse the pancake with flavor, while the green tops will serve as a vibrant garnish.
In a small bowl, whisk together the 2 tbsp Soy Sauce, 1 tbsp Maple Syrup, 1 tbsp Rice Vinegar, and 0.25 tsp Red Pepper Flakes. This mixture will add depth and balance to the final dish. Set both the aromatics and sauce aside until ready to use.
Step 3: Cook the Pancake to Crispy Perfection
Heat 2 tbsp Neutral Oil in a 10-inch nonstick skillet over medium heat until shimmering. Pour in the batter, spreading it evenly to form a ½-inch thick layer. Sprinkle the minced garlic and white parts of the scallions evenly across the surface.
Cook undisturbed for 5-7 minutes until the edges turn golden brown and begin to crisp. You’ll notice the pancake pulling away from the sides of the pan. Carefully flip using a large spatula and add another 2 tbsp Neutral Oil. Cook for an additional 5-7 minutes until the second side achieves the same deep golden crispness.
Step 4: Finish and Serve
Transfer the pancake to a cutting board and immediately brush the top with 1 tbsp Sesame Oil. This adds a nutty aroma and glossy sheen. Let it rest for 2 minutes to set slightly before slicing into wedges.
Drizzle the prepared soy sauce mixture over the top and garnish with the reserved green scallion slices. Serve while hot to fully appreciate the contrast between the soft, chewy interior and the crispy, golden edges. Each bite should deliver a harmonious blend of savory, sweet, and slightly tangy flavors.
Pro Tips For Making Glutinous Rice Pancake
- Soak the Rice: Glutinous rice needs at least 4 hours in cold water—any less and your pancakes will be gummy, not chewy. I learned this the hard way after making a batch that stuck to the pan like cement.
- Heat the Pan First: Get your pan screaming hot before adding oil, then lower to medium. After burning three batches, I finally figured out this prevents uneven cooking and that dreaded raw center.
- Skip the Overmixing: Stir the batter just until combined—overworking it develops gluten in the flour, making your pancakes tough instead of tender. My grandmother swore by this, and she was right.
- Use a Lid: Cover the pan for the last 2-3 minutes to steam the pancakes through. Sounds weird, but it works: the texture goes from good to restaurant-quality every time.
Regional Styles of glutinous rice pancake
Korean Tteokbokki Style
In Korea, these pancakes often incorporate gochujang for heat and a vibrant red color. Mix 2 tbsp gochujang with 1 tbsp soy sauce and 1 tbsp maple syrup for a spicy-sweet glaze. Top with sesame seeds and extra scallions for authenticity. 🌶️
Thai Crispy Rice
Thai versions use jasmine rice and add lemongrass and kaffir lime leaves to the batter. Serve with a dipping sauce of fish sauce, lime juice, and chili flakes. The citrusy aroma complements the crispy texture beautifully.
Chinese Jianbing
For a street-food twist, spread the batter thin and add hoisin sauce, crispy wonton wrappers, and cilantro. Roll it up like a burrito for easy eating. This style is a popular breakfast in northern China.
Vietnamese Bánh Xèo
Vietnam’s version uses a turmeric-infused batter for a golden hue. Add shrimp and bean sprouts to the pan before pouring the batter. Serve wrapped in lettuce with fresh herbs and nuoc cham sauce.
Japanese Okonomiyaki
This savory pancake includes shredded cabbage and a variety of toppings like bonito flakes and okonomiyaki sauce. Layer ingredients in the pan and press down before flipping. The result is hearty and packed with umami. 💛
Nutrition Facts
Frequently Asked Questions
Can I use regular rice instead of glutinous?
No, regular rice won’t give you the same chewy texture. Glutinous rice is essential for that signature soft, sticky interior.
How do I get extra crispy edges?
Press the batter down firmly in the pan and cook undisturbed for 5-7 minutes on medium heat. The cornstarch in the recipe helps too.
Can I make these gluten-free?
Yes! Swap the all-purpose flour for rice flour or tapioca starch. The texture will be slightly different but still delicious.
How do I store leftovers?
Keep in an airtight container in the fridge for 3-4 days. Reheat in a dry skillet to restore crispness.

- Mandhi Rice Recipe: Yemeni Spiced Lamb and Rice Feast - September 25, 2026
- Chuy’s Green Chili Rice Copycat Recipe: Spicy Southwest Flavor in Every Bite - September 25, 2026
- Beaten Rice Recipe: Fluffy Grains With Nutty Depth - September 25, 2026