
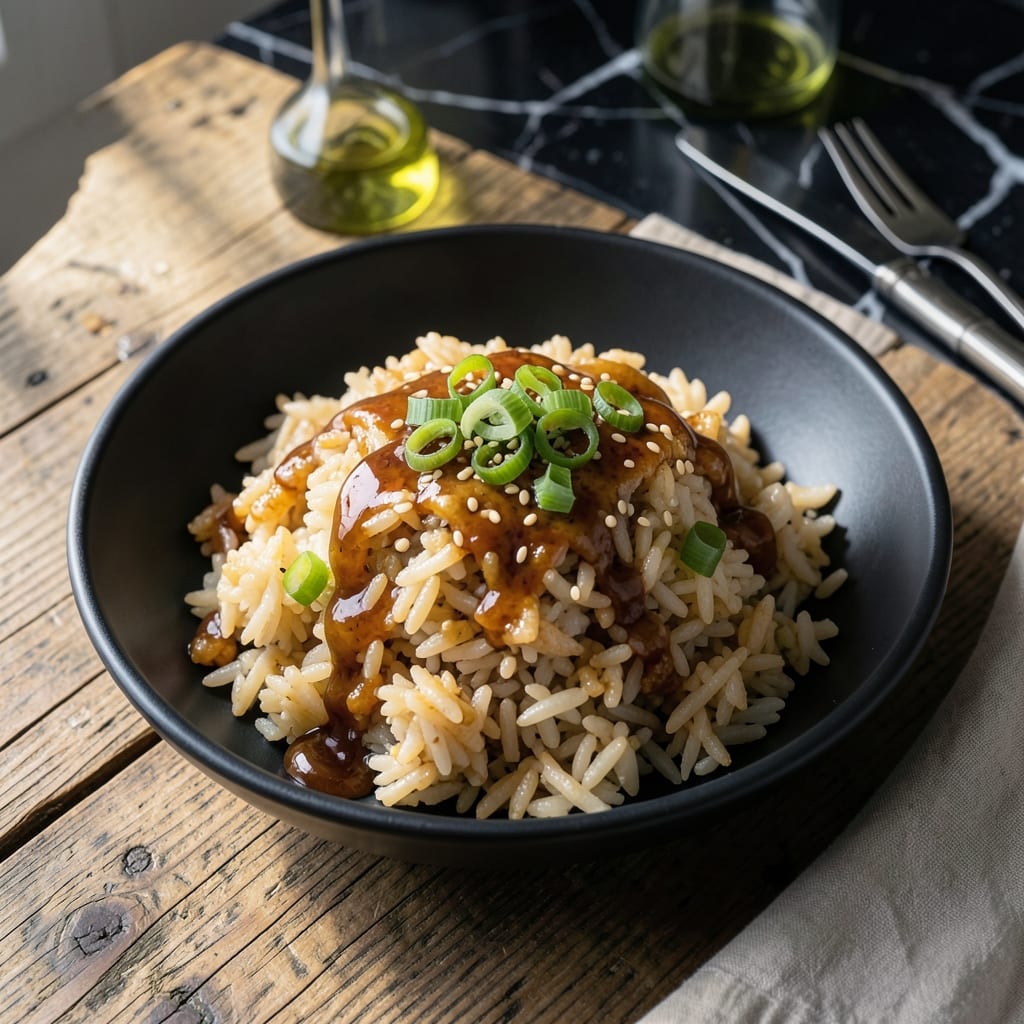
Achieving perfectly glazed teriyaki rice at home comes down to timing and technique. This method delivers restaurant-quality results with minimal effort, using a homemade sauce that caramelizes beautifully over tender rice.
I’ve refined this approach to ensure the sauce coats every grain without becoming soggy. The key is cooking the rice just until tender, then finishing it in the teriyaki glaze for maximum flavor absorption.
The result is a dish with a glossy sheen, balanced sweetness, and a satisfying chew. Each bite carries the depth of soy, ginger, and garlic, making it a reliable go-to for busy weeknights.
Serve it as a base for proteins or enjoy it on its own. The versatility makes it a staple worth mastering.
Ingredients for Teriyaki Rice
Pantry staples and a few fresh picks create this glossy, restaurant-worthy dish.
| Ingredient | Amount | Notes |
|---|---|---|
| Jasmine Rice 🍚 | 2 cups | Rinsed until water runs clear |
| Water 💧 | 2 ½ cups | For cooking rice |
| Soy Sauce 🫒 | ½ cup | Low-sodium preferred |
| Brown Sugar 🍚 | 3 tbsp | Packed for sweetness |
| Mirin 🍶 | 2 tbsp | Sweet cooking rice wine |
| Rice Vinegar 🍶 | 1 tbsp | For acidity balance |
| Fresh Ginger 🌿 | 1 tbsp | Finely grated |
| Garlic Cloves 🧄 | 3 cloves | Minced for depth |
| Cornstarch 🌾 | 1 tbsp | Mixed with 1 tbsp water |
| Sesame Oil 🫒 | 1 tsp | Toasted for aroma |
| Green Onions 🧅 | 3 whole | Thinly sliced for garnish |
| Toasted Sesame Seeds 🌰 | 1 tsp | For finishing touch |
The rice is non-negotiable—jasmine gives you that stickiness that clings to the sauce. Rinse it well to remove excess starch, otherwise you’ll get gummy rice. For soy sauce, Kikkoman low-sodium is my go-to, but any brand works. The mirin is key for that authentic depth; find it in the Asian aisle at Whole Foods or any well-stocked supermarket.
No mirin? Swap in 1 tbsp sugar plus 1 tbsp water. Missing rice vinegar? Apple cider vinegar in a pinch, though it’s slightly more assertive. The ginger and garlic should be fresh—jarred just doesn’t have the same punch. If you’re out of cornstarch, arrowroot powder works identically for thickening.
Cooked rice keeps 4-5 days in the fridge, but the sauce soaks in best fresh. Store leftovers in an airtight container. The teriyaki glaze thickens as it cools, so reheat with a splash of water to loosen. Garnishes like sesame seeds and green onions are best added fresh.
Why You’ll Love This Recipe
- It’s my Sunday ritual: make a big batch and pair it with different proteins all week long.
- One-Pot Wonder: I toss the jasmine rice in with the soy sauce, brown sugar, and mirin, and the whole thing cooks in one pot—no extra pans to scrub.
- Sweet-Savory Craving: The brown sugar and soy sauce create this glossy, umami-packed glaze that coats every grain.
- Meal Prep Magic: It’s my Sunday ritual: make a big batch and pair it with different proteins all week long.
Step-by-Step Instructions for Teriyaki Rice
This method ensures perfect texture and flavor balance every time you make this dish.
Step 1: Cook the Jasmine Rice
Rinse the 2 cups Jasmine Rice under cold water until the water runs clear. This removes excess starch and prevents gummy rice. I always use a fine-mesh strainer for this step to avoid losing grains down the drain.
Combine the rinsed rice with the 2.5 cups Water in a saucepan. Bring to a boil, then reduce heat to low, cover, and simmer for 15 minutes. Remove from heat and let it sit covered for 5 minutes to steam. You’ll know it’s done when all the water is absorbed and the rice is tender but still slightly firm to the bite.
Step 2: Prepare the Teriyaki Sauce
In a small saucepan, combine the 0.5 cup Soy Sauce, 3 tbsp Brown Sugar, 2 tbsp Mirin, 1 tbsp Rice Vinegar, 1 tbsp Fresh Ginger, and 3 cloves Garlic Cloves. Stir well to dissolve the brown sugar completely.
Bring the mixture to a gentle simmer over medium heat. In a small bowl, mix the 1 tbsp Cornstarch with 1 tablespoon of water to create a slurry. Slowly whisk the slurry into the simmering sauce and cook for 1-2 minutes until it thickens to a glossy, syrup-like consistency that coats the back of a spoon.
Step 3: Combine Rice and Sauce
Once the rice is cooked, transfer it to a large bowl. Drizzle the 1 tsp Sesame Oil over the warm rice and gently fluff with a fork to distribute. This adds a nutty aroma that complements the teriyaki perfectly.
Pour about three-quarters of the teriyaki sauce over the rice and fold gently to coat every grain. Reserve the remaining sauce for serving. The rice should glisten with sauce but not be soggy—this is the hallmark of well-made teriyaki rice.
Step 4: Garnish and Serve
Thinly slice the 3 whole Green Onions and sprinkle them over the rice along with the 1 tsp Toasted Sesame Seeds. These garnishes add freshness and crunch to each bite.
Serve immediately while warm, with the remaining teriyaki sauce on the side for those who prefer extra glaze. The rice should have a subtle sweetness balanced by the savory soy, with each grain distinct yet perfectly coated. This is teriyaki rice done right.
Pro Tips For Making Teriyaki Rice
- Rinse the Rice: Wash jasmine rice until water runs clear to remove excess starch—this prevents gummy teriyaki rice that clumps together.
- Reduce the Sauce: Simmer soy sauce, brown sugar, and mirin for 3-4 minutes until it thickens slightly, or it’ll pool at the bottom of your bowl instead of coating the rice.
- Use Warm Rice: Stir the teriyaki sauce into freshly cooked, still-warm rice so it absorbs better and doesn’t turn into a sad, dry lump.
- Skip Cold Mirin: I learned this the hard way—cold mirin straight from the fridge can make your sauce seize up, so let it sit at room temp for 10 minutes first.
Dietary Considerations for These Flavors
Gluten-Free Adaptation
Swap regular soy sauce for tamari or a certified gluten-free soy sauce like San-J. This simple change keeps all the flavor while eliminating gluten. I always check labels to ensure no cross-contamination. 💡
Vegan Version
Use coconut sugar instead of brown sugar and ensure your mirin is vegan (some contain fish-based additives). The teriyaki glaze will still caramelize beautifully over the rice.
Lower Sodium Option
Reduce the soy sauce to ⅓ cup and add 1 tsp salt-free soy sauce alternative. Boost umami with 1 tsp mushroom powder—this keeps the depth without excess sodium.
Sugar-Free Twist
Replace brown sugar with 2 tbsp erythritol or monk fruit sweetener. The sauce will thicken similarly, though it may lack some caramel notes. A splash of pineapple juice adds natural sweetness.
Nut Allergy Consideration
Skip the sesame oil and garnish, as sesame is a common allergen. Use avocado oil for toasting the rice instead. For garnish, try chopped cilantro or nori strips for similar visual appeal.
Diabetic-Friendly
Cut the brown sugar to 1 tbsp and add 1 tsp stevia for sweetness. The rice itself has a moderate glycemic index, so pair with protein like grilled chicken to balance blood sugar. 💪
Nutrition Facts
Frequently Asked Questions
Can I use a different type of rice?
Jasmine is ideal, but short-grain or sushi rice work well too. Avoid long-grain varieties as they won’t absorb the sauce as effectively.
How do I prevent the rice from getting mushy?
Rinse the rice thoroughly to remove excess starch, and don’t overcook it. 15 minutes of simmering followed by 5 minutes of steaming is perfect.
Can I make the sauce ahead of time?
Yes! The sauce keeps in the fridge for up to 5 days. Reheat gently before mixing with freshly cooked rice for the best texture.
What if my sauce is too thin?
Mix 1 tsp cornstarch with 1 tbsp water and whisk it into the simmering sauce. Cook for 1-2 minutes until thickened.

- Mandhi Rice Recipe: Yemeni Spiced Lamb and Rice Feast - September 25, 2026
- Chuy’s Green Chili Rice Copycat Recipe: Spicy Southwest Flavor in Every Bite - September 25, 2026
- Beaten Rice Recipe: Fluffy Grains With Nutty Depth - September 25, 2026