
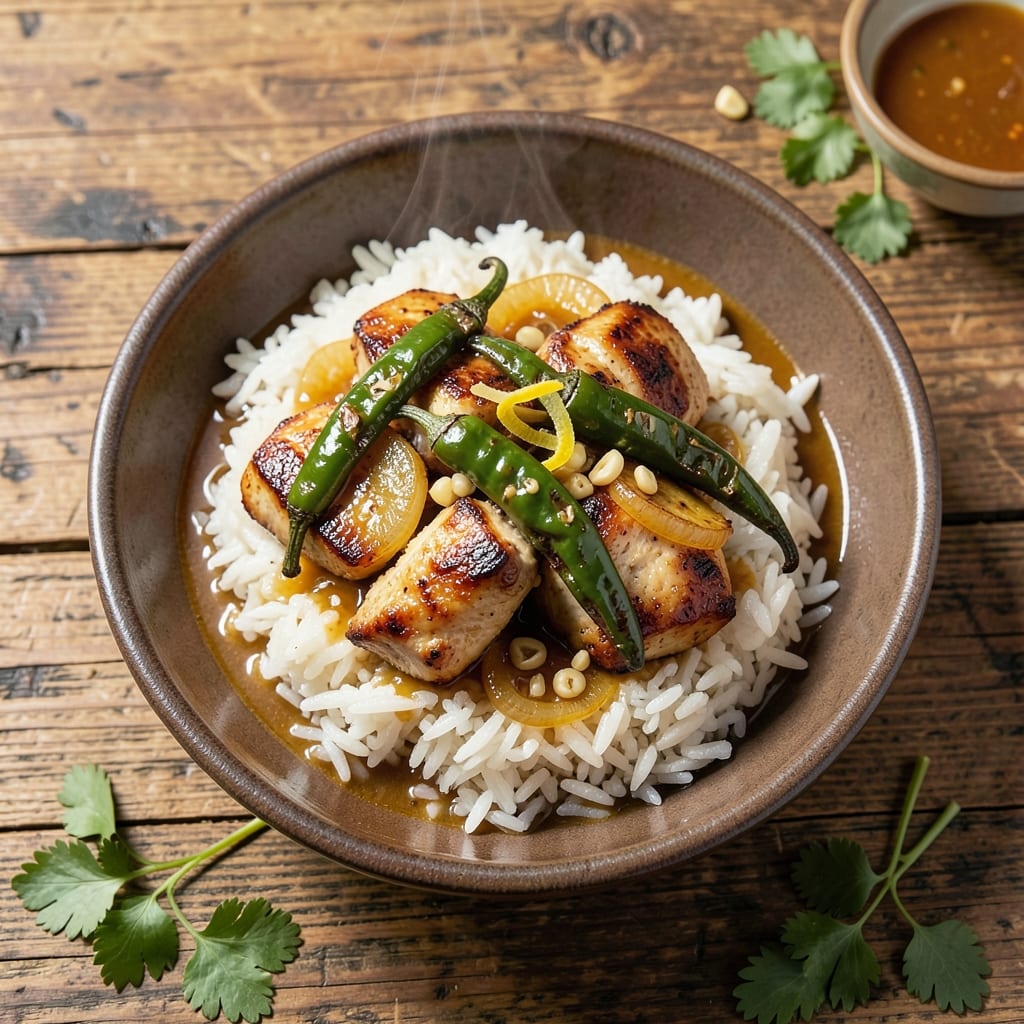
This one-pot wonder brings bold Southwestern flavors to your kitchen with minimal effort. The green chili peppers infuse both the chicken and rice with a mild, earthy heat that’s balanced by creamy, melted cheese.
The beauty of this method is its simplicity. You’ll brown the chicken first, then build layers of flavor with onions, garlic, and the star ingredient—roasted green chili. The rice absorbs all these elements as it cooks, creating a dish where every bite is packed with taste.
What emerges is a hearty, comforting meal with tender chicken, fluffy rice, and a subtle spice that lingers just enough. The melted cheese on top ties everything together, making it a complete dinner that satisfies without being overly heavy.
Perfect for weeknight cooking or feeding a crowd, this recipe delivers restaurant-quality results in under an hour.
Ingredients for Green Chili Chicken and Rice
Bold Southwestern flavors start with fresh chicken, rice, and roasted green chili peppers for this hearty dish.
| Ingredient | Amount | Notes |
|---|---|---|
| Boneless Skinless Chicken Thighs 🍗 | 1 ½ lb | Cut into bite-sized pieces |
| Long-Grain White Rice 🍚 | 1 ½ cups | Uncooked, rinsed well |
| Roasted Green Chili Peppers 🌶️ | 2 cups | Diced, canned or fresh |
| Yellow Onion 🧅 | 1 whole | Medium, finely diced |
| Garlic Cloves 🧄 | 3 cloves | Minced for depth of flavor |
| Chicken Broth 💧 | 2 ½ cups | Low-sodium preferred |
| Shredded Monterey Jack Cheese 🧀 | 1 ½ cups | Or substitute Cheddar |
| Olive Oil 🫒 | 2 tbsp | Divided for cooking |
| Ground Cumin 🌿 | 1 tsp | Toasted for warmth |
| Dried Oregano 🍃 | 1 tsp | Crushed between fingers |
| Salt 🧂 | 1 tsp | Kosher or sea salt |
| Black Pepper 🌶️ | ½ tsp | Freshly ground preferred |
| Fresh Cilantro 🌿 | ¼ cup | Chopped, for garnish |
The chicken is the foundation here. Boneless, skinless thighs stay juicier than breasts through the cooking process. Look for plump, evenly colored pieces at Whole Foods or your local butcher—avoid anything with a grayish tint. The green chilis are non-negotiable for that authentic flavor; 505 Southwestern or Hatch brands are reliable for canned. Fresh roasted chilis from a Latin market are even better if you have access.
No green chilis? Poblano peppers (roasted and diced) work in a pinch, though they’re milder. Out of Monterey Jack? Pepper Jack adds extra heat, or use Colby Jack for milder flavor. The rice must be long-grain—jasmine or basmati won’t absorb the liquid correctly. For the broth, Better Than Bouillon makes a solid chicken base if you’re starting from concentrate.
This keeps well for 4 days in the fridge—reheat gently with a splash of broth to keep the rice moist. Freeze portions for up to 3 months (cheese may separate slightly but flavor holds). Always bring chilis to room temp before dicing for cleaner cuts.
Why You’ll Love This Recipe
- One Pot Wonder: I love that everything cooks together—chicken, rice, and those roasted green chilies—no extra pans to wash.
- Smoky Heat: The combination of roasted green chilies, garlic, and onions gives it this deep, smoky flavor that’s just right.
- Meal Prep Hero: Honestly, it tastes even better the next day, so I always make extra for lunches.
- Budget Friendly: Chicken thighs stay juicy and cost less than breasts, so I can feed my family without breaking the bank.
Step-by-Step Instructions for Green Chili Chicken and Rice
Here’s the tested method that delivers perfectly spiced, one-pot results every time.
Step 1: Sear the Chicken and Build the Base
Heat 1 tbsp Olive Oil in a large, deep skillet or Dutch oven over medium-high heat. Add the bite-sized Boneless Skinless Chicken Thighs and sear for 5-6 minutes, stirring occasionally, until lightly browned on all sides. The chicken doesn’t need to cook through at this stage—just develop flavor.
Transfer the chicken to a plate and set aside. In the same skillet, add the remaining 1 tbsp Olive Oil. Sauté the finely diced Yellow Onion for 3-4 minutes until softened and translucent. Add the minced Garlic Cloves, Ground Cumin, Dried Oregano, Salt, and Black Pepper, stirring constantly for 30 seconds until fragrant.
Step 2: Toast the Rice and Incorporate Peppers
Add the rinsed Long-Grain White Rice to the skillet and cook for 1-2 minutes, stirring frequently. This toasting step enhances the nutty flavor of the rice and prevents a gummy texture. You’ll notice the grains become slightly opaque as they absorb the spices and oil.
Stir in the diced Roasted Green Chili Peppers, making sure they’re evenly distributed throughout the rice mixture. The peppers will soften further during cooking, infusing the dish with their characteristic Southwestern heat. Cook for an additional 1 minute to meld the flavors together.
Step 3: Add Liquids and Return Chicken
Pour in the Chicken Broth and stir well to combine all ingredients. The liquid should come to a gentle simmer. Return the seared chicken and any accumulated juices to the skillet, nestling the pieces into the rice mixture.
Reduce heat to medium-low, cover, and let cook undisturbed for 20 minutes. Resist the urge to peek—this allows steam to build and cook the rice evenly. After 20 minutes, check that most of the liquid has been absorbed and the rice is nearly tender.
Step 4: Melt in the Cheese and Finish
Sprinkle the Shredded Monterey Jack Cheese evenly over the top of the chicken and rice. Cover again and cook for an additional 5-7 minutes on low heat until the cheese is fully melted and the rice is tender. The residual heat will finish melting any stubborn bits of cheese.
Remove from heat and let sit covered for 5 minutes. This final rest allows all the flavors to meld together and ensures the rice absorbs any remaining liquid. The cheese should create a creamy, cohesive layer throughout the dish.
Step 5: Garnish and Serve
Uncover and sprinkle with the chopped Fresh Cilantro, distributing it evenly over the top. The cilantro adds a bright, fresh contrast to the rich, spicy flavors of the dish. Gently fluff the rice with a fork to incorporate some of the melted cheese from the top.
Serve hot, with each portion featuring a mix of tender chicken, flavorful rice, and melted cheese. The dish should have a consistent texture throughout, with the chicken fully cooked and the rice perfectly tender, not mushy.
Pro Tips For Making Green Chili Chicken And Rice
- Brown the Chicken First: Sear the boneless thighs in batches—about 4-5 minutes per side over medium-high heat until golden. I learned this the hard way: skipping this step leaves the chicken bland and the sauce watery.
- Roast Fresh Chilies: Use fresh green chilis and char them directly over a gas flame or under the broiler for 8-10 minutes. Sounds like extra work, but it actually changes the outcome—store-bought roasted ones lack that smoky depth.
- Toast the Rice: Before adding liquid, cook the dry rice with the onions and garlic for 2-3 minutes until lightly golden. My grandmother swore by this, and she was right: it keeps the grains separate and adds a nutty flavor.
- Skip the Shortcuts: Resist the urge to use pre-minced garlic or onion powder here. Freshly minced garlic and diced yellow onion melted into the dish make a real difference in the final flavor.
Essential Equipment for Great green chili chicken and rice
The Right Skillet
For this one-pot dish, I always reach for my 12-inch cast iron skillet—it retains heat beautifully and develops that perfect sear on the chicken. A 5-6 quart Dutch oven like Le Creuset works equally well if you prefer even heat distribution.
Quality Knife Matters
You’ll be dicing onions, mincing garlic, and chopping peppers, so a sharp 8-inch chef’s knife is essential. I use Wüsthof Classic—it glides through veggies effortlessly. A cutting board with a groove to catch juices keeps your workspace clean.
Measuring Tools
Accurate measurements make all the difference, especially with rice and liquid ratios. I keep a set of stainless steel measuring cups and a 2-cup glass measuring cup for the broth. A fine-mesh strainer helps rinse the rice thoroughly. 💡
Wooden Spoon Essential
A sturdy wooden spoon is perfect for stirring the rice and scraping up those flavorful browned bits from the bottom of the skillet. I also keep a silicone spatula on hand for folding in the cheese at the end without scratching my cookware.
Thermometer for Precision
While not strictly necessary, I love using my instant-read thermometer to confirm the chicken reaches 165°F before adding it back to the rice. It’s a small step that ensures perfect doneness every time.
Serving in Style
For presentation, I serve this directly from the skillet at the table, but if you prefer individual portions, shallow pasta bowls work beautifully. They’re wide enough to show off the layers of chicken, rice, and melted cheese. 🔥
Nutrition Facts
Frequently Asked Questions
Can I use chicken breasts instead of thighs?
Yes, but thighs stay juicier. If using breasts, reduce cooking time to 15 minutes to prevent dryness. The flavor will be milder but still delicious.
What if I don’t have green chilis?
Poblano peppers work as a milder substitute. For extra heat, add 1/2 tsp cayenne or diced jalapeños. The dish will taste different but still flavorful.
How do I prevent mushy rice?
Rinse the rice well and toast it for 2 minutes before adding liquid. Avoid peeking while cooking—steam is key for fluffy results.
Can this be made ahead?
Refrigerate for up to 4 days or freeze for 3 months. Reheat with a splash of broth to restore moisture.

- Jollof Rice Sauce Recipe: West African Tomato and Spice Infusion - September 25, 2026
- Japanese Rice Soup Recipe: Umami-Rich Comfort in a Bowl - September 25, 2026
- Homemade Cream Of Rice Recipe: Silk-Smooth Breakfast in Minutes - September 25, 2026