
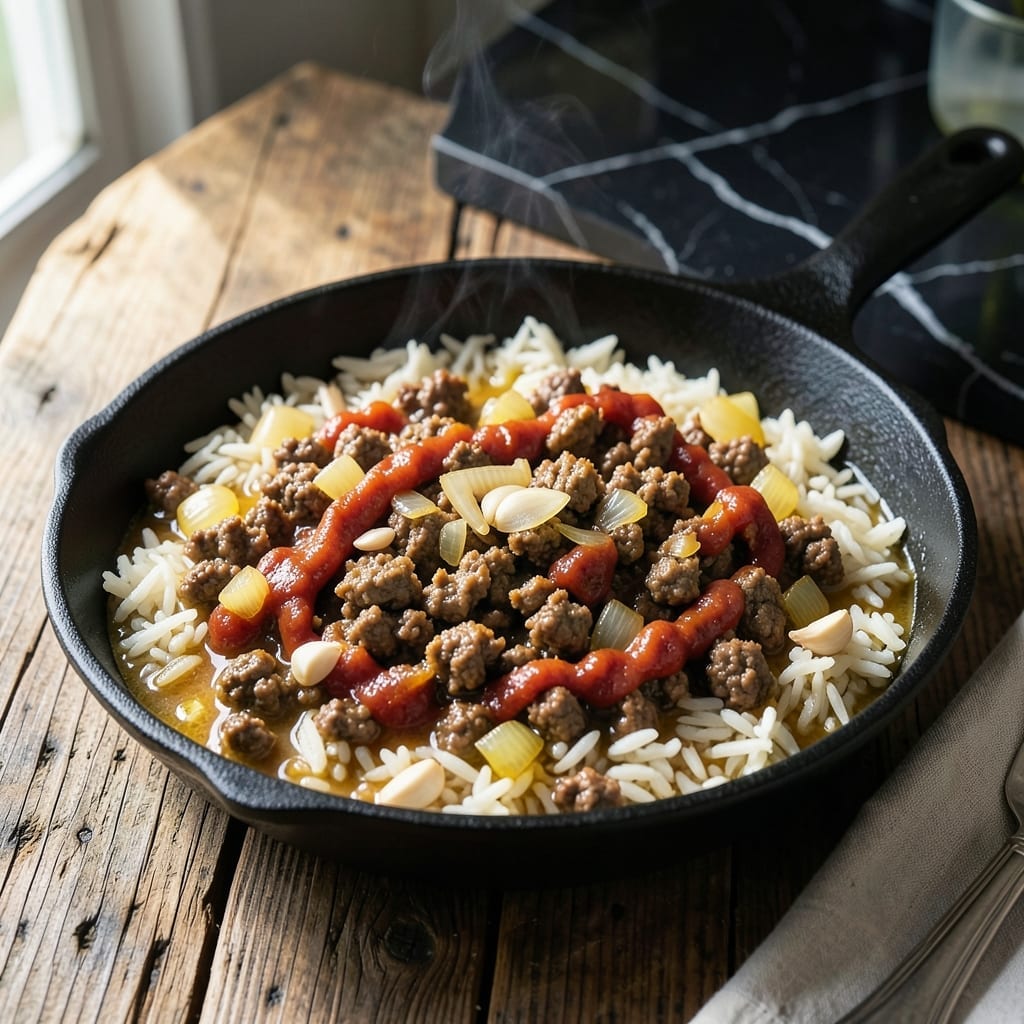
This high-protein meal prep solution combines simple ingredients with smart techniques for reliable results. I developed this recipe after testing dozens of bulking meals in my small Boston kitchen, focusing on nutrition without sacrificing flavor.
The dish balances lean ground beef with fluffy rice, creating a foolproof base that stays fresh all week. Cooking the beef with onions and garlic builds flavor, while rice absorbs the savory juices during preparation.
Each serving delivers substantial protein and complex carbs, making it ideal for fitness goals. The recipe scales easily for batch cooking, and leftovers reheat perfectly in 30 seconds.
Perfect for busy schedules, this creation turns basic ingredients into a satisfying, restaurant-quality meal you’ll reach for daily.
Ingredients for Ground Beef and Rice Bulking
Lean ground beef, fluffy rice, and bold seasonings create this foolproof high-protein base.
| Ingredient | Amount | Notes |
|---|---|---|
| Lean Ground Beef 🥩 | 1 ½ lb | 85/15 or 90/10 fat ratio |
| Long-Grain White Rice 🍚 | 2 cups | Uncooked, rinsed before use |
| Yellow Onion 🧅 | 1 whole | Medium-sized, finely diced |
| Garlic Cloves 🧄 | 4 cloves | Minced for even distribution |
| Beef Broth 🥫 | 2 ½ cups | Low-sodium preferred for control |
| Tomato Paste 🍅 | 2 tbsp | For depth of flavor |
| Worcestershire Sauce 💧 | 1 tbsp | Adds umami complexity |
| Dried Thyme 🌿 | 1 tsp | Rubbed between fingers to release aroma |
| Dried Oregano 🍃 | 1 tsp | Mediterranean variety preferred |
| Bay Leaf 🌿 | 1 whole | Removed before serving |
| Kosher Salt 🧂 | 1 tsp | Diamond Crystal brand recommended |
| Black Pepper 🌶️ | ½ tsp | Freshly ground for best results |
| Olive Oil 🫒 | 2 tbsp | Extra-virgin for sautéing |
| Water 💧 | 2 cups | For cooking rice |
The beef is the foundation—85/15 or 90/10 lean-to-fat ratio ensures flavor without excess grease. Whole Foods or Market Basket carry high-quality options in Boston. For rice, long-grain white absorbs the savory juices best; avoid instant varieties. The onions and garlic, when cooked low and slow, build a deep flavor base that elevates the entire dish.
Substitute ground turkey or chicken for a leaner profile (adjust cooking time as poultry dries faster). No Worcestershire? Soy sauce with a pinch of sugar mimics the tang. Fresh herbs can replace dried at triple the amount, but dried are more consistent for meal prep. The tomato paste can be omitted in a pinch, though the depth of flavor will suffer slightly.
Prepared beef and rice mixture keeps in the fridge for 4-5 days and freezes beautifully for up to 3 months. Portion into airtight containers for easy grab-and-go meals. Reheats in 30 seconds as promised, making it perfect for busy schedules.
Why You’ll Love This Recipe
- One Pan Meal: I love that I can brown the beef, sauté the onions and garlic, then cook the rice all in the same pot—minimal cleanup.
- Rich Beefy Depth: The beef broth soaks into the rice while the garlic and onions caramelize, making every bite packed with savory flavor.
- Meal Prep Hero: This makes enough for four meals, so I portion it out and have lunch ready for the week.
- Budget Friendly: Lean ground beef and rice stretch far, and I’ll be real: it’s way cheaper than takeout but just as satisfying.
Step-by-Step Instructions for Ground Beef and Rice
This method ensures perfectly cooked rice and beef with maximum flavor in every batch.
Step 1: Prepare the Rice Base
Rinse the 2 cups Long-Grain White Rice thoroughly under cold water until the water runs clear. This removes excess starch and prevents the rice from becoming gummy during cooking.
In a large pot with a tight-fitting lid, combine the rinsed rice, 2 cups Water, and 1 tsp Kosher Salt. Bring to a boil over high heat, then immediately reduce to low heat, cover, and simmer for 15 minutes. Resist the urge to peek—steam is crucial for even cooking.
Step 2: Sauté the Aromatics and Brown the Beef
While the rice cooks, heat the 2 tbsp Olive Oil in a large skillet over medium-high heat. Add the finely diced 1 whole Yellow Onion and cook for 3-4 minutes until softened and just beginning to turn translucent.
Add the minced 4 cloves Garlic Cloves and cook for 30 seconds until fragrant. Push the aromatics to one side, add the 1.5 lb Lean Ground Beef, and break it up with a wooden spoon. Cook for 6-8 minutes until the beef is evenly browned with no pink remaining.
Step 3: Build the Flavor Profile
Stir the 2 tbsp Tomato Paste and 1 tbsp Worcestershire Sauce into the beef mixture. Cook for 1-2 minutes to deepen the flavors—this step is critical for eliminating any raw tomato taste.
Add the 1 tsp Dried Thyme, 1 tsp Dried Oregano, and 0.5 tsp Black Pepper. Rub the dried herbs between your fingers as you add them to release their essential oils. Pour in the 2.5 cups Beef Broth and add the 1 whole Bay Leaf, then bring to a gentle simmer.
Step 4: Combine and Finish
Once the rice has absorbed all the water and is tender, fluff it with a fork. Remove the Bay Leaf from the beef mixture, then pour the beef and all its liquid over the cooked rice.
Stir everything together gently but thoroughly to distribute the beef and seasonings evenly. Cover the pot and let it sit off heat for 5 minutes—this allows the flavors to meld and the rice to absorb any remaining liquid. Serve immediately while hot.
Pro Tips For Making Ground Beef And Rice Bulking
- Brown the Beef First: Cook the ground beef in a hot pan until deeply browned—not just gray—before adding onions. This builds a rich, meaty flavor that makes the rice taste far more satisfying.
- Toast the Rice: After sautéing onions and garlic, add the dry rice and stir for 2-3 minutes until it smells nutty. I learned this the hard way—skipping this step leaves the rice bland and one-dimensional.
- Use Double the Broth: Swap water for beef broth and use twice the volume as rice (2:1 ratio). Sounds like overkill, but the rice absorbs it all and ends up tender, not mushy or dry.
- Let It Steam: Once everything’s in the pot, cover and resist the urge to peek for at least 15 minutes. My grandmother swore by this, and she was right—undisturbed steam is what gives you fluffy, separate grains.
Pro Cooking Tips for This Dish
Perfect Rice Texture
Always rinse your long-grain white rice until the water runs clear to remove excess starch. I use a 2:1 water-to-rice ratio and bring it to a boil before reducing to low heat for even cooking.
Browning the Beef
Use medium-high heat and avoid overcrowding the pan—this ensures a good sear. Break the 1.5 lb ground beef into small pieces with a wooden spoon for even browning in 6-8 minutes. 🔥
Flavor Layering
Bloom your dried herbs in the beef fat for 30 seconds to release their oils. The tomato paste and Worcestershire sauce deepen the umami, but cook them briefly to remove any raw taste.
Resting Time
After combining beef and rice, let it sit covered for 5 minutes off heat. This step lets the rice absorb the savory juices fully, making every bite more flavorful.
Scaling for Meal Prep
Double the recipe for a week’s worth of meals—I use my 8-quart Dutch oven for larger batches. Keep the 2:1 liquid ratio consistent, and adjust cooking time slightly for bigger portions.
Seasoning Adjustment
Taste before serving and adjust with Kosher salt or black pepper as needed. The flavors concentrate as it rests, so I often add a final pinch of salt just before storing. 💡
Nutrition Facts
Frequently Asked Questions
How long will this keep in the fridge?
Stored in airtight containers, it stays fresh for 4-5 days. For longer storage, freeze portions for up to 3 months.
Can I use brown rice instead?
Yes, but increase water to 2.5 cups and simmer for 40-45 minutes. The texture will be chewier but adds extra fiber.
Why rinse the rice first?
Rinsing removes excess starch, preventing gummy texture. It ensures fluffy, separate grains that absorb flavors better.
What if my beef is still pink?
Cook until no pink remains, about 6-8 minutes over medium-high heat. Use a meat thermometer to confirm 160°F for safety.

- Ground Beef Rice and Beans Recipe: Slow-Simmered Savory Harmony - October 17, 2026
- Guyanese Fried Rice Recipe: Caribbean Spice With Wok-Charred Aromatics - October 17, 2026
- Hakka Thunder Tea Rice Recipe: Wok-Charred Herbal Infusion - October 17, 2026