
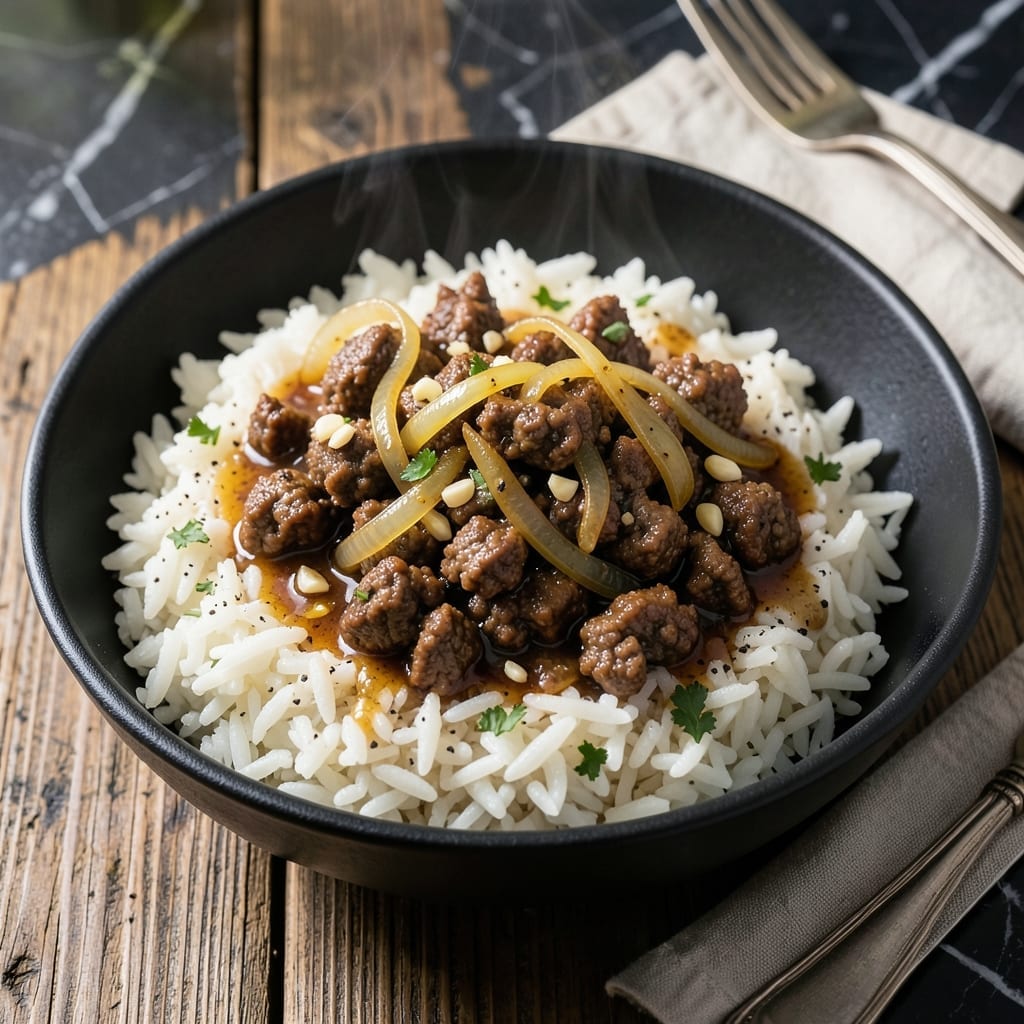
This rice cooker method delivers a complete meal with minimal effort and maximum flavor. I developed this technique after testing in my tiny Boston kitchen, where counter space is at a premium.
Ground beef cooks directly with the rice, absorbing seasonings while the grains steam to perfect tenderness. The result is a hearty, one-pot dinner that’s ready when you are.
What you get is evenly cooked rice with savory beef distributed throughout, creating a balanced bite in every spoonful. It’s the kind of dish that solves weeknight dinner without sacrificing quality.
Serve it straight from the cooker for an easy, satisfying meal.
Ingredients for Ground Beef Rice Cooker
Pantry staples meet ground beef for an easy, flavor-packed one-pot meal.
| Ingredient | Amount | Notes |
|---|---|---|
| Ground Beef 🥩 | 1 lb | 80-85% lean preferred |
| Long-Grain White Rice 🍚 | 1 ½ cups | Uncooked, rinsed thoroughly |
| Beef Broth 🥣 | 2 ½ cups | Low-sodium for control |
| Yellow Onion 🧅 | 1 whole | Medium, finely diced |
| Garlic Cloves 🧄 | 3 cloves | Minced for even distribution |
| Worcestershire Sauce 🫒 | 1 tbsp | Adds umami depth |
| Soy Sauce 🫒 | 2 tbsp | Low-sodium variety |
| Tomato Paste 🍅 | 2 tbsp | For rich, savory base |
| Dried Thyme 🍃 | 1 tsp | Crushed for better infusion |
| Dried Oregano 🌿 | 1 tsp | Mediterranean flavor profile |
| Bay Leaf 🌿 | 1 whole | Removed before serving |
| Kosher Salt 🧂 | 1 tsp | Adjust to taste |
| Ground Black Pepper 🌶️ | ½ tsp | Freshly ground preferred |
| Frozen Peas 🌱 | ½ cup | Added at the end |
| Vegetable Oil 🫒 | 1 tbsp | For sautéing aromatics |
The beef is the backbone here. 80-85% lean ground beef gives you the right fat ratio for flavor without greasiness. I grab mine from Whole Foods or Market Basket—both have consistently good quality. For the rice, long-grain white absorbs the liquid perfectly, but jasmine works too (in a pinch). The broth should be low-sodium so you can control the seasoning yourself.
No Worcestershire? Extra soy sauce plus a pinch of sugar gets you close. Fresh garlic is ideal, but jarred minced garlic works fine (drain the liquid first). Swap dried herbs for fresh at one-third the amount. The tomato paste can be from a can or those convenient squeeze tubes at Trader Joe’s. Frozen peas can be swapped for diced carrots (add with the rice).
This keeps well for 4-5 days in the fridge. Reheat with a splash of water to loosen the rice. Freezes beautifully for 3 months—just thaw overnight. Perfect for meal prep (I always make double).
Why You’ll Love This Recipe
- Set and Forget: I toss everything in the rice cooker and walk away—no stirring, no watching, just perfect beefy rice every time.
- Savory Depth: The beef broth and garlic infuse into the rice so every bite tastes rich, not flat.
- Meal Prep Hero: I make a big batch Sunday and pack leftovers for lunches all week.
- Stretches a Pound: One pound of ground beef feeds my family of four with rice filling us up, so it’s kind to my wallet.
Step-by-Step Instructions for Ground Beef and Rice
This hands-off method lets your rice cooker do all the work for a hearty, flavorful meal.
Step 1: Brown the Ground Beef with Aromatics
Heat the 1 tbsp vegetable oil in a large skillet over medium-high heat. Add the 1 lb ground beef and cook, breaking it up with a wooden spoon, for 5-6 minutes until no longer pink and starting to develop a light crust.
Stir in the finely diced 1 whole yellow onion and cook for another 3 minutes until softened and translucent. Add the minced 3 cloves garlic cloves and cook for 30 seconds until fragrant. The beef should be well-browned—this builds a deep flavor base for your dish.
Step 2: Build the Flavor Foundation
Reduce heat to medium and stir in the 2 tbsp tomato paste, 1 tbsp Worcestershire sauce, and 2 tbsp soy sauce. Cook for 1-2 minutes, stirring constantly, until the mixture darkens slightly. This step intensifies the umami and savory notes.
Add the 1 tsp dried thyme, 1 tsp dried oregano, 1 tsp kosher salt, and 0.5 tsp ground black pepper. Stir to combine and let the spices toast for 30 seconds to release their aromas. The mixture should be thick, fragrant, and deeply colored.
Step 3: Combine Everything in the Rice Cooker
Transfer the beef mixture to your rice cooker insert. Add the 1.5 cups long-grain white rice and stir to combine, ensuring the rice is well-coated with the beef and spices. Pour in the 2.5 cups beef broth and stir gently. The liquid should cover the rice by about ½ inch.
Add the 1 whole bay leaf to the center of the mixture—this will infuse the dish with subtle depth as it cooks. Close the rice cooker lid and set it to the standard cooking cycle. Most cookers will take 20-25 minutes to complete the cycle.
Step 4: Finish with Peas and Rest
Once the rice cooker switches to “keep warm,” open the lid and quickly stir in the 0.5 cup frozen peas. The residual heat will thaw and warm them through in just 2-3 minutes. Remove the bay leaf and discard it.
Close the lid again and let the dish rest for 5 minutes. This allows the rice to fully absorb any remaining liquid and the flavors to meld together. The rice should be tender, the beef perfectly cooked, and the peas bright green.
Pro Tips For Making Ground Beef Rice Cooker
- Brown the Beef First: Cook the ground beef in a pan until deeply browned before adding to the rice cooker—I learned this the hard way after ending up with gray, steamed meat instead of rich, caramelized bits.
- Rinse the Rice: Give the long-grain white rice a quick rinse under cold water to remove excess starch, or you’ll wind up with a gummy, sticky mess instead of fluffy grains.
- Use Room-Temp Broth: Pour in beef broth that’s not ice-cold straight from the fridge, or it’ll slow down the cooker’s timing and leave your rice underdone in spots.
- Sauté Aromatics Together: Sauté the diced yellow onion and minced garlic in the same pan as the beef for 2-3 minutes—it builds way more flavor than tossing them in raw, and it saves you from dirtying another dish.
Troubleshooting This Dish
Rice Still Crunchy
If your rice is undercooked, you likely didn’t use enough liquid. Add ½ cup hot beef broth, stir, and run another 10-minute cycle. My Zojirushi cooker sometimes needs this extra boost in cold kitchens. 💡
Beef is Dry
This happens when using lean beef or over-browning. Switch to 80-85% lean ground beef and brown for only 4-5 minutes. The fat keeps the meat juicy while cooking with rice.
Burnt Bottom Layer
Stir the beef mixture thoroughly before adding rice to prevent sticking. If using an older cooker, try 1 tbsp less tomato paste—its sugars can cause burning. Clean your non-stick insert between uses.
Mushy Rice Texture
Overcooking or too much liquid is the culprit. Measure your 1.5 cups rice precisely and use 2.5 cups broth. Let it rest exactly 5 minutes after cooking—no longer.
Flavors Seem Bland
Double-check your seasonings. I always taste the beef mixture before adding rice and adjust with ½ tsp salt or 1 tsp soy sauce if needed. Freshly ground pepper makes a difference too. 🌟
Peas Stay Frozen
Add peas only after the cooker switches to “keep warm.” If they’re still cold after 3 minutes, stir and close the lid for another 2 minutes. Thawed peas work even better.
Nutrition Facts
Frequently Asked Questions
Do I need to rinse the rice first?
Yes, rinse the 1.5 cups rice until the water runs clear. This removes excess starch and prevents a gummy texture in your finished dish.
Can I use ground turkey instead?
Use 1 lb ground turkey, but add 1 tbsp olive oil when browning since it’s leaner than beef. The cooking time remains the same.
What if my rice cooker doesn’t have a sauté function?
No problem—just brown the beef and aromatics in a skillet first, then transfer everything to the cooker. This ensures proper browning for maximum flavor.
How do I prevent the rice from sticking?
Stir the beef mixture well before adding rice, and use a non-stick insert. A quick spray of cooking oil on the pot bottom also helps.

- Jamaican Jollof Rice Recipe: Island Spice in Every Bite - October 18, 2026
- Hamburger Rice Hot Dish Recipe: Midwest Comfort in One Pan - October 18, 2026
- Iranian Cabbage Rice Recipe: Aromatic Herbs and Spiced Layers - October 18, 2026