
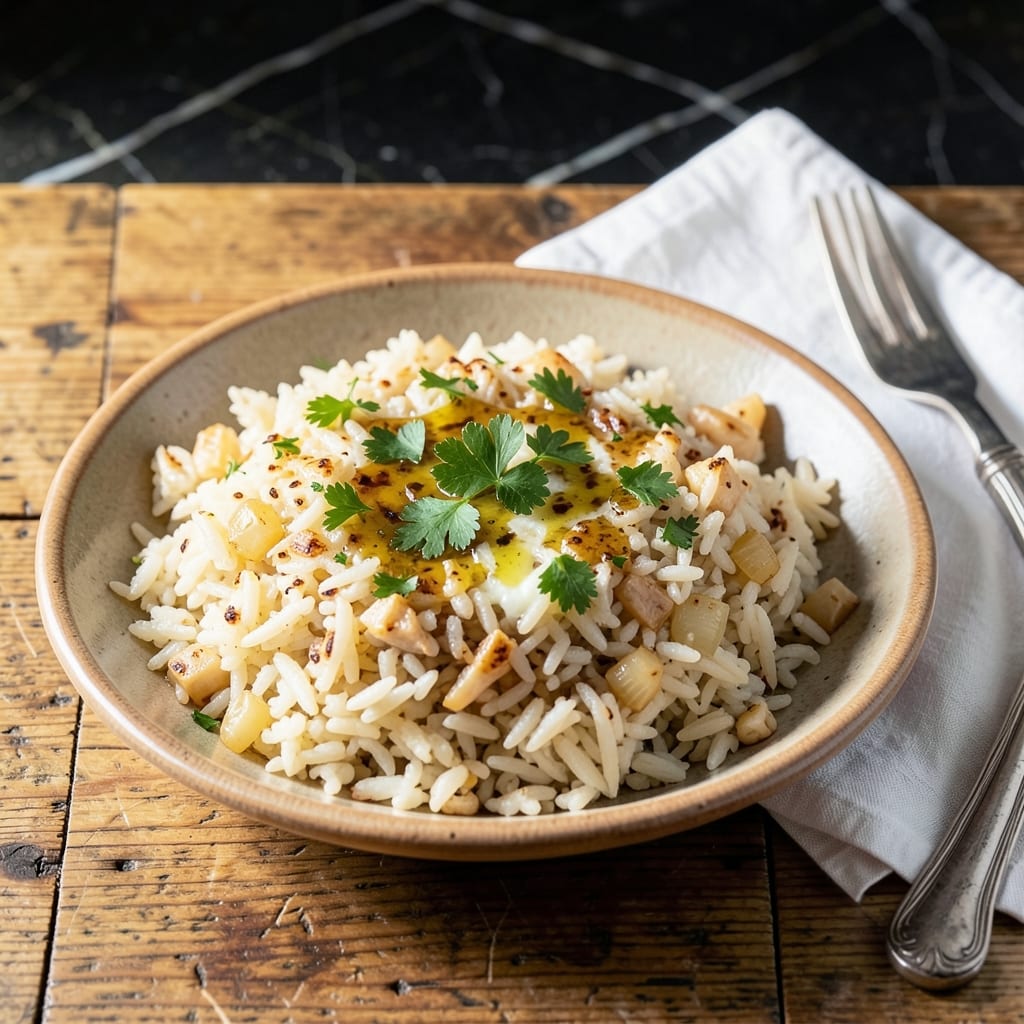
This classic pilaf transforms simple rice into a fragrant side dish with minimal effort. The traditional technique of toasting the grains before cooking unlocks their nutty depth.
Fresh herbs add bright, vibrant notes that complement the buttery rice perfectly. The result is a fluffy, aromatic dish that pairs beautifully with any main course.
Ingredients for Herbed Rice Pilaf
Fragrant long-grain rice meets vibrant fresh herbs for a fluffy, aromatic side dish everyone loves.
| Ingredient | Amount | Notes |
|---|---|---|
| Long-Grain White Rice 🍚 | 1 ½ cups | Rinsed until water runs clear |
| Unsalted Butter 🧈 | 3 tbsp | Divided for toasting and finishing |
| Yellow Onion 🧅 | 1 whole | Finely diced for even distribution |
| Garlic Cloves 🧄 | 3 cloves | Minced for aromatic base |
| Chicken Stock 🍲 | 3 cups | Vegetable stock for vegetarian option |
| Fresh Parsley 🌿 | ½ cup | Flat-leaf variety, finely chopped |
| Fresh Dill 🌿 | ¼ cup | Chopped, stems removed |
| Fresh Thyme Sprigs 🌿 | 4 sprigs | Leaves stripped from stems |
| Bay Leaf 🍃 | 1 whole | For subtle depth during cooking |
| Kosher Salt 🧂 | 1 tsp | Diamond Crystal preferred for even seasoning |
| Freshly Ground Black Pepper 🌶️ | ½ tsp | Coarse grind for texture |
| Lemon Zest 🍋 | 1 tsp | From one medium lemon for brightness |
The rice quality matters most here. Basmati or jasmine offer superior aroma and texture compared to generic long-grain. For the stock, homemade chicken stock yields the most depth, though Better Than Bouillon paste works in a pinch. Fresh herbs are non-negotiable—grocery store bunches are fine if vibrant and fragrant. The butter should be European-style for richer flavor (look for Plugrá or Kerrygold).
Need a vegetarian version? Vegetable stock at a 1:1 ratio works perfectly. Short on fresh herbs? Dried at one-third the amount (use parsley flakes, dried dill, and ground thyme). No fresh lemon? Bottled lemon juice at half the zest amount adds needed acidity. For extra richness, stir in 2 tbsp crème fraîche at the end (or Greek yogurt for tang).
Pilaf keeps well for 4 days refrigerated in an airtight container. Reheat gently with a splash of stock to restore moisture. The herbs are best added fresh, but you can prep them 1 day ahead—store wrapped in damp paper towels. Freezes beautifully for up to 3 months.
Why You’ll Love This Recipe
- One Pot Wonder: I love that everything cooks together—rice, onions, garlic, and stock—so I’m not stuck washing a sink full of dishes afterward.
- Buttery Herb Magic: The butter toasts the onion and garlic before the rice even hits the pan, and the herbs soak up every bit of that rich flavor.
- Feeds a Crowd: I double the batch and it reheats perfectly for lunches all week—still fluffy, still fragrant.
- Pantry Staples: Between us, I always have these ingredients on hand, so it’s my go-to when I need a side in a pinch.
Step-by-Step Instructions for Herbed Rice Pilaf
Master this technique for perfectly fluffy rice with vibrant herb flavor in every bite.
Step 1: Toast the Rice in Butter
Melt 2 tbsp Unsalted Butter in a medium saucepan over medium heat. Add the 1.5 cups Long-Grain White Rice and stir constantly for 2-3 minutes until the grains turn slightly opaque and smell nutty. This toasting step builds a subtle depth of flavor that sets pilaf apart from plain rice.
Watch carefully—you want the rice to lightly toast, not brown. The grains should glisten with butter but not darken significantly. This process also helps the rice maintain its shape during cooking rather than turning mushy.
Step 2: Sauté Aromatics Until Fragrant
Add the finely diced 1 whole Yellow Onion to the pan with the toasted rice. Cook for 4-5 minutes, stirring frequently, until the onion softens and becomes translucent. The edges should just begin to turn golden.
Stir in the minced 3 cloves Garlic Cloves and cook for an additional 30 seconds until fragrant. Be careful not to let the garlic burn—it should release its aroma without taking on any color. The combination of onion and garlic creates the aromatic foundation for the dish.
Step 3: Add Liquids and Herbs
Pour in the 3 cups Chicken Stock, then add the 1 whole Bay Leaf, stripped leaves from 4 sprigs Fresh Thyme Sprigs, 1 tsp Kosher Salt, and 0.5 tsp Freshly Ground Black Pepper. Stir well to combine all ingredients.
Bring the mixture to a boil over medium-high heat. Once boiling, reduce the heat to low, cover the pan with a tight-fitting lid, and let it simmer. This is where the magic happens—the rice absorbs all the herby, savory liquid.
Step 4: Simmer Until Fluffy
Let the rice simmer undisturbed for 15-18 minutes until all the liquid is absorbed and the grains are tender. Resist the urge to peek or stir during this time—each interruption releases steam and can lead to uneven cooking.
You’ll know it’s done when you see tiny steam holes on the surface and hear a faint sizzling sound. The rice should be soft with no chalky center when tasted. If it’s still firm, add 2-3 tbsp water and cook for another 2-3 minutes.
Step 5: Finish with Fresh Herbs and Lemon
Remove the pan from heat and let it sit covered for 5 minutes. This resting period allows the rice to steam and become even fluffier. Then, gently fluff the rice with a fork to separate the grains.
Stir in the remaining 1 tbsp Unsalted Butter, 0.5 cup Fresh Parsley, 0.25 cup Fresh Dill, and 1 tsp Lemon Zest. These fresh additions brighten the dish and add layers of herbaceous complexity. Serve immediately while warm.
Pro Tips For Making Herbed Rice Pilaf
- Toast the Rice: Cook the rice in butter for 2-3 minutes until slightly translucent before adding liquid—this deepens the nutty flavor and prevents a mushy texture.
- Use Warm Stock: I learned this the hard way: cold chicken stock slows down cooking and can make the rice uneven. Heat it first for consistent absorption.
- Skip the Rinse: Long-grain white rice needs its starch for pilaf’s signature fluffy-yet-connected texture, so resist the urge to rinse it.
- Bloom the Herbs: Add dried herbs to the butter with the onions for 30 seconds—this wakes up their flavor before the liquid goes in.
Make-Ahead Tips for herbed rice pilaf
Prep Ahead Tips
You can rinse and measure the 1.5 cups Long-Grain White Rice up to 2 days ahead—store it in a sealed container in the fridge. Dice the 1 whole Yellow Onion and mince the 3 cloves Garlic the night before, keeping them in separate airtight containers. This saves 10-15 minutes on cooking day. 💡
Herb Prep
Wash and dry the Fresh Parsley, Fresh Dill, and Fresh Thyme up to 1 day ahead. Store them wrapped in damp paper towels in the fridge to maintain freshness. Strip the thyme leaves just before cooking to preserve their aroma.
Stock Storage
If using homemade Chicken Stock, freeze it in 3-cup portions so it’s ready to go. Better Than Bouillon paste can be pre-measured and stored in the fridge. Cold stock is fine—it’ll warm quickly in the pan.
Partial Cooking
Toast the rice and sauté the aromatics in advance, then cool and refrigerate for up to 24 hours. When ready, add the stock and herbs, then simmer as usual. This cuts active cooking time to just 20 minutes. ⏰
Freezing Cooked Pilaf
Cool the finished dish completely before transferring to airtight containers. It freezes well for 3 months. Thaw overnight in the fridge, then reheat with a splash of stock to restore moisture.
Reheating Tips
For best results, reheat on the stovetop over low heat with a lid, adding 2-3 tbsp stock or water. Microwave works too—cover and heat in 1-minute intervals, stirring between each. 🔥
Nutrition Facts
Frequently Asked Questions
Can I use brown rice instead?
Yes, but adjust the liquid to 3.5 cups and simmer for 40-45 minutes. Brown rice needs more time and water to soften.
Why do I toast the rice first?
Toasting enhances the nutty flavor and helps the grains stay separate. It also prevents mushiness by strengthening the rice structure before cooking.
Can I make this in a rice cooker?
Use the sauté function for toasting, then add liquids and herbs. Cook on the standard setting. The texture may be slightly less fluffy than stovetop.
How do I fix mushy rice?
Spread it on a baking sheet to dry out in a 300°F oven for 5-10 minutes. Next time, measure liquid precisely and avoid stirring while cooking.

- Jimmy Dean Sausage and Rice Recipe: Hearty One-Pot Savory Delight - October 19, 2026
- Indian Jasmine Rice Recipe: Fragrant Basmati-Free Elegance - October 19, 2026
- KFC Rizo Rice Recipe: Copycat Side Dish With Savory Spice Blend - October 19, 2026