
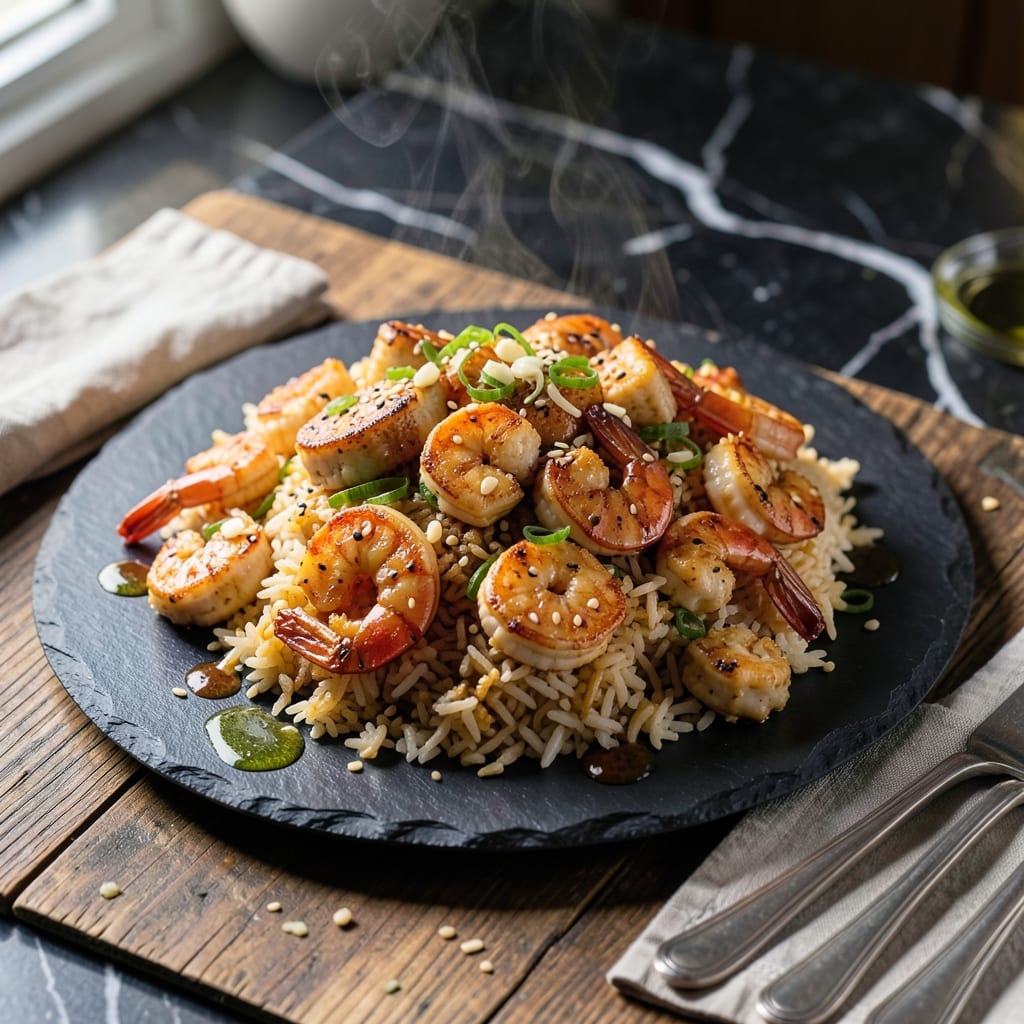
This teppanyaki-style dish brings the smoky flavors of hibachi to your home kitchen. I developed this recipe after years of studying Japanese grill techniques, perfecting the balance between tender proteins and perfectly charred rice.
The secret lies in cooking everything at high heat, which creates that signature caramelization. Chicken and shrimp are marinated in a simple soy-garlic mixture, then cooked quickly to retain juiciness. Day-old rice works best for achieving the right texture.
What emerges is a dish with distinct smoky notes, tender protein pieces, and rice that’s lightly crisped yet still fluffy. The combination of flavors and textures makes this a meal that’s both satisfying and impressive.
Serve with additional soy sauce and a sprinkle of sesame seeds for the full experience.
Ingredients for Hibachi Chicken and Shrimp Fried Rice
Pantry staples, fresh proteins, and day-old rice make this teppanyaki-style dish shine.
| Ingredient | Amount | Notes |
|---|---|---|
| Boneless Skinless Chicken Thighs 🍗 | 1 lb | Cut into bite-sized pieces |
| Large Shrimp 🦐 | ¾ lb | Peeled, deveined, tails off |
| Day-Old Cooked White Rice 🍚 | 4 cups | Cold, preferably overnight |
| Soy Sauce 🫕 | ⅓ cup | Low-sodium preferred |
| Garlic Cloves 🧄 | 4 cloves | Minced finely for marinade |
| Fresh Ginger 🌿 | 1 tbsp | Grated or minced |
| Sesame Oil 🫒 | 2 tbsp | Toasted for best flavor |
| Vegetable Oil 💧 | 3 tbsp | High smoke point for frying |
| Medium Yellow Onion 🧅 | 1 whole | Diced finely |
| Frozen Peas and Carrots Mix 🥕 | 1 cup | Thawed before using |
| Large Eggs 🥚 | 3 whole | Lightly beaten for scrambling |
| Green Onions 🌱 | ½ cup | Thinly sliced for garnish |
| Toasted Sesame Seeds 🌰 | 2 tbsp | For finishing and garnish |
| Salt 🧂 | ½ tsp | Kosher or sea salt |
| Black Pepper 🌶️ | ½ tsp | Freshly ground preferred |
The proteins are non-negotiable here. Chicken thighs stay juicier than breasts at high heat—Costco has great pre-cut options if you’re short on time. For shrimp, wild-caught frozen (thawed) works as well as fresh. Day-old rice from a Chinese takeout container? Perfect. Just make sure it’s cold and dry. The soy sauce matters too—Kikkoman or Yamasa are my go-tos for authentic flavor.
No shrimp? Diced chicken breast or tofu keeps it hearty. Out of sesame oil? Toasted peanut oil adds a similar depth. Fresh ginger is ideal, but ground ginger at half the amount works in a pinch. The frozen veggie mix can be swapped for fresh diced carrots and peas (just cook them a minute longer). If you’re avoiding eggs, skip them entirely—it’s still delicious.
Leftovers keep surprisingly well. Store in an airtight container for up to 4 days in the fridge. Reheat in a skillet with a splash of water to revive the texture. Freezes for 2 months (thaw overnight before reheating). I always make extra—this tastes even better the next day.
Why You’ll Love This Recipe
- One Pan Wonder: I toss the chicken, shrimp, and rice together with garlic and soy sauce—no extra dishes, no stress.
- Umami Bomb: The soy sauce and garlic give it that deep, savory hibachi flavor I crave every time.
- Weeknight Hero: Honestly, it’s my go-to for busy evenings when I need dinner fast but still want it to feel special.
- Budget Stretcher: Leftovers taste even better the next day, and it feeds my family for two meals straight.
Step-by-Step Instructions for Hibachi Chicken and Shrimp Fried Rice
Here’s the method I’ve perfected for that classic teppanyaki flavor and texture at home.
Step 1: Marinate and Cook the Proteins
Cut the 1 lb Boneless Skinless Chicken Thighs into bite-sized pieces and toss with 2 tablespoons Sesame Oil, 2 tablespoons Soy Sauce, minced 4 cloves Garlic Cloves, and grated 1 tbsp Fresh Ginger. Let it sit for 10 minutes while you prep the rest.
Heat 1 tablespoon Vegetable Oil in a wok or large skillet over high heat. Add the chicken and cook for 5-6 minutes until browned and cooked through. Remove and set aside. In the same pan, add the 0.75 lb Large Shrimp and cook for 2-3 minutes per side until pink and opaque. Remove and set aside with the chicken.
Step 2: Scramble the Eggs and Sauté Aromatics
In the same pan, add the remaining 2 tablespoons Vegetable Oil and heat over medium-high heat. Pour in the 3 whole Large Eggs and scramble quickly until just set but still slightly runny. Remove the eggs and set aside.
Add the diced 1 whole Medium Yellow Onion to the pan and sauté for 2-3 minutes until translucent and fragrant. Stir in the 1 cup Frozen Peas and Carrots Mix and cook for another 2 minutes until the vegetables are tender.
Step 3: Combine and Season the Fried Rice
Increase the heat to high and add the 4 cups Day-Old Cooked White Rice, breaking up any clumps with your spatula. Stir-fry for 3-4 minutes until the rice is heated through and slightly crispy in spots.
Return the chicken, shrimp, and scrambled eggs to the pan. Drizzle with the remaining 0.33 cup Soy Sauce and sprinkle with 0.5 tsp Salt and 0.5 tsp Black Pepper. Toss everything together for 2-3 minutes until everything is evenly coated and heated through.
Step 4: Garnish and Serve
Remove from heat and stir in the 0.5 cup Green Onions, reserving a small handful for garnish. Transfer to a serving platter and sprinkle with the remaining green onions and 2 tbsp Toasted Sesame Seeds.
Let it rest for 2 minutes to allow the flavors to meld together. Serve immediately while hot, with extra soy sauce on the side if desired. The rice should have a slight smokiness from the high heat, with each grain distinct and coated in savory, umami-rich flavor.
Pro Tips For Making Hibachi Chicken And Shrimp Fried Rice
- Use Cold Rice: Day-old rice from the fridge is drier and fries up fluffier—fresh rice turns to mush. I learned this the hard way after making a sad, sticky pan of fried rice.
- Prep Proteins Separately: Cut chicken into 1-inch pieces and pat shrimp completely dry before cooking. Sounds tedious, but it prevents steaming and guarantees a good sear.
- High Heat Only: Crank your burner to max and don’t overcrowd the pan—hibachi rice needs that smoky, slightly charred flavor. After burning two batches, I finally stopped trying to cook it all at once.
- Salt the Chicken Early: Toss the chicken thighs with soy sauce and let them sit 10 minutes before cooking. My grandmother swore by this, and she was right: it keeps them juicy and flavorful.
Essential Equipment for This Dish
High-Heat Wok
A carbon steel wok is non-negotiable for authentic hibachi texture. I swear by my 14-inch Made In wok—it heats evenly and develops a natural nonstick surface over time. Avoid nonstick coatings; they can’t handle the high heat needed. 🔥
Sharp Chef’s Knife
You’ll be dicing onions, chicken, and shrimp quickly. My 8-inch Wüsthof stays razor-sharp. A dull knife crushes food instead of cutting it cleanly, which affects texture in your final dish.
Rice Cooker
For perfectly cooked rice every time, I use a Zojirushi rice cooker. Day-old rice is key for fried rice, and this machine produces consistently dry, separate grains. Cook a double batch the day before for this recipe.
Wooden Rice Paddle
A wooden rice paddle won’t scratch your wok or cookware. I keep mine soaking in water to prevent cracking. It’s perfect for breaking up rice clumps and tossing ingredients without damaging your pan.
Instant-Read Thermometer
While not traditional, my ThermoWorks MK4 ensures proteins reach safe temps. Chicken should hit 165°F and shrimp 145°F. This prevents overcooking while maintaining juiciness.
Cast Iron Grill Press
For that authentic hibachi char, I use my vintage Lodge cast iron grill press. Press down on the proteins while cooking to maximize contact with the hot surface. It creates those beautiful grill marks everyone loves. 🌟
Nutrition Facts
Frequently Asked Questions
Can I use fresh rice instead of day-old?
Day-old rice works best because it’s drier and fries up fluffier. Fresh rice can turn mushy. If you must use fresh, spread it on a tray and refrigerate for 30 minutes to dry it out first.
How do I prevent the shrimp from getting rubbery?
Cook shrimp over high heat for just 2-3 minutes per side until pink and opaque. Remove immediately to avoid overcooking. Shrimp continues cooking slightly off the heat.
Why does my fried rice taste bland?
You likely used too little soy sauce or didn’t season in layers. Taste and adjust with extra soy sauce or a pinch of salt and pepper before serving.
Can I make this dish ahead of time?
Yes, but store components separately. Cooked rice keeps for 4 days, proteins for 3 days. Reheat proteins gently, then stir-fry with rice and veggies for best texture.

- Jollof Rice Sauce Recipe: West African Tomato and Spice Infusion - September 25, 2026
- Japanese Rice Soup Recipe: Umami-Rich Comfort in a Bowl - September 25, 2026
- Homemade Cream Of Rice Recipe: Silk-Smooth Breakfast in Minutes - September 25, 2026