
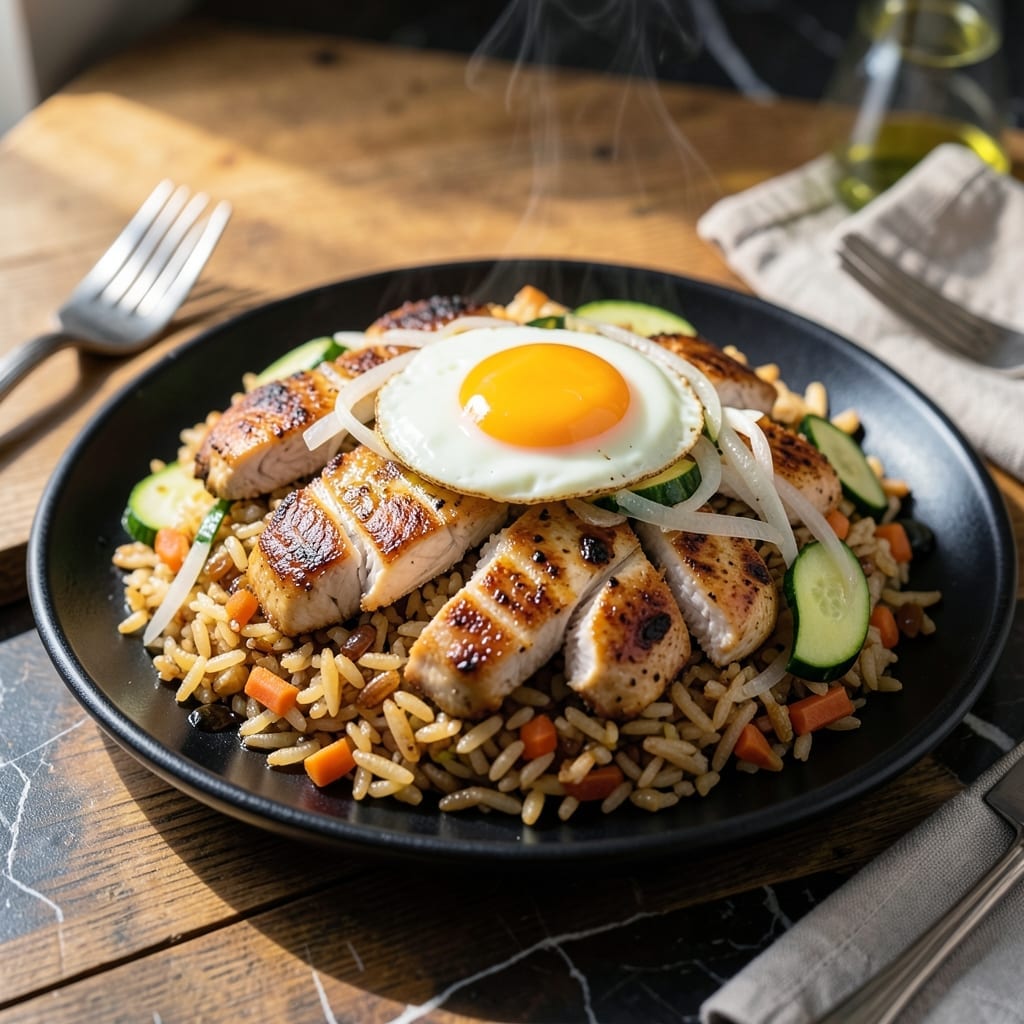
This recipe brings the sizzle and smoke of hibachi restaurants straight to your home kitchen. I’ve tested it repeatedly to capture that signature wok-charred flavor and tender texture that makes this dish so addictive.
Using simple ingredients and high heat, you’ll achieve that restaurant-quality taste with every bite. The key is cooking the rice a day ahead and using a well-seasoned wok or skillet for that authentic sear.
The result is perfectly charred rice with crispy edges, mixed with your choice of protein and vegetables. Each bite delivers that familiar, satisfying crunch and savory depth you expect from a hibachi grill.
Serve it hot with a drizzle of umami sauce for the full experience. This version stays true to the original while making it accessible for home cooks.
Ingredients for Hibachi Fried Rice Copycat
Pantry staples meet fresh veggies for that iconic hibachi taste at home.
| Ingredient | Amount | Notes |
|---|---|---|
| Cooked White Rice 🍚 | 4 cups | Day-old, chilled preferred |
| Vegetable Oil 🫒 | 3 tbsp | High smoke point for searing |
| Large Eggs 🥚 | 2 whole | Beaten lightly |
| Carrots 🥕 | 1 whole | Small dice, about 1 cup |
| Zucchini 🥒 | 1 whole | Small dice, about 1 cup |
| White Onion 🧅 | ½ whole | Finely diced |
| Garlic Cloves 🧄 | 3 cloves | Minced finely |
| Green Onions 🌱 | 3 whole | Sliced for garnish |
| Soy Sauce 🫙 | 3 tbsp | Low-sodium preferred |
| Sesame Oil 🫒 | 1 tsp | Toasted for aroma |
| Frozen Peas 🌱 | ½ cup | Thawed before cooking |
| Chicken Breast 🍗 | 1 lb | Boneless, skinless, small dice |
| Salt 🧂 | ½ tsp | Kosher or sea salt |
| Black Pepper 🌶️ | ½ tsp | Freshly ground preferred |
| Sesame Seeds 🌰 | 1 tsp | Toasted for garnish |
The rice is the foundation—day-old from the fridge (not fresh) gives you those perfect charred edges. For the veggies, Costco has great pre-diced mixes if you’re short on time. The chicken? Thighs work too (and honestly stay juicier). Look for dark meat with good marbling if you want that extra flavor boost. Most Asian markets carry the right high-heat oils if you’re making this often (the good stuff, not the pre-shredded kind).
No chicken? Shrimp or beef (cut thin) cooks up fast. Want veggie-only? Extra mushrooms or bell peppers add great texture. Out of sesame oil? Skip it—it’s for aroma, not essential. Fresh ginger (about a teaspoon, grated) takes this to the next level if you’ve got it. The soy sauce can be tamari for gluten-free (or whatever you’ve got in the pantry).
Leftovers keep 4-5 days in the fridge. Freeze for 3 months (portion first so you can grab what you need). Reheats best in a skillet to crisp those edges back up—worth the extra minute.
Why You’ll Love This Recipe
- One Pan Wonder: I love that I can make this from start to finish in a single skillet—no extra dishes, just flavor.
- Umami Bomb: The eggs and veggies soak up that savory hibachi magic, making every bite ridiculously good.
- Weeknight Hero: Honestly, it’s my go-to when I need something fast, filling, and family-approved on a busy night.
- Budget Stretcher: Leftovers taste even better the next day, and a little rice goes a long way with all those veggies mixed in.
Step-by-Step Instructions for Hibachi Fried Rice
Authentic wok-charred flavor starts with proper prep and high heat—here’s how to nail it.
Step 1: Prep and Season All Ingredients
Start by dicing the 1 lb Chicken Breast into small, even ¼-inch pieces. I do this first so the chicken can come to room temperature while I prep the rest. Season it with ½ tsp Salt and ½ tsp Black Pepper—this ensures every bite is flavorful.
Next, small-dice the 1 whole Carrots and 1 whole Zucchini (about 1 cup each), finely dice the ½ whole White Onion, and mince the 3 cloves Garlic Cloves. Slice the 3 whole Green Onions for garnish. Thaw the ½ cup Frozen Peas under cold water and drain well. Lightly beat the 2 whole Large Eggs in a small bowl. Having everything ready (mise en place) is crucial for stir-frying.
Step 2: Cook Chicken and Vegetables Over High Heat
Heat 2 tbsp of the 3 tbsp Vegetable Oil in a large skillet or wok over high heat until it shimmers. Add the seasoned chicken and cook for 3-4 minutes, stirring occasionally, until it’s no longer pink and develops light golden edges.
Push the chicken to one side and add the remaining 1 tbsp Vegetable Oil to the pan. Toss in the diced carrots, zucchini, and white onion. Stir-fry for 4-5 minutes until the vegetables soften slightly but retain a bite. Add the minced garlic and cook for 30 seconds until fragrant—don’t let it burn.
Step 3: Scramble Eggs and Combine with Rice
Create a well in the center of the pan and pour in the beaten eggs. Scramble quickly with a spatula until just set—about 1-2 minutes. You want soft, slightly runny curds that will coat the rice beautifully.
Add the 4 cups Cooked White Rice (day-old, chilled works best) to the pan, breaking up any clumps with your spatula. Stir-fry for 2-3 minutes until the rice is heated through and starts to develop a slight crispness. This is where you get that authentic wok-charred texture.
Step 4: Finish with Sauces and Final Touches
Drizzle the 3 tbsp Soy Sauce and 1 tsp Sesame Oil evenly over the rice mixture. Add the thawed peas and stir-fry for another 2 minutes until everything is well combined and the peas are heated through. Taste and adjust seasoning if needed.
The rice should have a light golden color from the soy sauce and a subtle nutty aroma from the sesame oil. The grains should be separate with a slight chew, not mushy. This is the hallmark of great hibachi fried rice.
Step 5: Garnish and Serve Immediately
Transfer the fried rice to a serving platter or individual plates. Sprinkle with the sliced green onions and 1 tsp Sesame Seeds for a pop of color and extra flavor. The green onions add freshness, while the sesame seeds provide a delightful crunch.
Serve immediately while hot. The texture changes quickly as it cools, so dig in right away for that authentic restaurant experience. Each bite should deliver a perfect balance of savory chicken, sweet vegetables, and that signature wok-seared flavor.
Pro Tips For Making Hibachi Fried Rice Copycat
- Use Day-Old Rice: Fresh rice turns to mush in the wok—I learned this the hard way after three sad batches. Cook your rice the night before and refrigerate it uncovered so it dries out just enough to get that perfect hibachi texture.
- Crank the Heat: High heat is non-negotiable for that signature slightly charred flavor. About 2 tablespoons of oil in a screaming hot pan before adding anything else—yes, even if your smoke detector complains.
- Prep Veggies Small: Dice the carrots and zucchini into tiny, uniform pieces (think ¼-inch cubes) so they cook fast and evenly. Sounds tedious, but it actually changes the outcome—no one wants crunchy carrots in their fried rice.
- Scramble Eggs First: Push the eggs to one side of the wok after scrambling so they stay soft and distinct. Skip mixing them in too early, or you’ll end up with rubbery yellow bits instead of those fluffy hibachi-style curds.
Common Mistakes When Making This Dish
Using Fresh Rice
Never use freshly cooked rice—it releases too much starch and turns mushy. I learned this the hard way in my tiny Boston kitchen. Always use day-old, chilled rice from the fridge for those perfect charred edges. 💡
Overcrowding the Pan
Cooking too much at once steams the ingredients instead of searing them. Work in batches if needed, especially with the chicken. Your skillet should be hot enough that a drop of water sizzles and evaporates immediately.
Low Heat Cooking
Hibachi fried rice requires high heat to achieve that signature wok-char. If your home stove isn’t powerful, cook in smaller batches and let the pan reheat between additions. The sizzle is your guide—if it stops, your pan isn’t hot enough.
Overcooking the Eggs
Scramble the eggs just until set—about 1-2 minutes. Overcooked eggs become rubbery and lose their tender texture. I pull them off while they’re still slightly soft so they finish cooking when mixed with the hot rice.
Skipping the Prep
All ingredients must be prepped before cooking starts. Hibachi-style cooking happens fast at high heat. Have your 2 eggs beaten, veggies diced, and sauces measured—this is non-negotiable for success.
I keep everything in small bowls within arm’s reach for efficiency.
Neglecting the Garnishes
Those final touches matter more than you think. The green onions and sesame seeds add freshness and crunch that balance the dish. Skip them and you’ll miss that restaurant-quality finish.
Nutrition Facts
Frequently Asked Questions
Why use day-old rice?
Day-old rice is drier and has less moisture, allowing it to crisp up properly in the pan. Fresh rice becomes mushy because it releases too much starch.
Can I substitute other proteins?
Try shrimp (cook 2-3 minutes), beef strips (1-2 minutes), or tofu for a vegetarian option. Just keep pieces small for even cooking.
What if my pan isn’t hot enough?
Cook in smaller batches to maintain high heat. Let the pan reheat between additions. You’ll know it’s ready when water sizzles and evaporates instantly.
Can I make this gluten-free?
Yes! Use tamari instead of soy sauce. Double-check all other ingredients for hidden gluten, especially sauces and seasonings.

- Jamaican Jollof Rice Recipe: Island Spice in Every Bite - October 18, 2026
- Hamburger Rice Hot Dish Recipe: Midwest Comfort in One Pan - October 18, 2026
- Iranian Cabbage Rice Recipe: Aromatic Herbs and Spiced Layers - October 18, 2026